Inspecting a Cutting Plan
To inspect a created project, navigate to the Cutting Plan Inspection Page of the relevant cutting plan.
Accessing the Cutting Plan Inspection Page
After creating a cutting plan using the Cutting Plan Creation Page, you will automatically be redirected to the Cutting Plan Inspection Page of the relevant cutting plan.
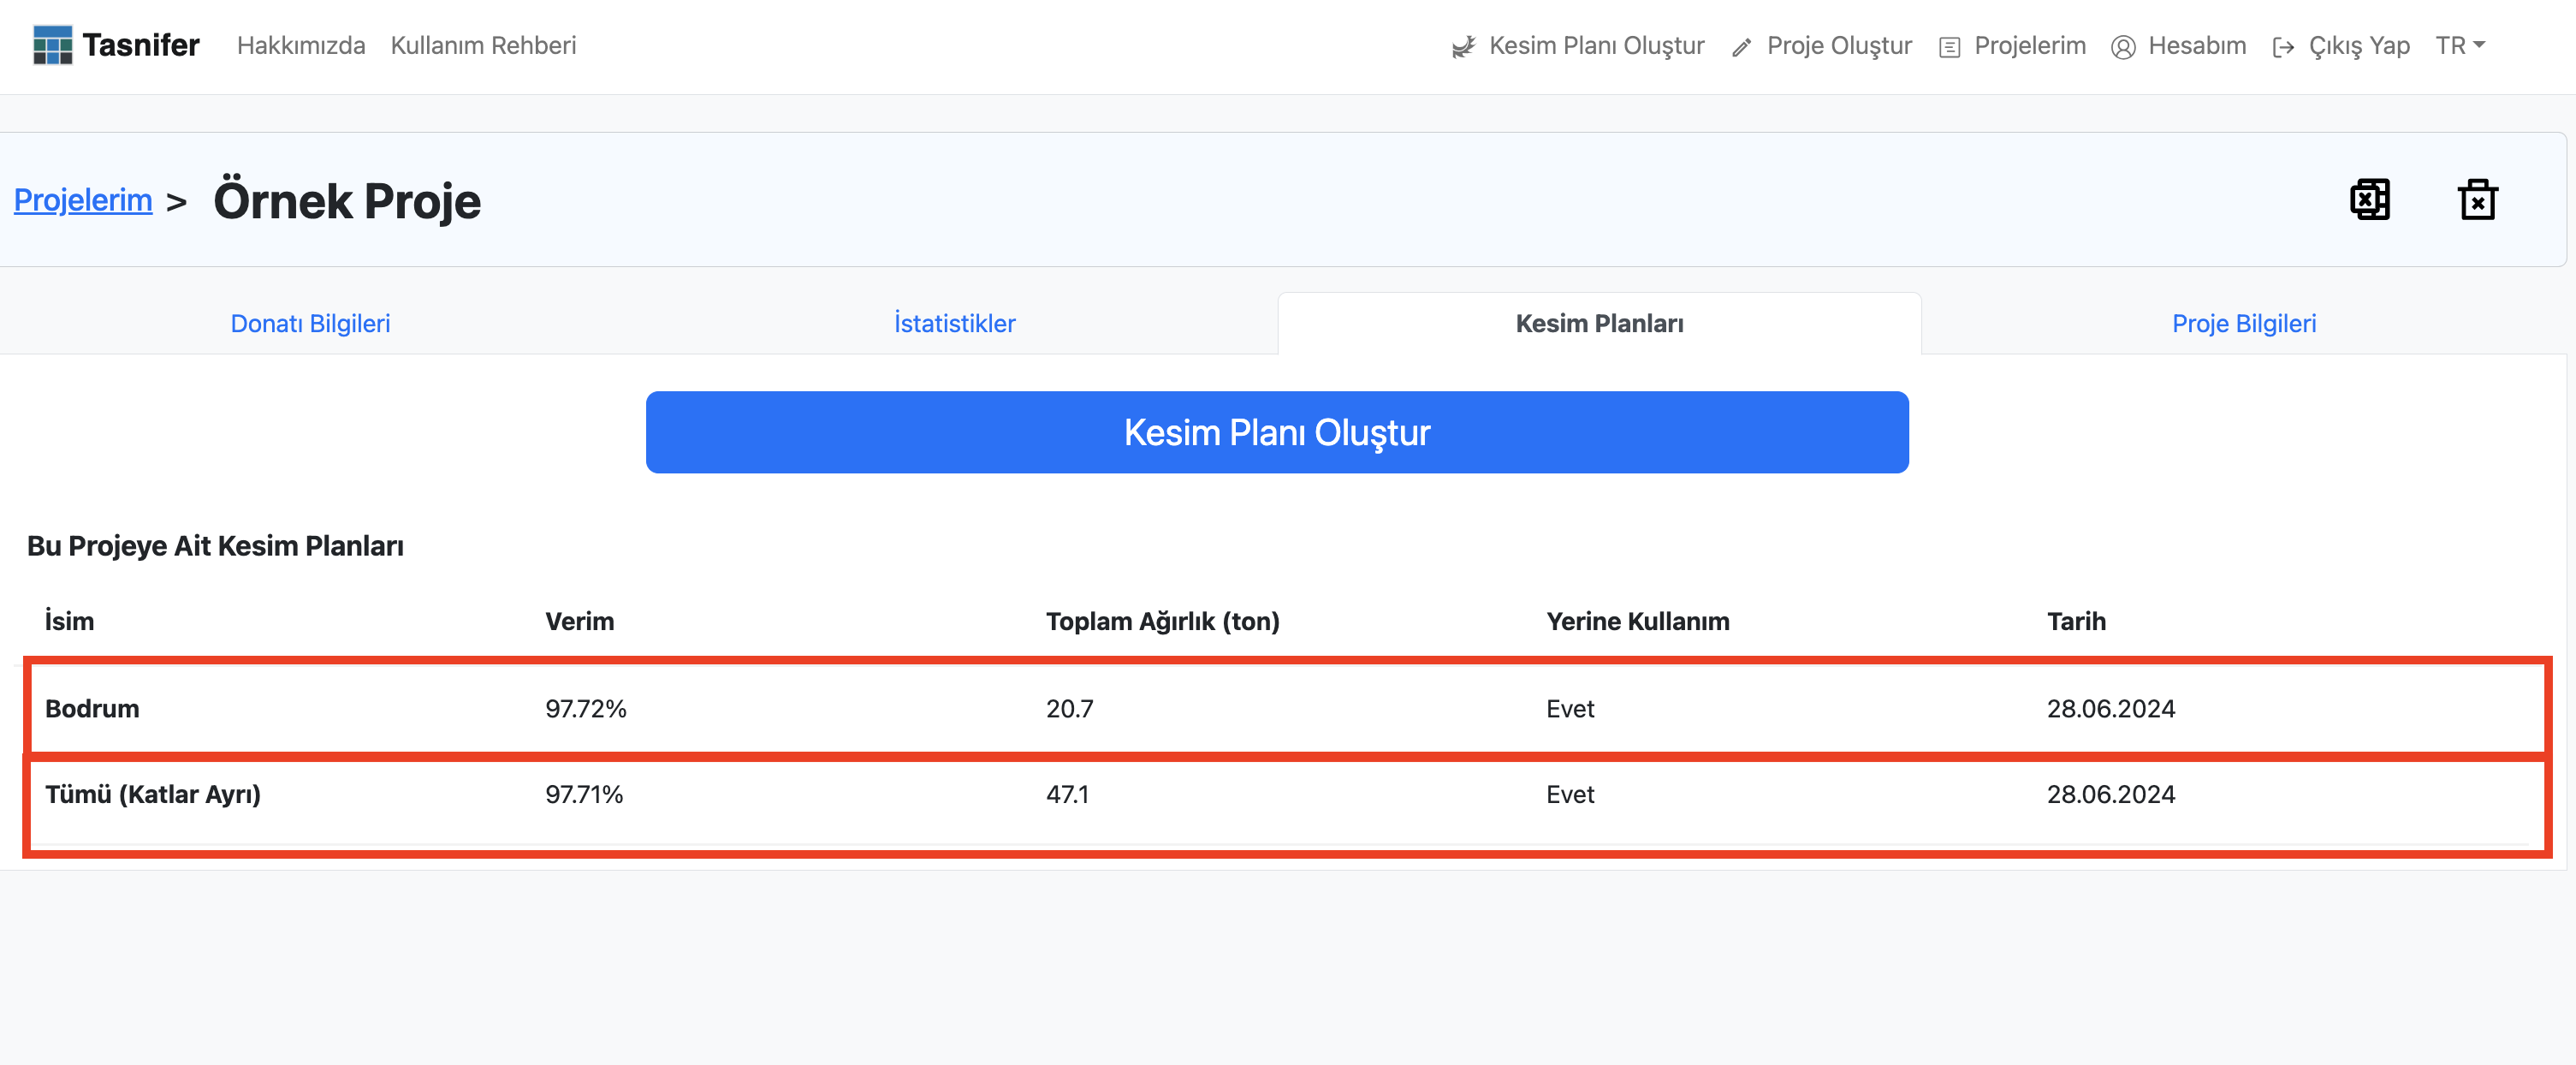
To access the Cutting Plan Inspection Page of a previous cutting plan, first, navigate to the Project Inspection Page of the relevant project and then to the Cutting Plans Tab.
In this tab, click on the relevant cutting plan item in the list to access its Cutting Plan Inspection Page.
Cutting Plan Inspection Page
The Cutting Plan Inspection Page may appear differently depending on the status of the cutting plan.
If the cutting plan is being processed in the background
If the cutting plan contains a large number and variety of parts, it is queued for optimization and processed in the background by Tasnifer servers. During this time, the Cutting Plan Inspection Page appears as follows:
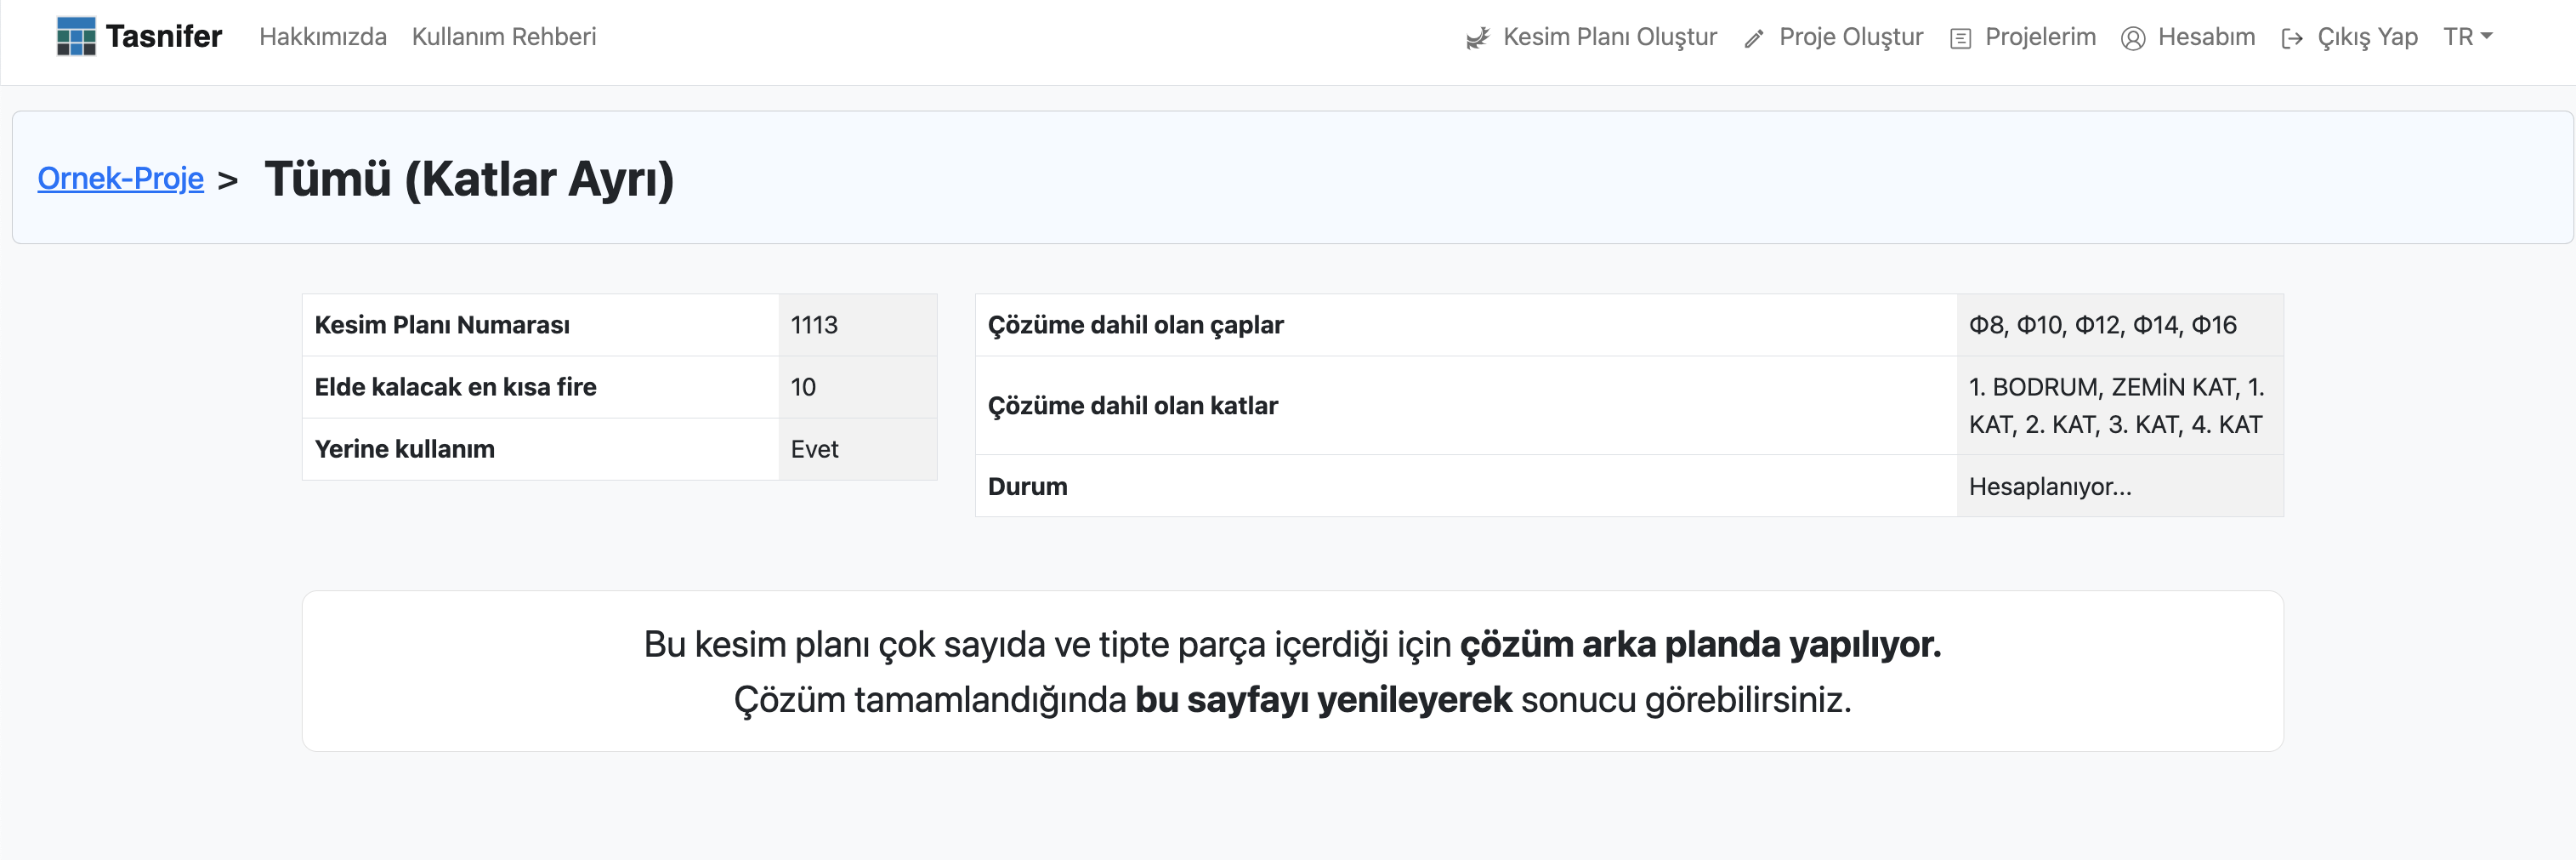
As indicated on the page, the cutting plan is queued and being processed in the background. The current status of the cutting plan is displayed in the Status row of the table on the right.
When the calculation of the cutting plan is complete, the page will not refresh automatically. Therefore, the user must refresh the page periodically to check if the calculation is complete.
Once the calculation is complete, the user will be able to access the cutting plan details.
If the project of the cutting plan is inactive
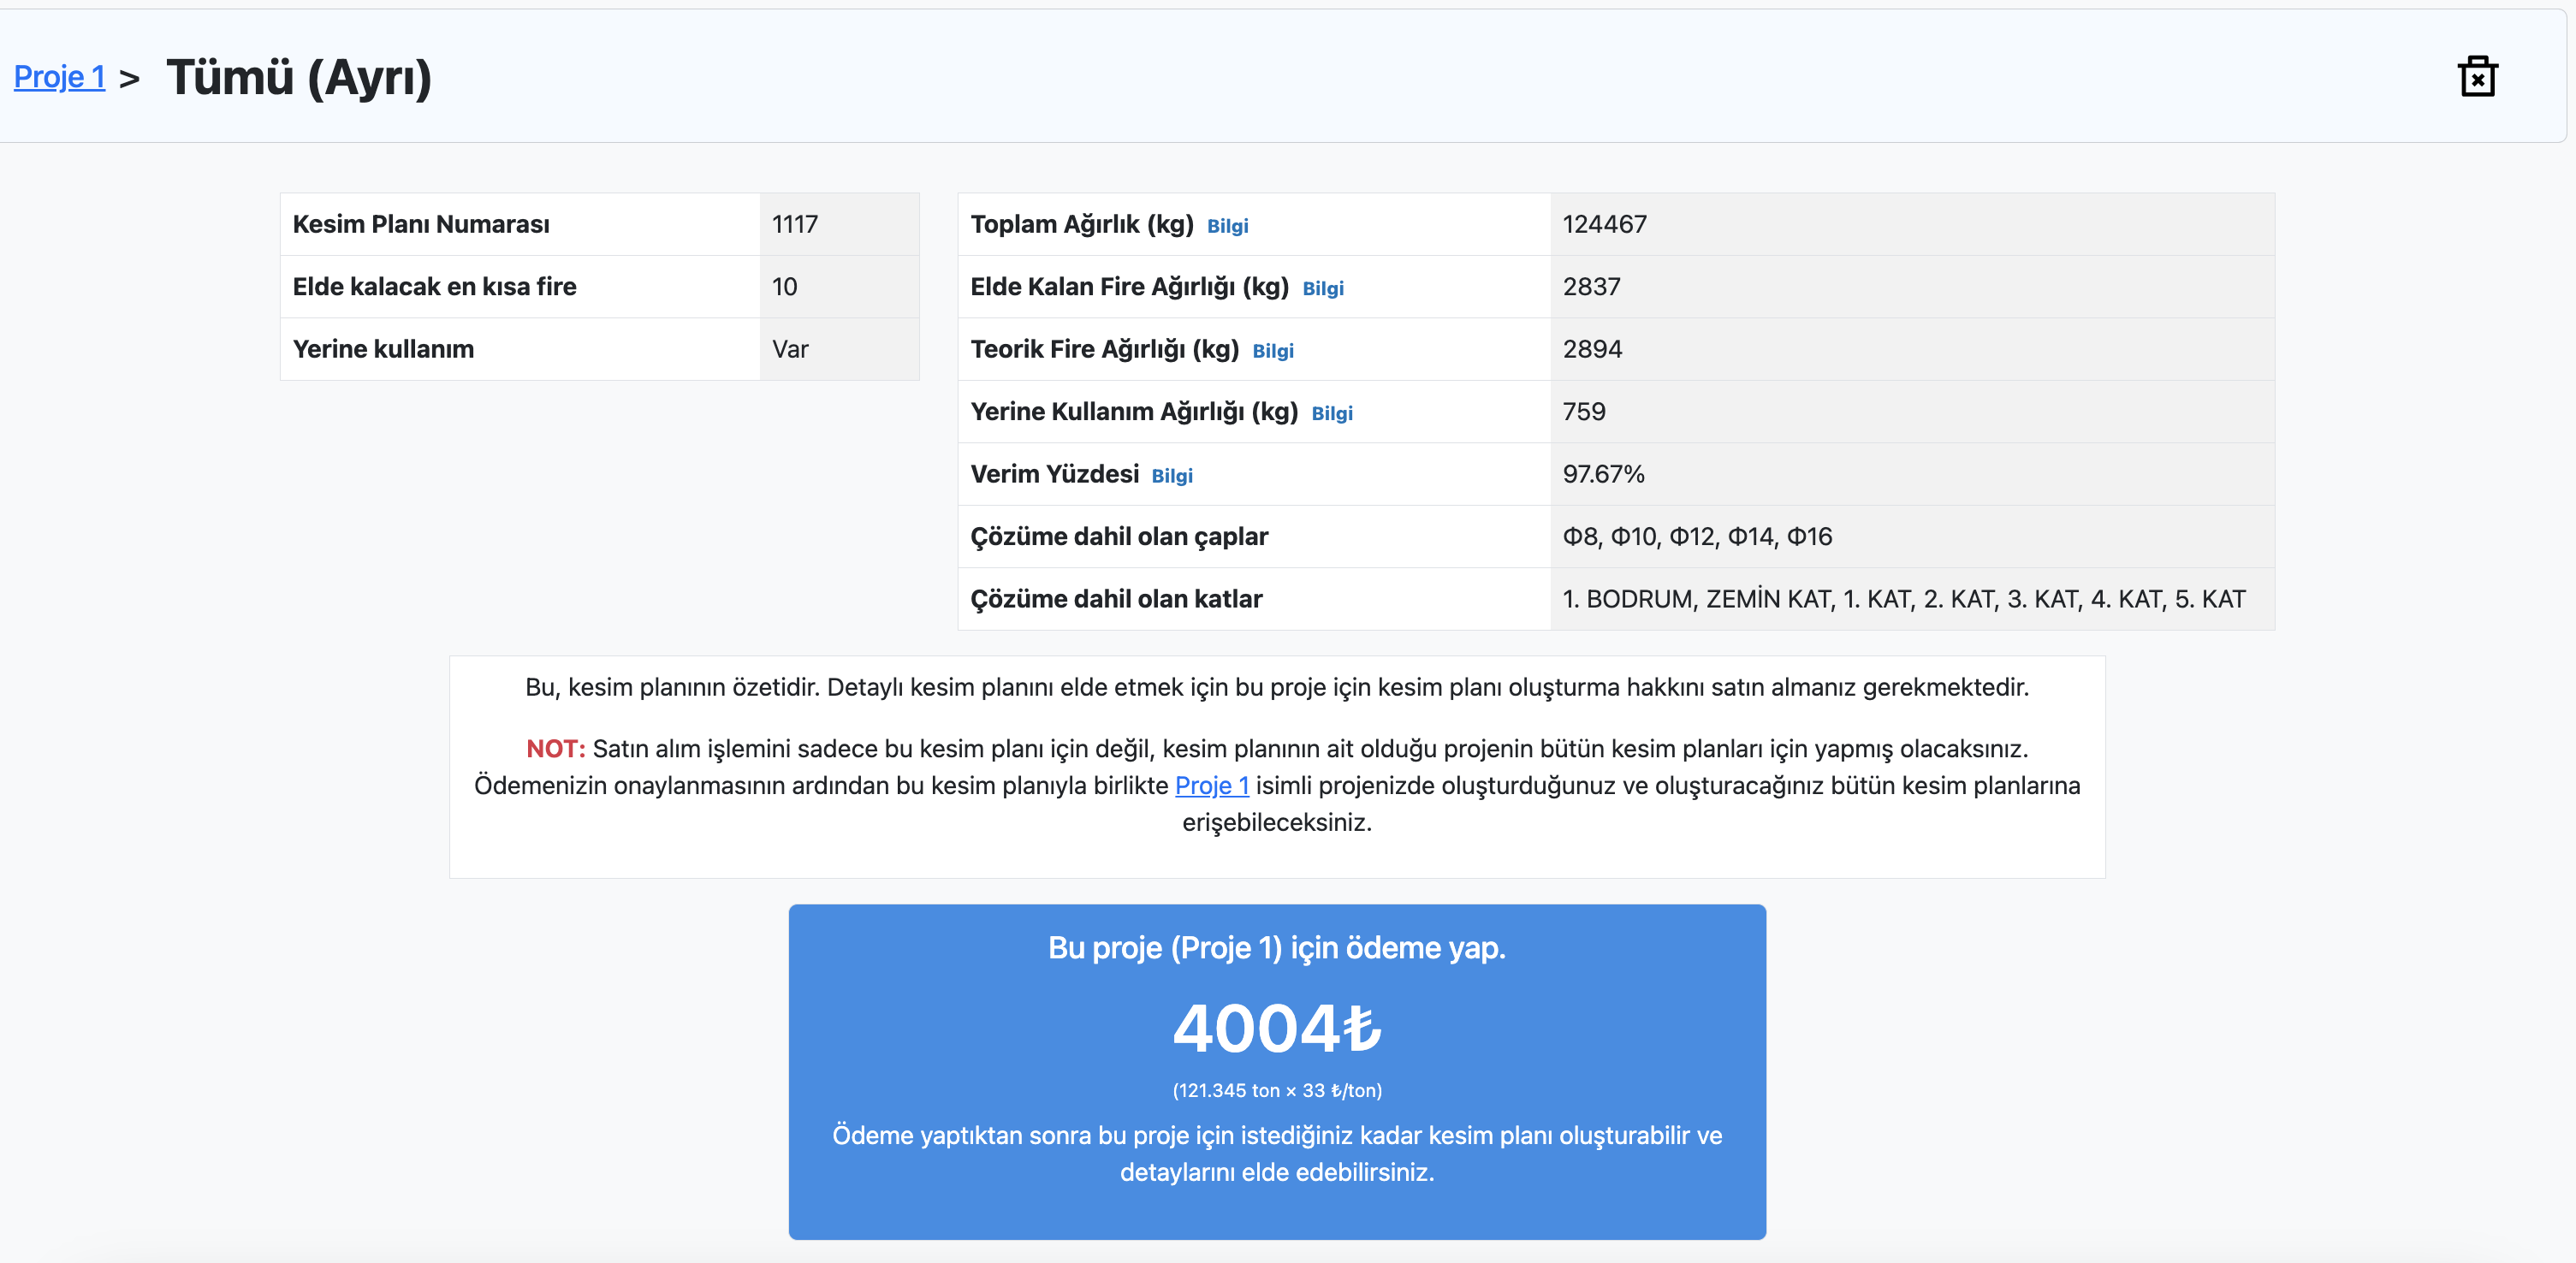
To access the details of a cutting plan, the project to which the cutting plan belongs must be activated (purchased).
The Cutting Plan Inspection Page for inactive cutting plans appears as follows:
If the project of the cutting plan is active
The Cutting Plan Inspection Page for cutting plans of activated projects appears as follows:
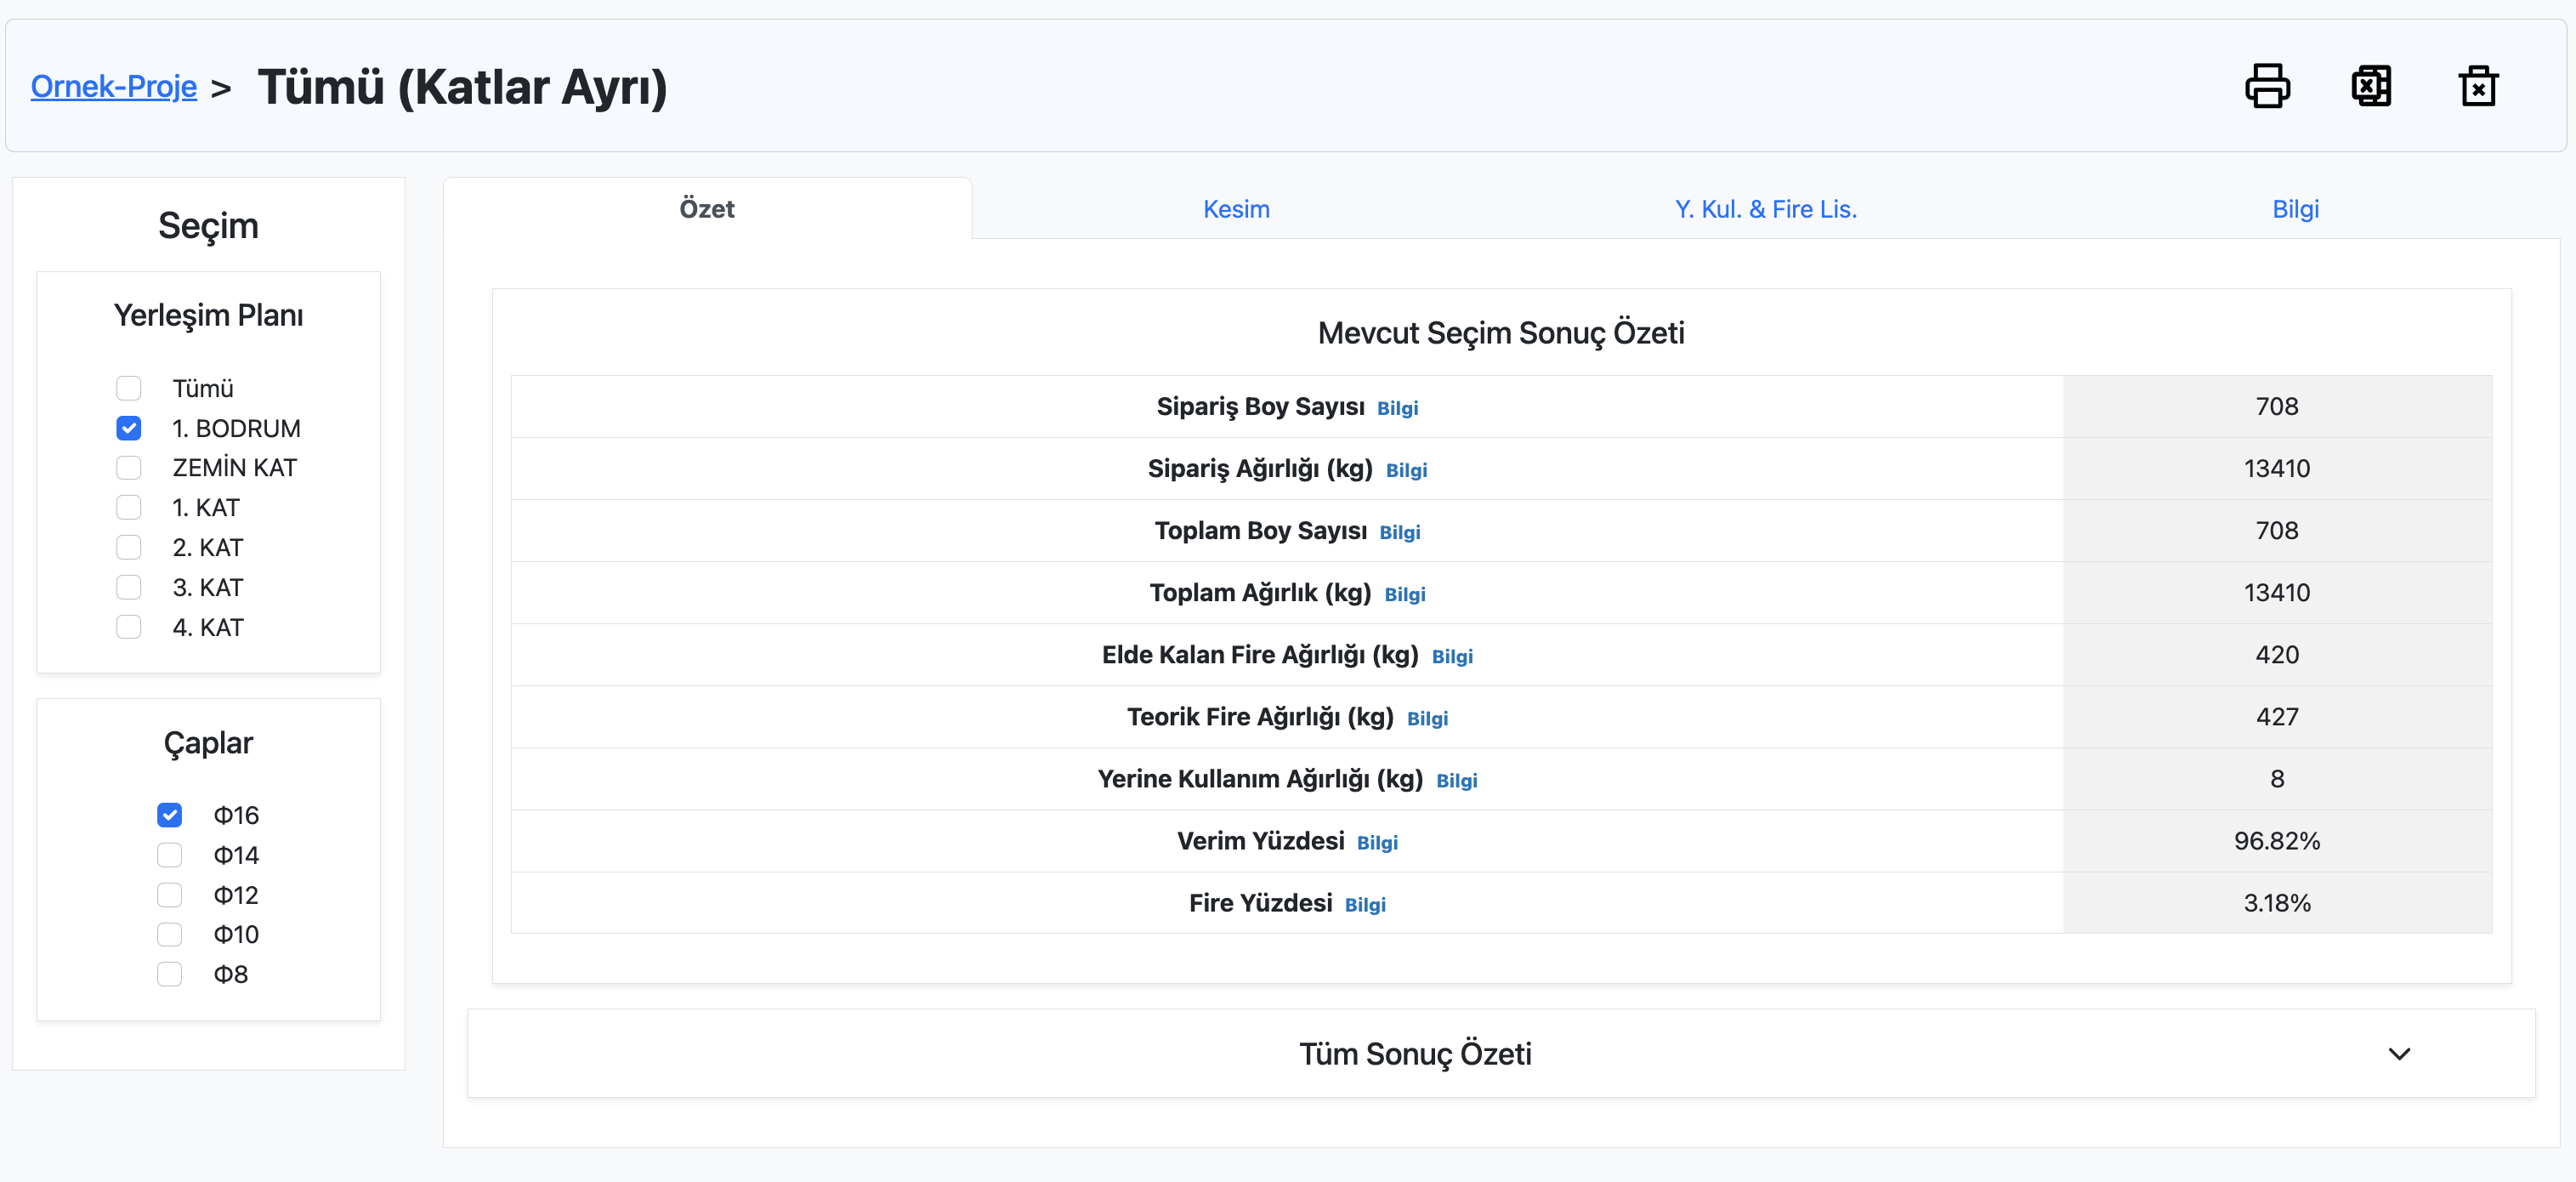
This page consists of 5 parts:
- Selection
- Summary Tab
- Cutting Tab
- Substitution & Waste List Tab
- Information Tab
Selection
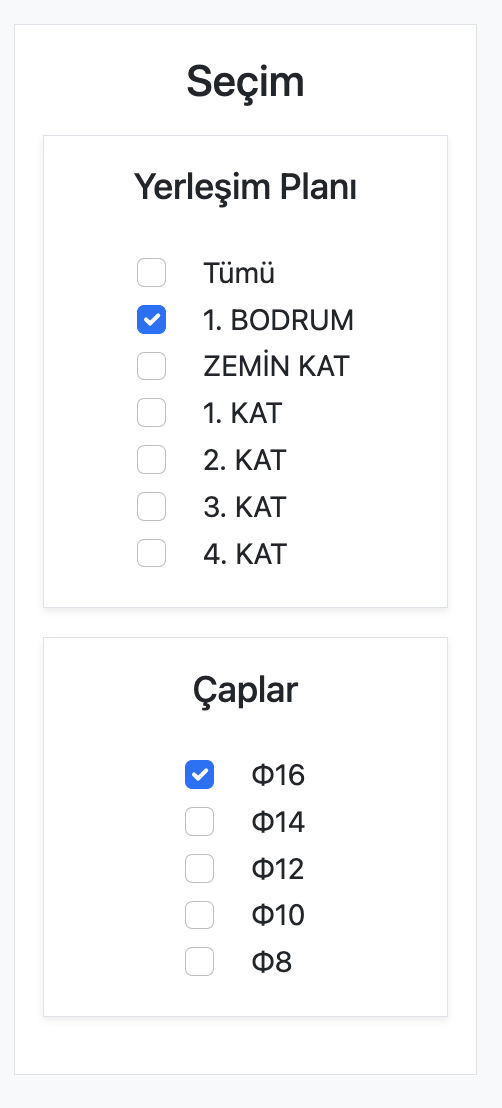
From here, the floors and diameter information to be inspected in the cutting plan are selected. The reinforcements in the selected floors with the selected diameter will be analyzed based on the optimization results in the tabs on the page.
Summary Tab
In this tab, various statistical information about the optimization results of the reinforcements for the selected floor and diameter in Selection is provided.
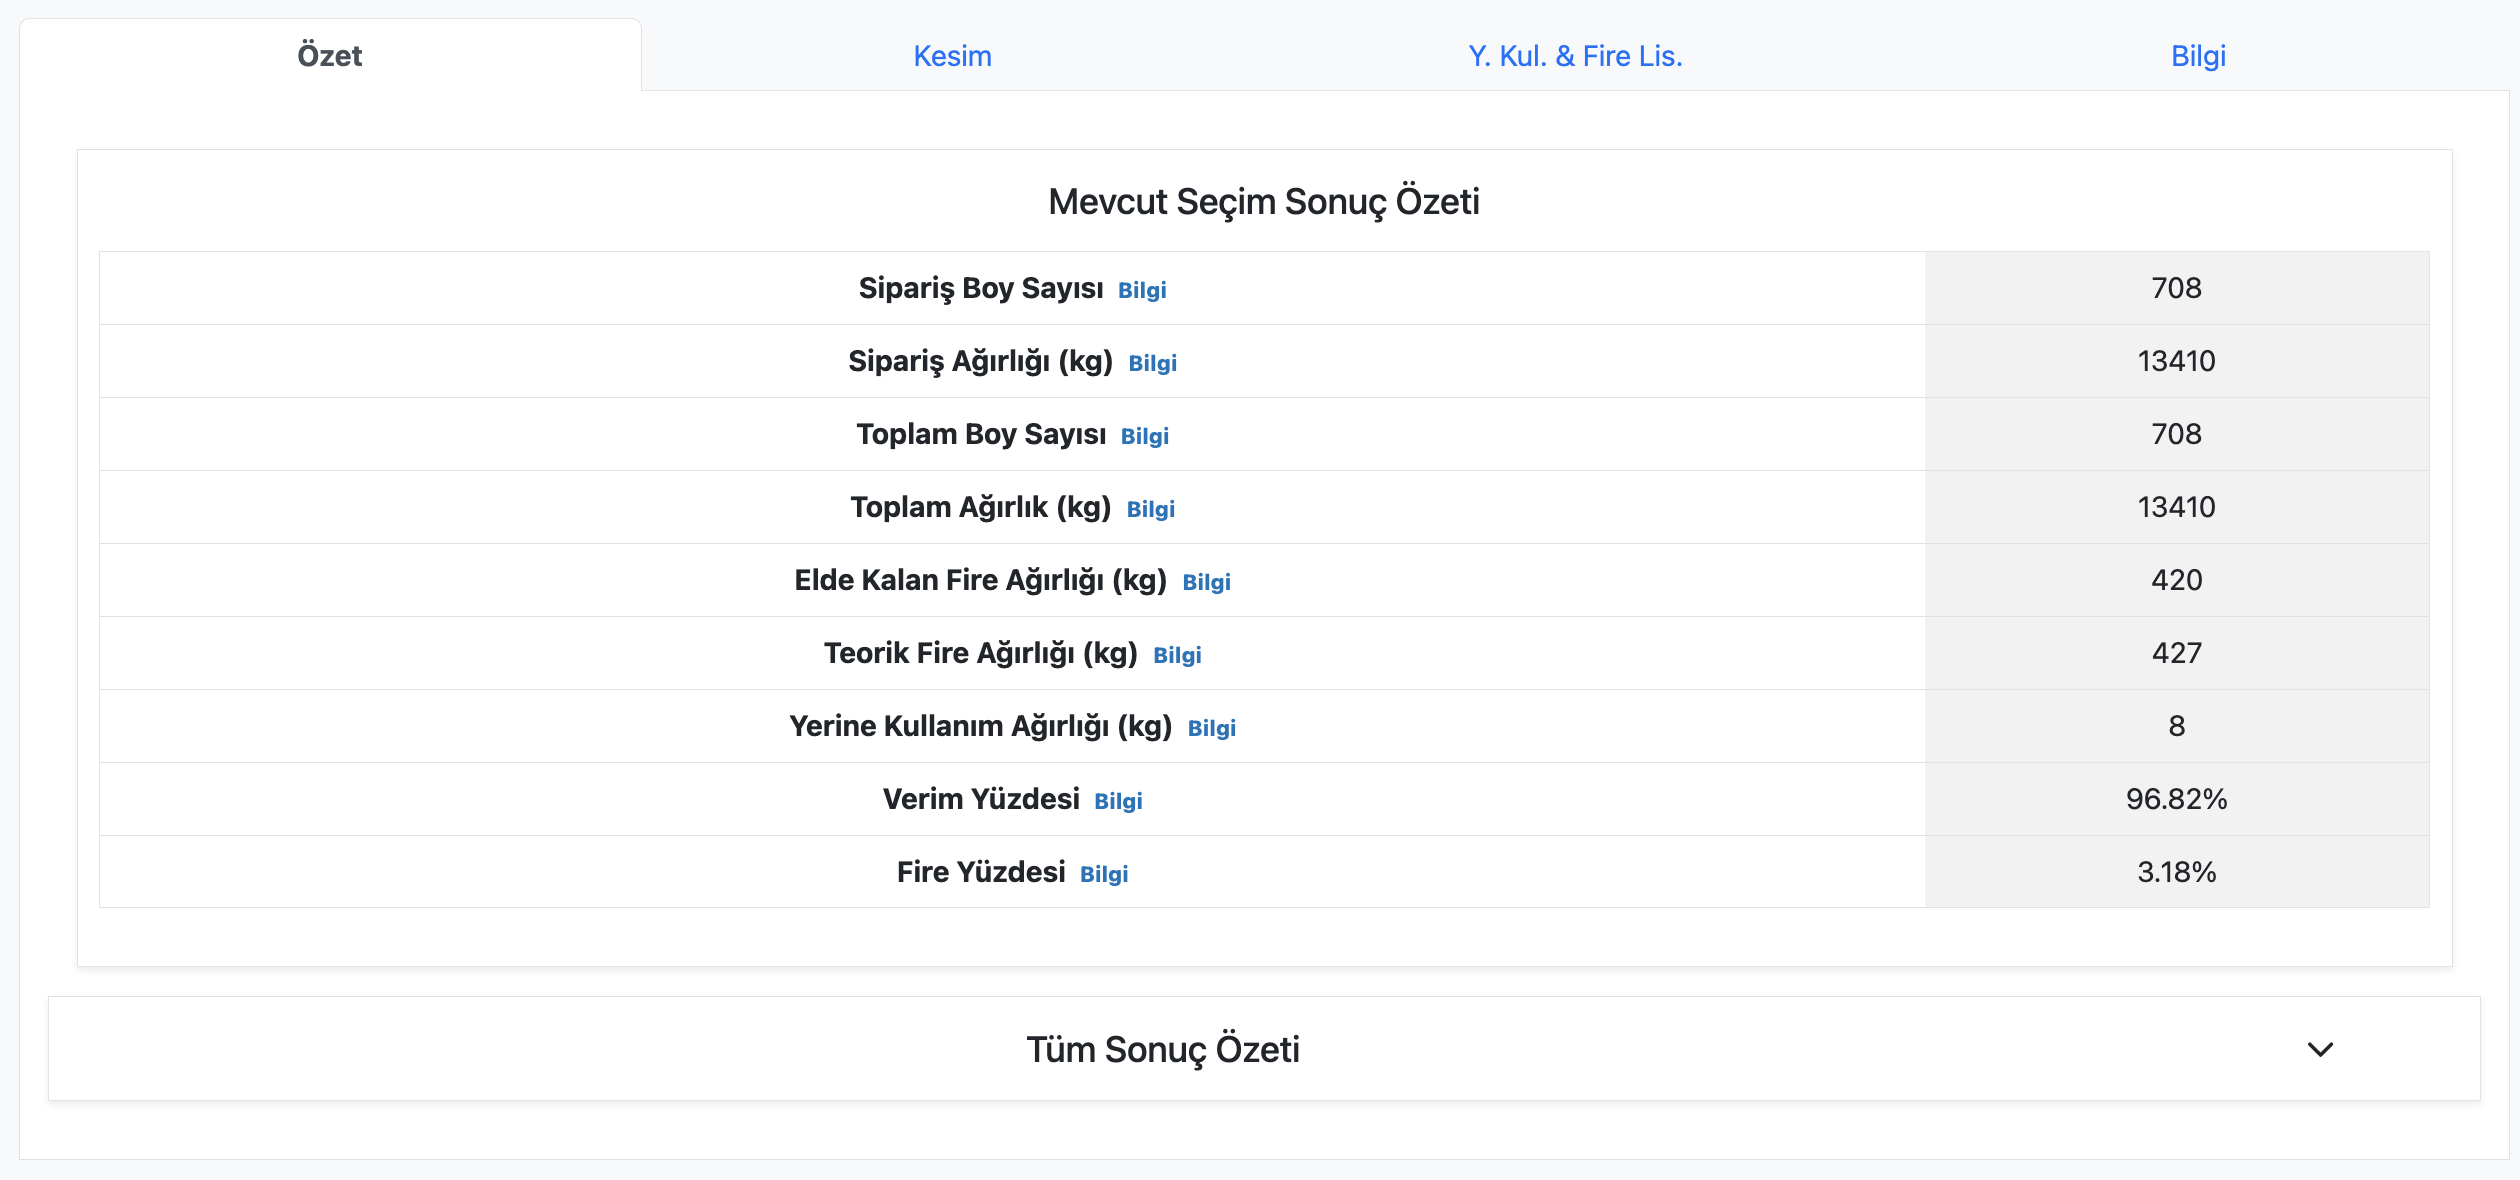
The Current Selection Summary table provides various statistics based on the floor and diameter information selected in Selection. Detailed information about these statistics can be learned by clicking the "Info" text in the table cells.
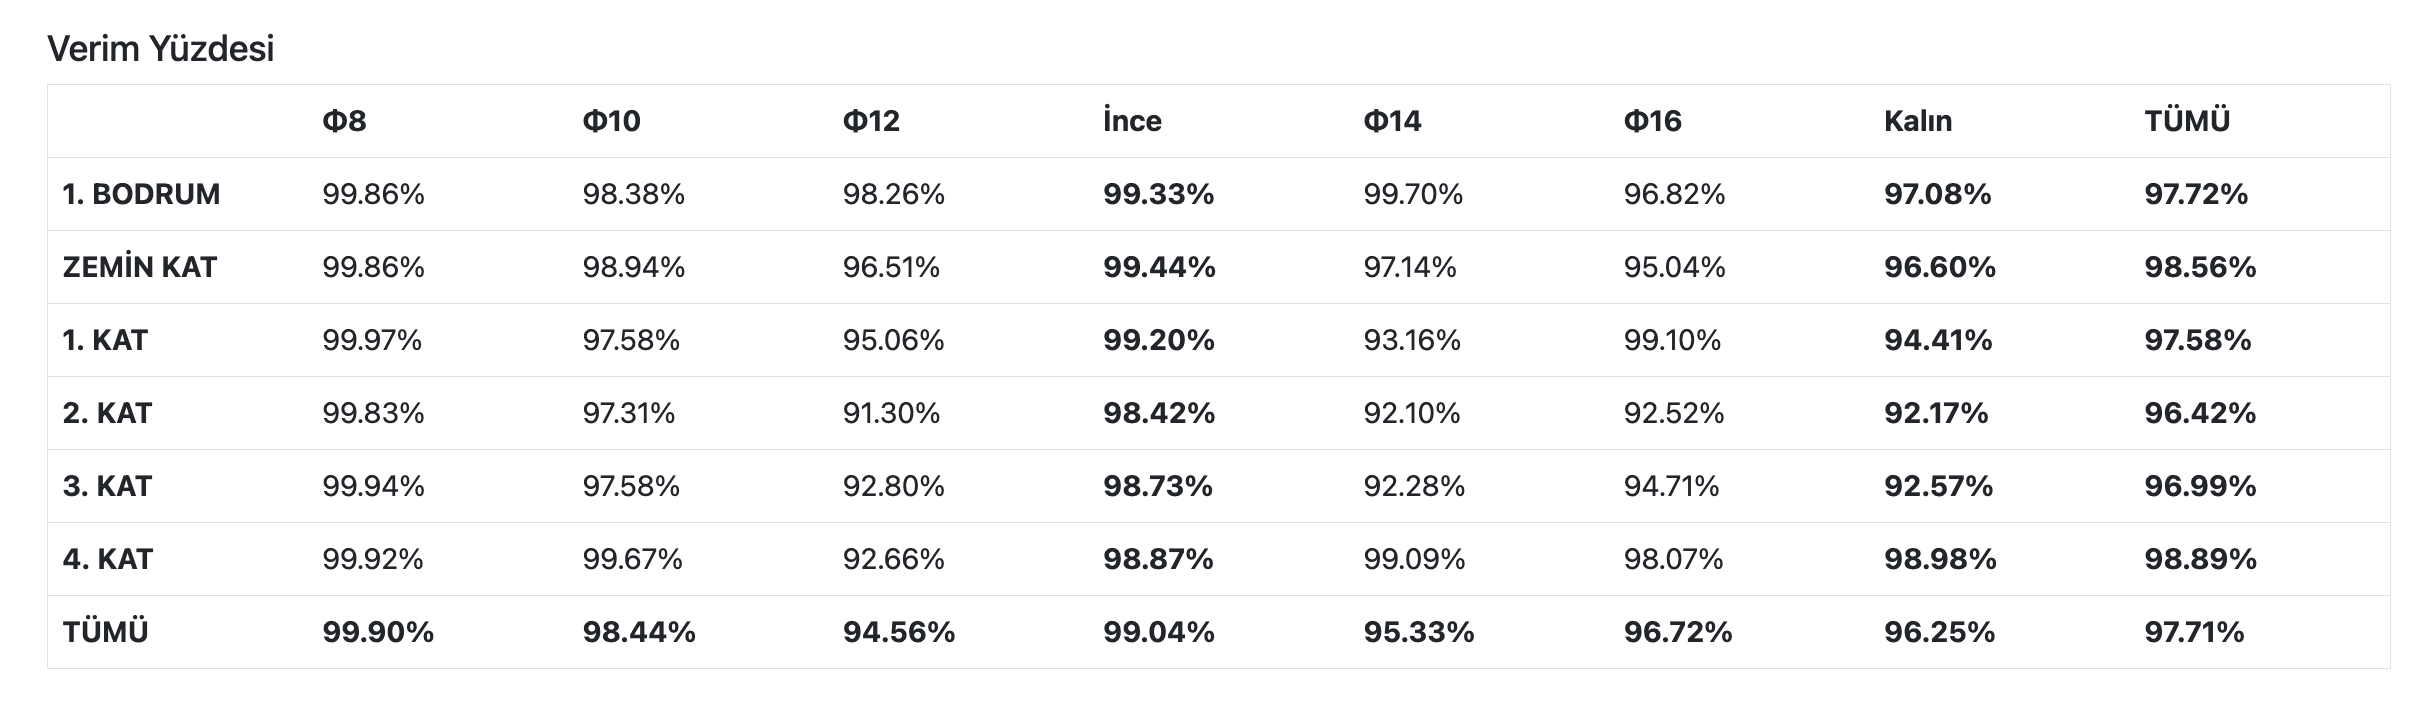
The Overall Results Summary table provides the statistics calculated in the Current Selection Summary for the entire project. The tables can be collapsed or expanded by clicking the arrow on the far right of the table header. Below is an example of the table where the "Efficiency" statistic is provided collectively:
Cutting Tab
In this tab, the cutting plan resulting from the optimization of the reinforcements for the selected floor and diameter in Selection can be inspected. The cuts in the cutting plan are listed here.
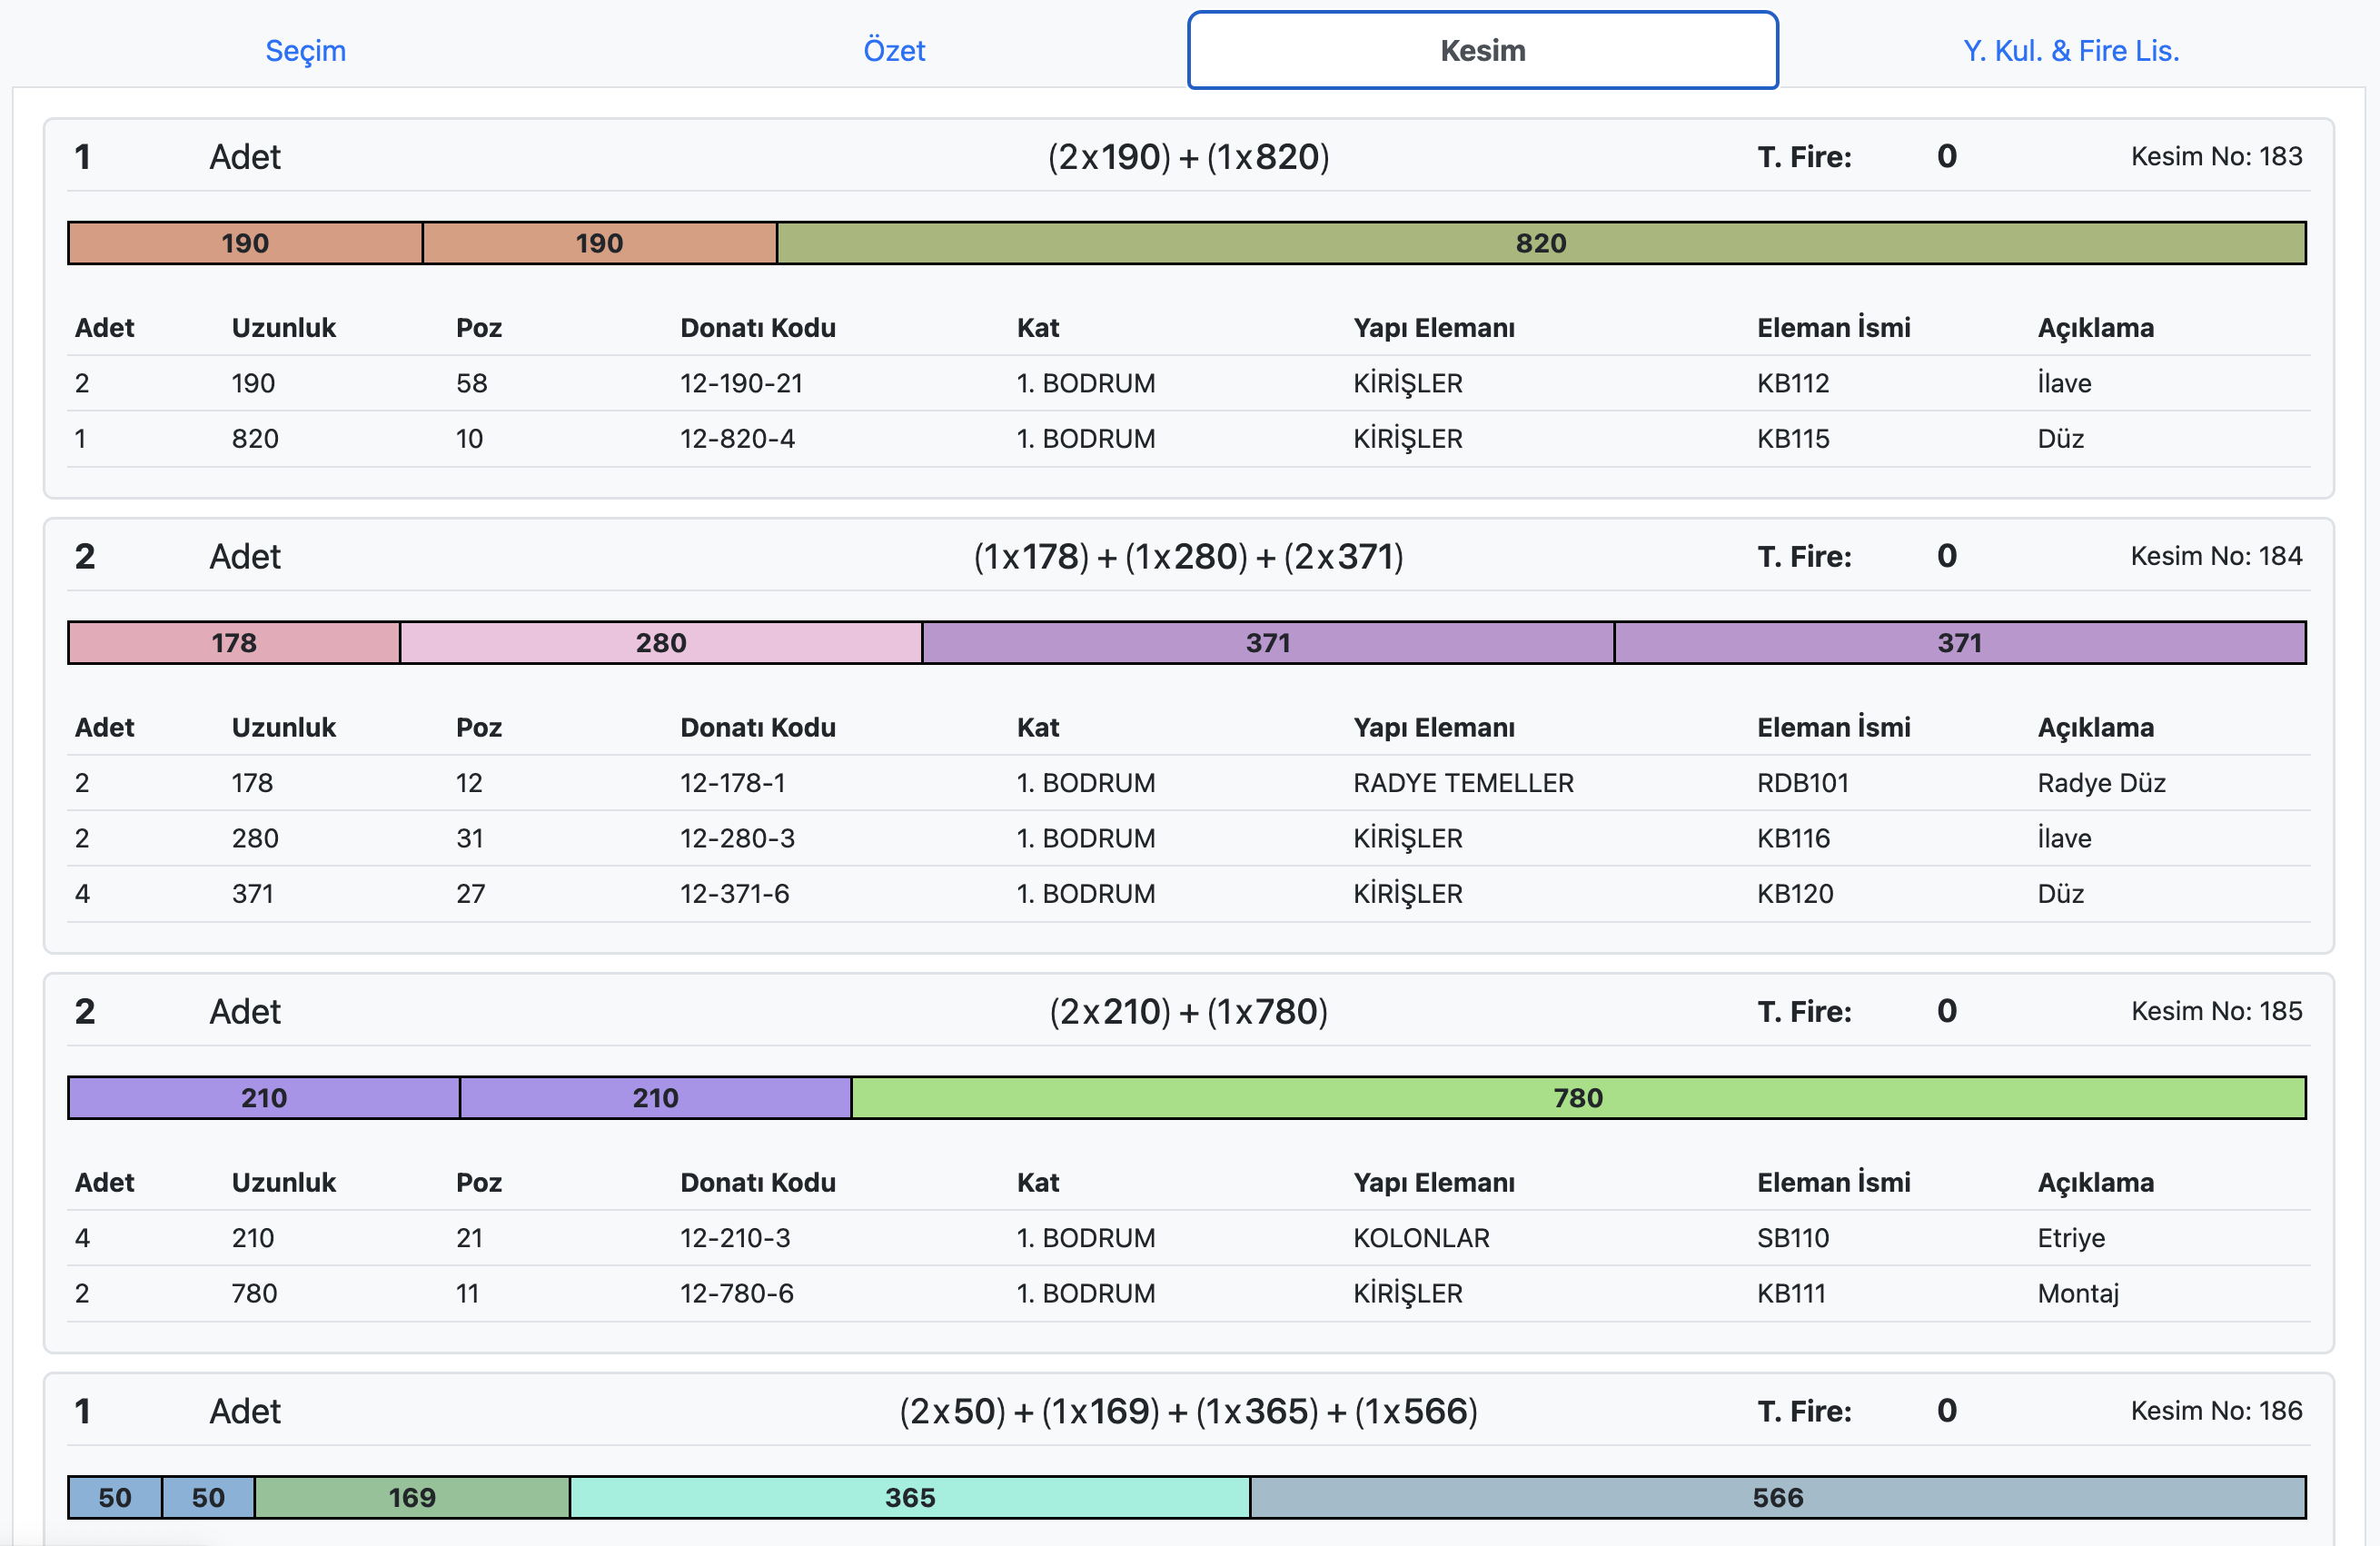
The information displayed for a cut includes:
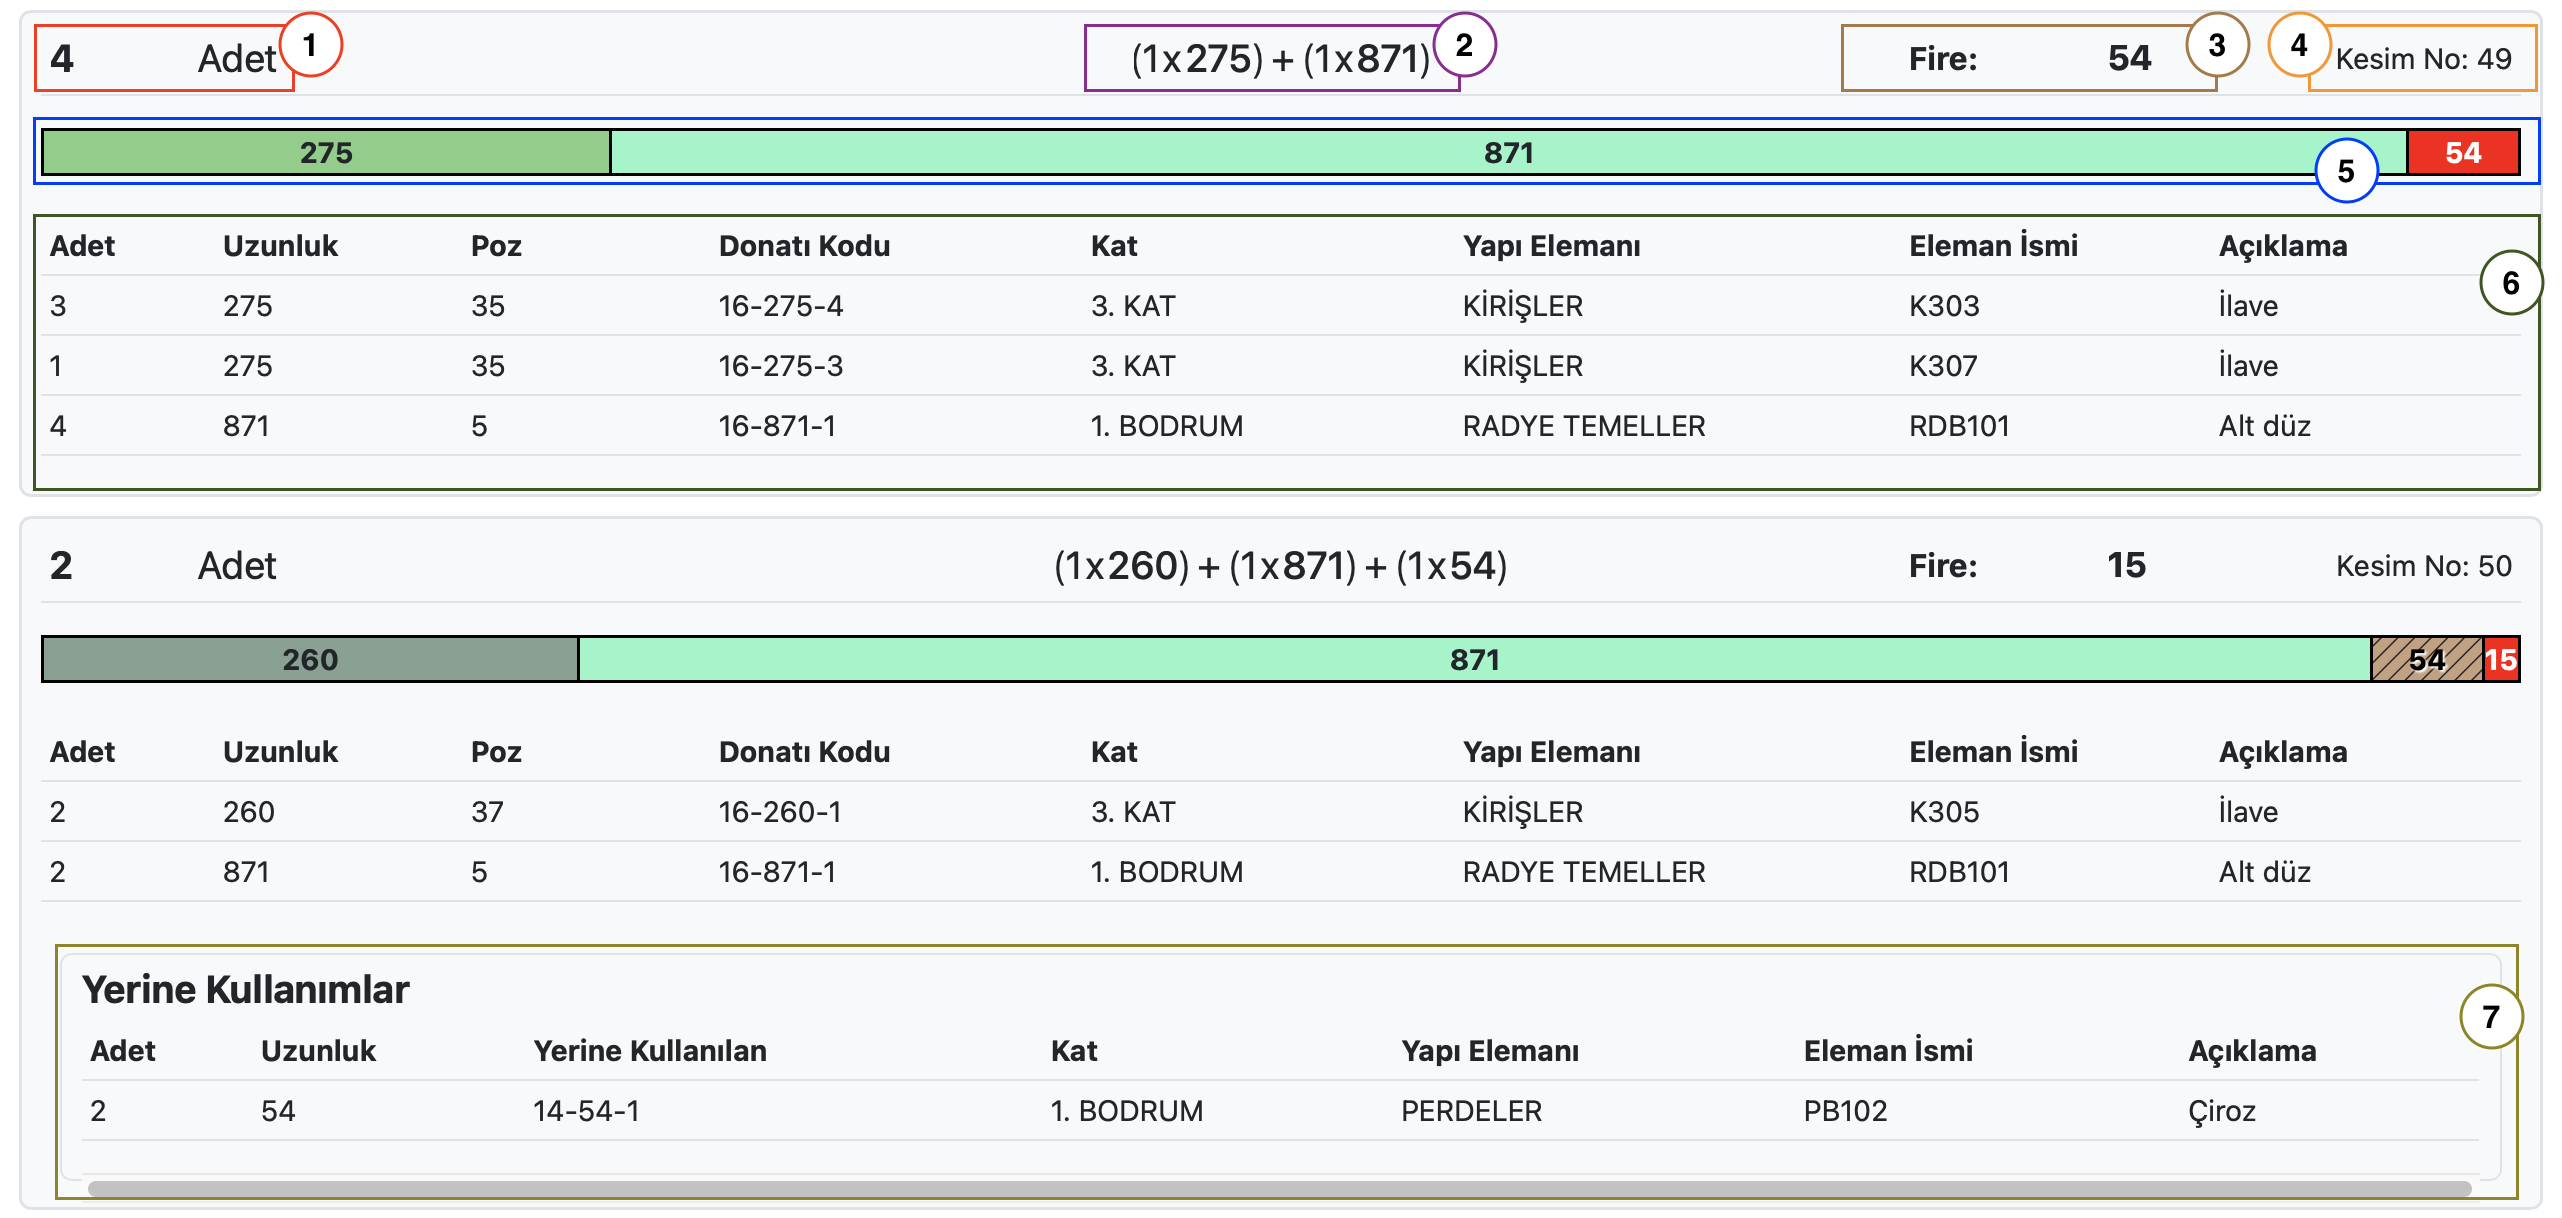
- The number of pieces to be cut in the given shape
- The textual representation of the cutting shape
- Total waste for the cutting shape (Number of pieces × Remaining waste from one cut)
- A unique cutting number assigned to each cutting shape
- Visual representation of the cutting shape
- Locations where the resulting cuts will be placed
- Information on whether the waste from the cutting shape was used in a lower diameter
Substitution & Waste List Tab
In this tab, the substitutions and wastes in the cuts for the selected floor and diameter in Selection can be accessed.
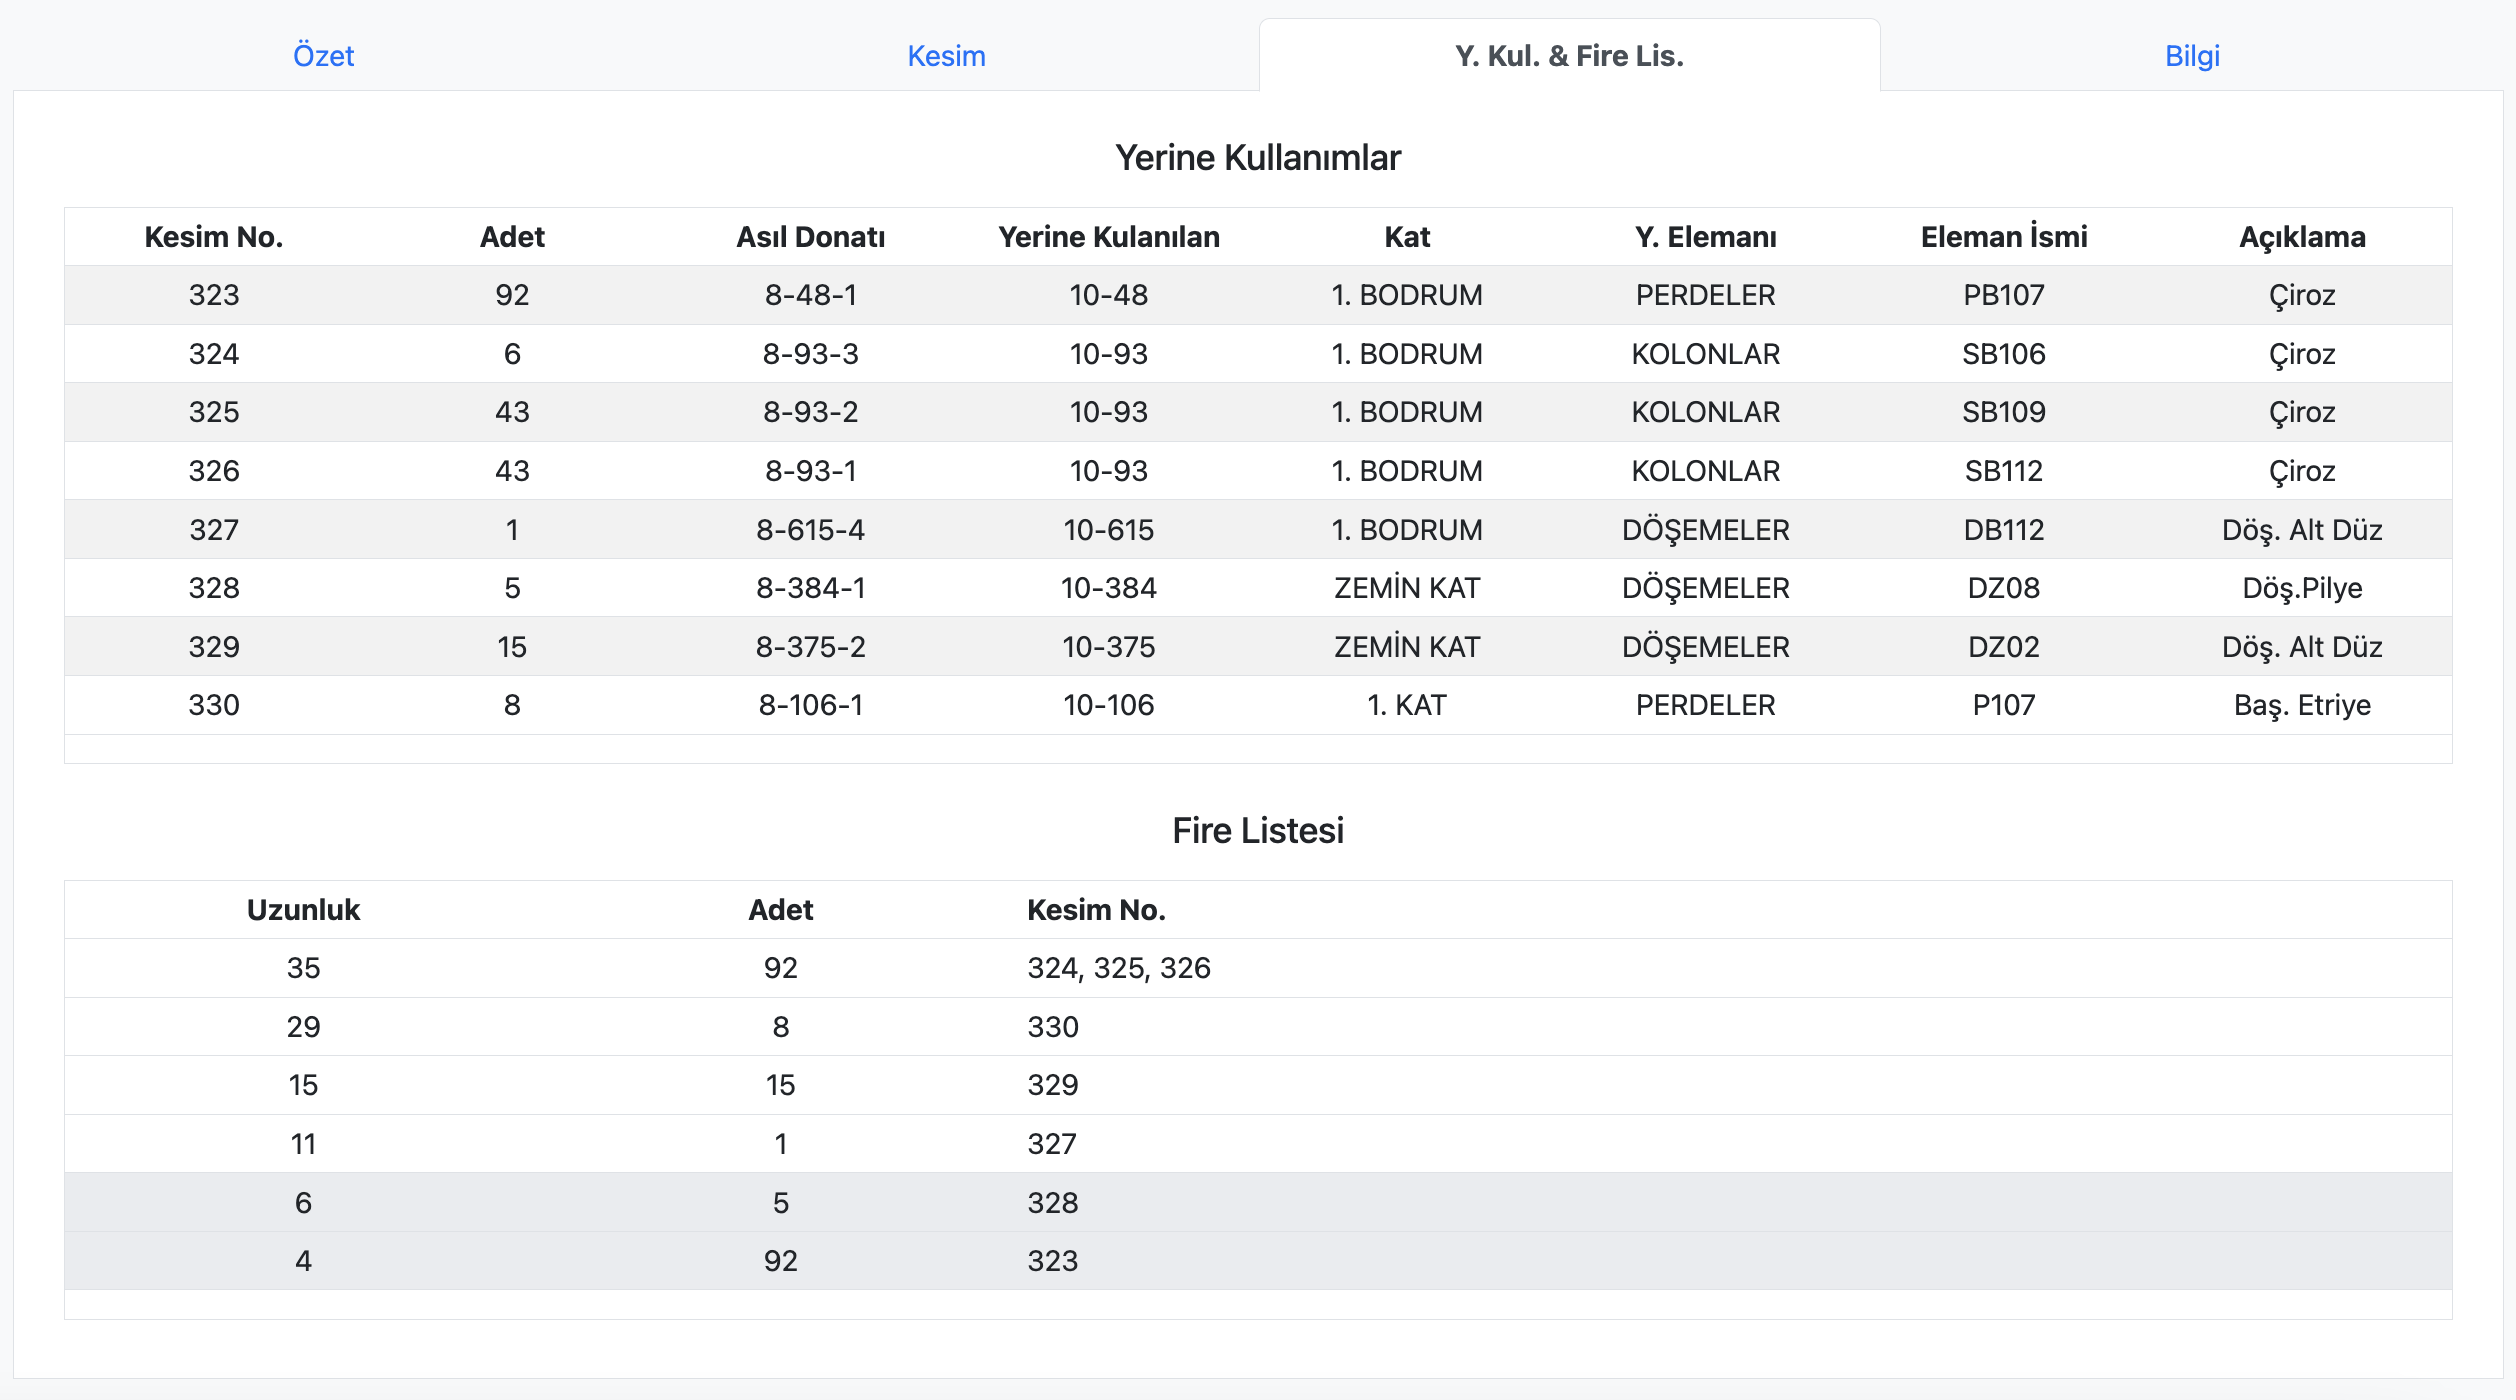
The "Original Reinforcement" column in the Substitution table shows the reinforcement code of the original reinforcement for which a substitution was made with a higher diameter. The "Substituted With" column contains the diameter and length information of the reinforcement used as a substitution for the original reinforcement. For example, "16-54" means a Φ16 reinforcement with a length of 54 cm.
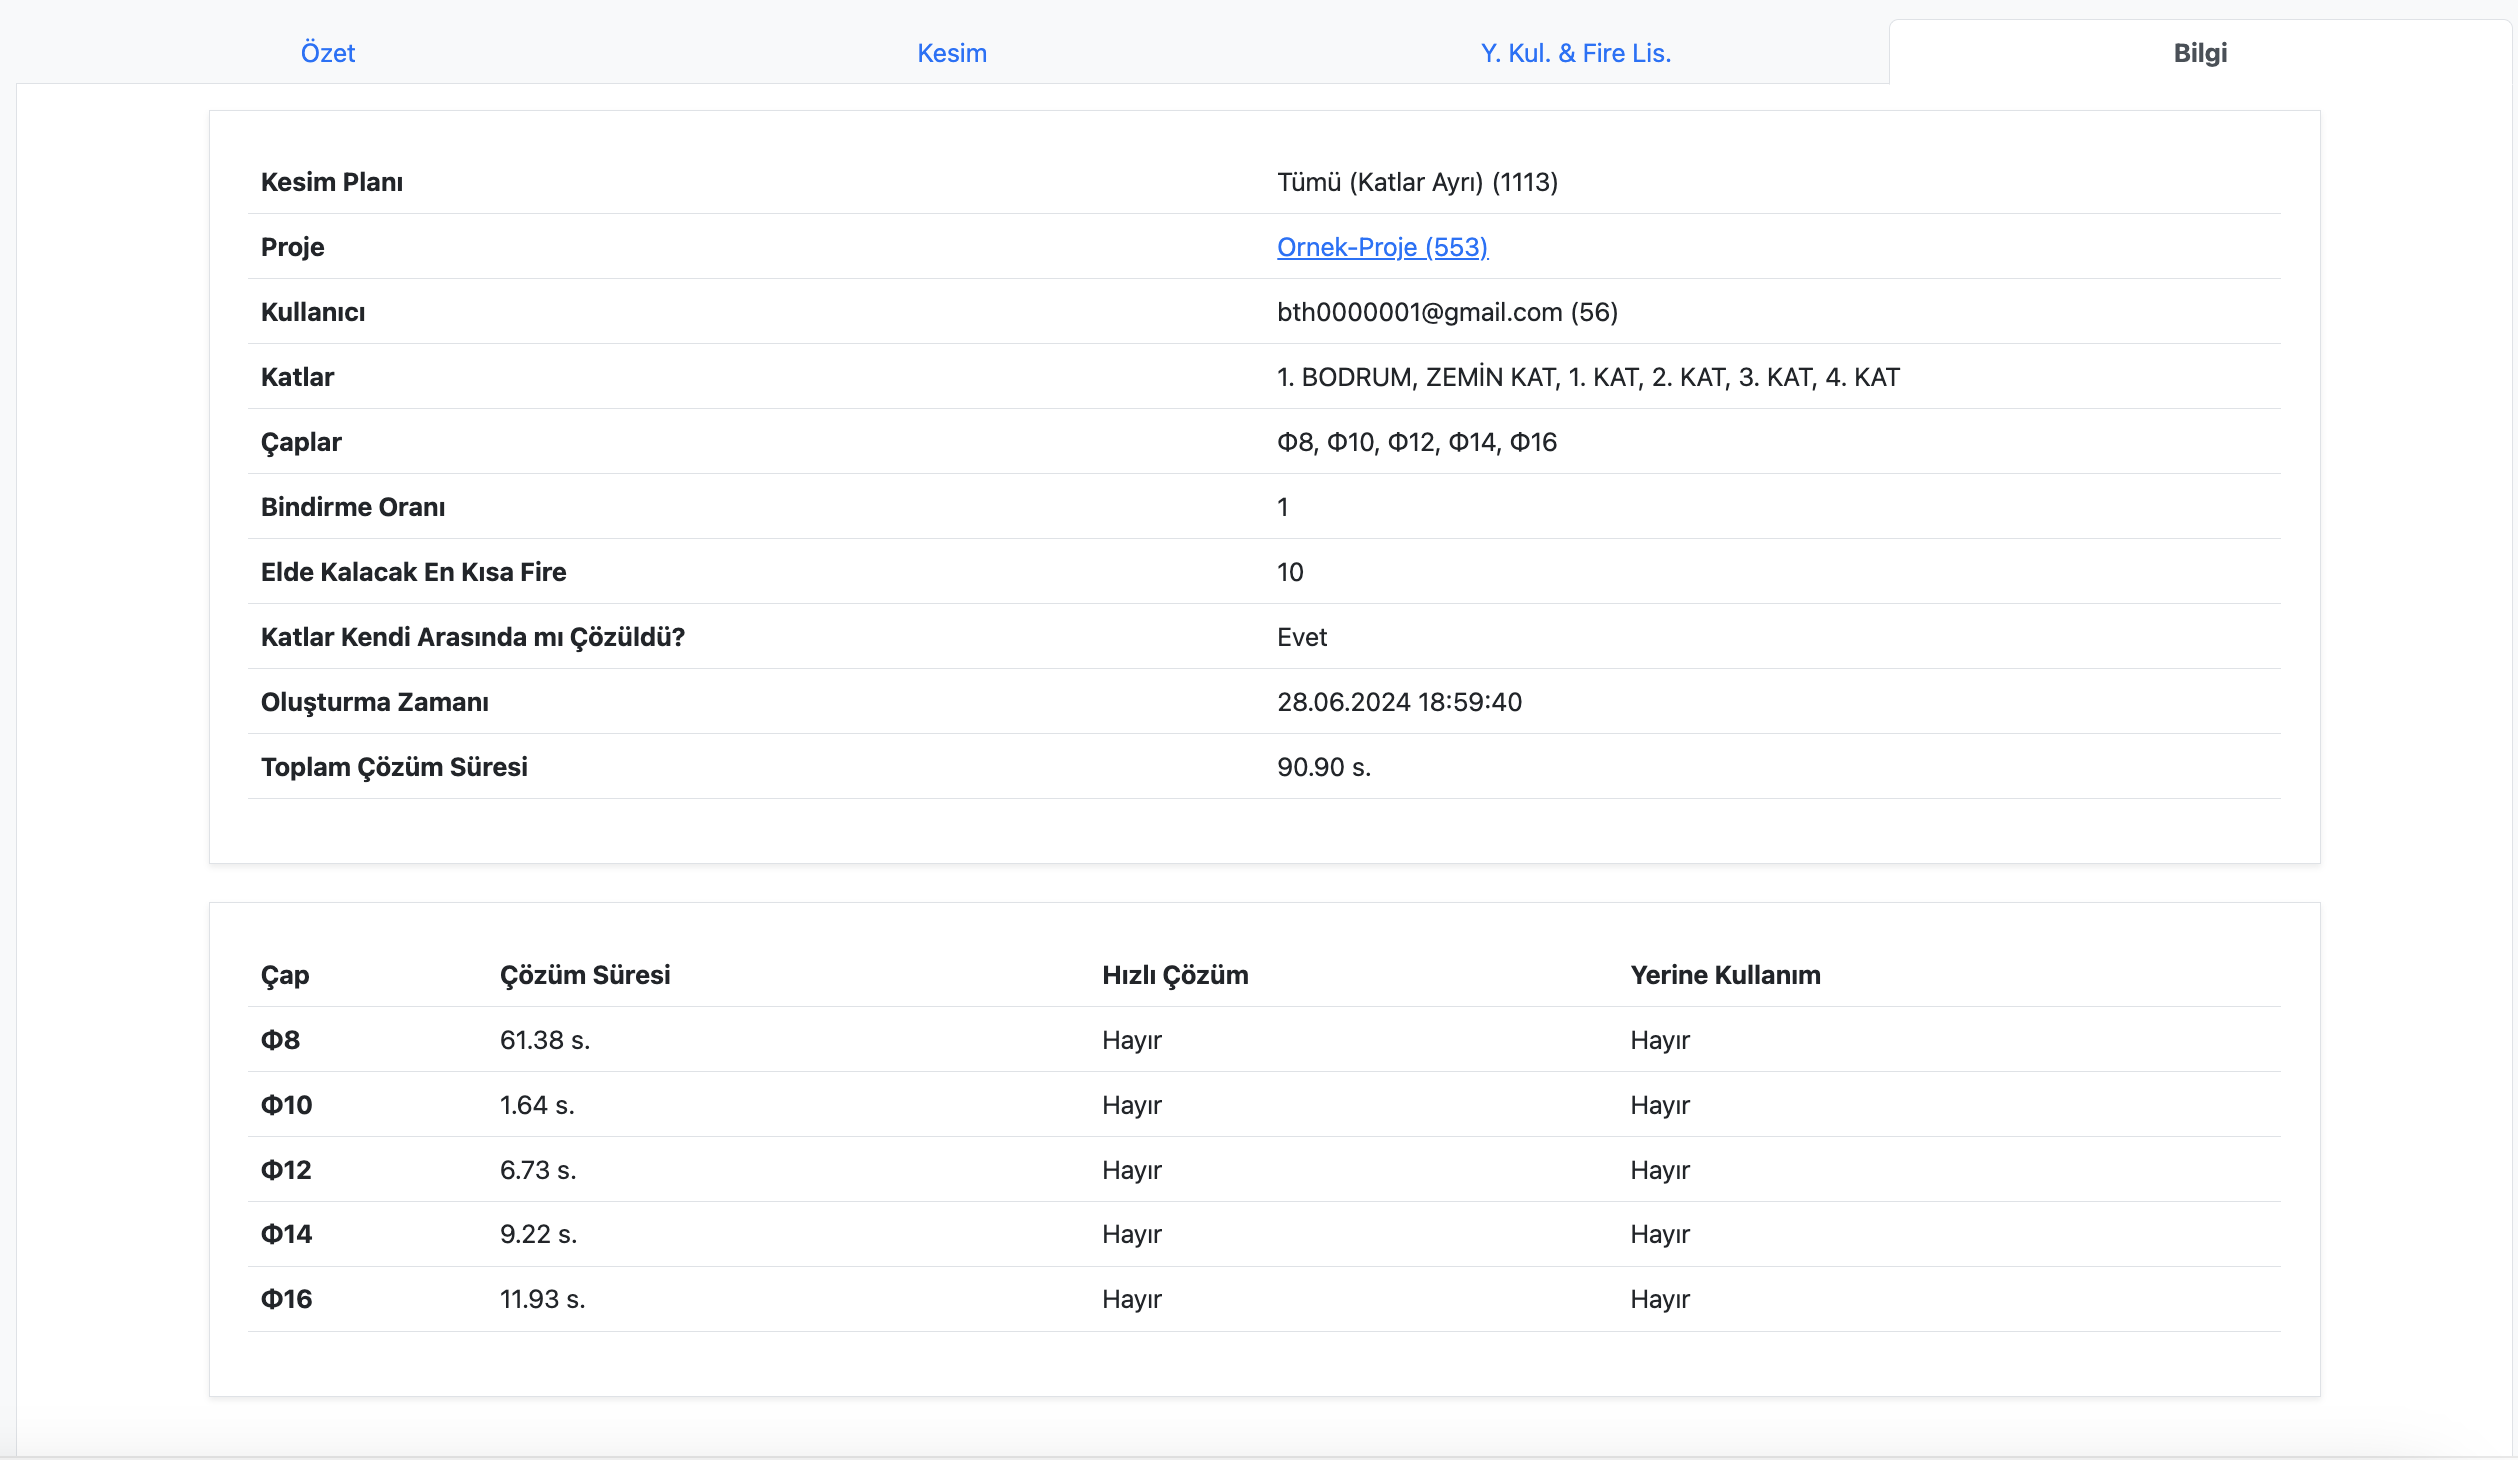
Information Tab
This tab contains some information about the cutting plan.
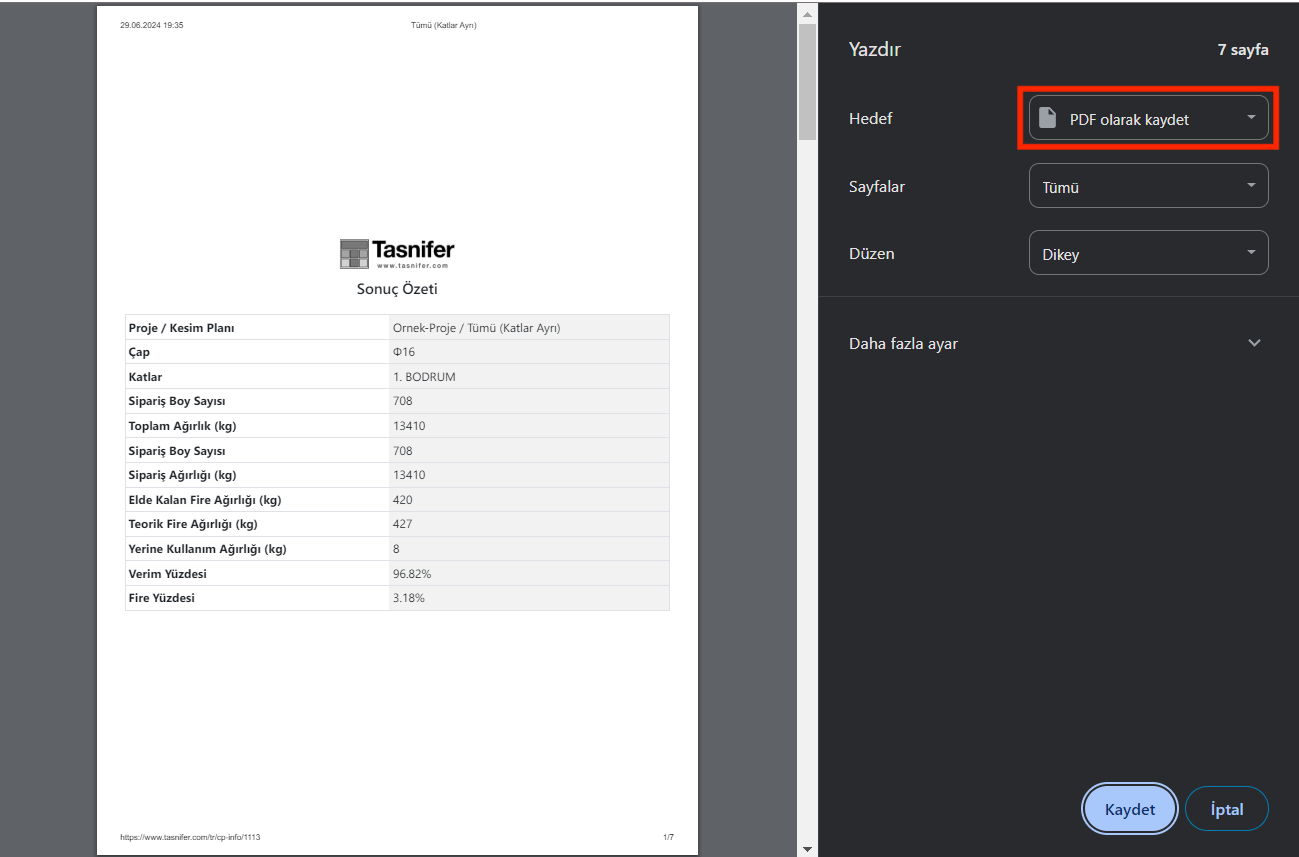
Printing the Cutting Plan
Cutting plans of activated projects can be printed or saved in PDF format.
The printed or saved cutting plan includes the cuts for the floors and diameters selected in Selection.
To print the cutting plan, click the Printer icon to the right of the cutting plan title at the top of the Cutting Plan Inspection Page.

To save the document as a PDF, after clicking the Print Cutting Plan button, select the "Save as PDF" option in the browser's print screen. This process may vary for each browser.
Cutting Plan Excel File
Excel files of cutting plans for activated projects can be downloaded.
The Excel file can be downloaded by clicking the Excel icon to the right of the cutting plan title at the top of the Cutting Plan Inspection Page.

The reinforcement cutting plan Excel file consists of 5 sheets:
- Cuts
- Placements
- Substitutions
- Wastes
- Long Reinforcements
The Cuts sheet lists each cut. | 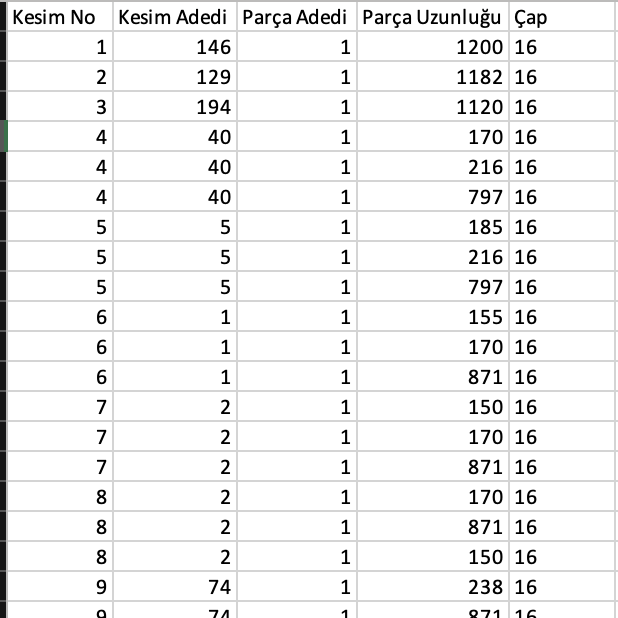 |
The Placements sheet shows the location of each cut. | 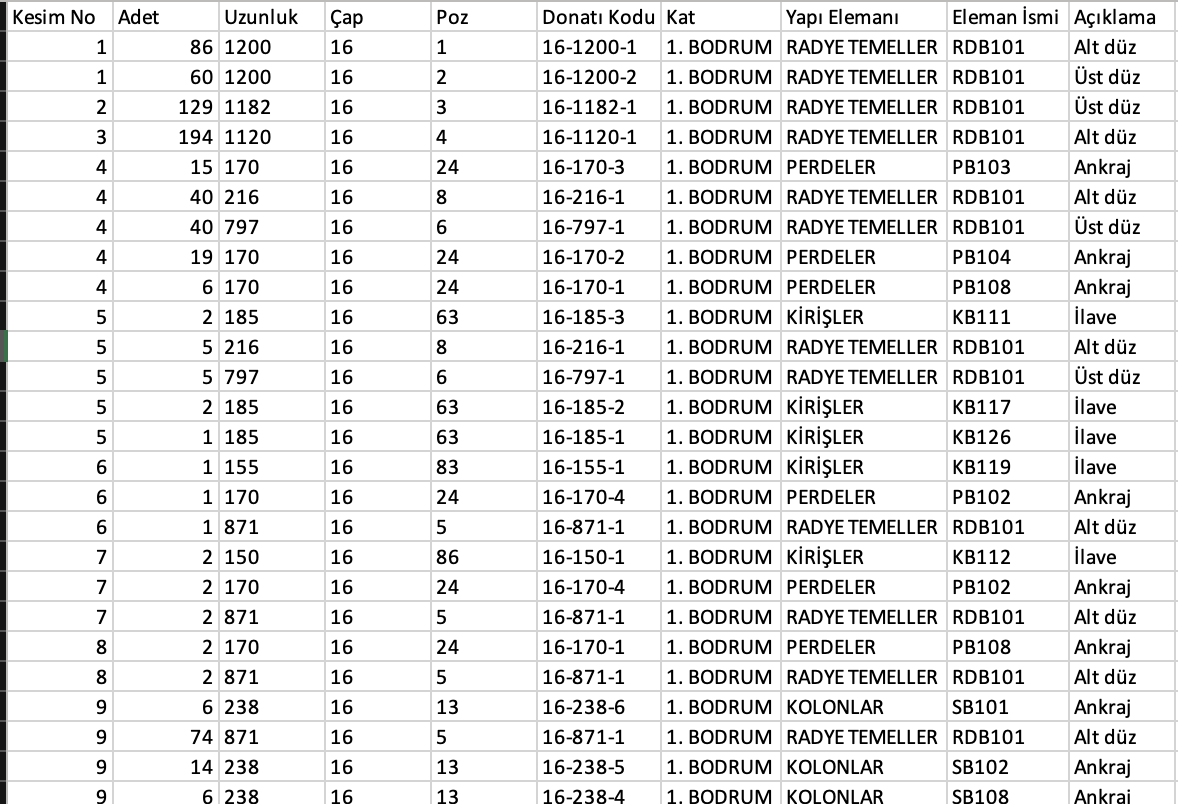 |
The Substitutions sheet lists the substitutions. | 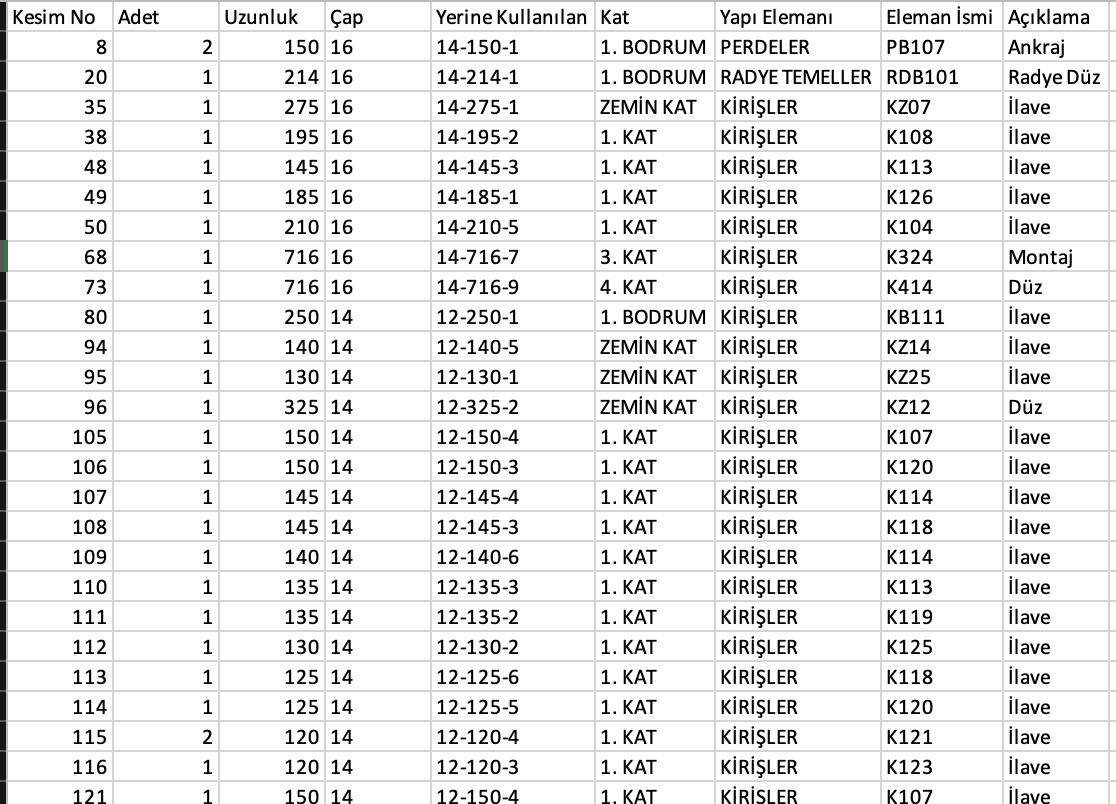 |
The Wastes sheet lists the wastes in the cuts. | 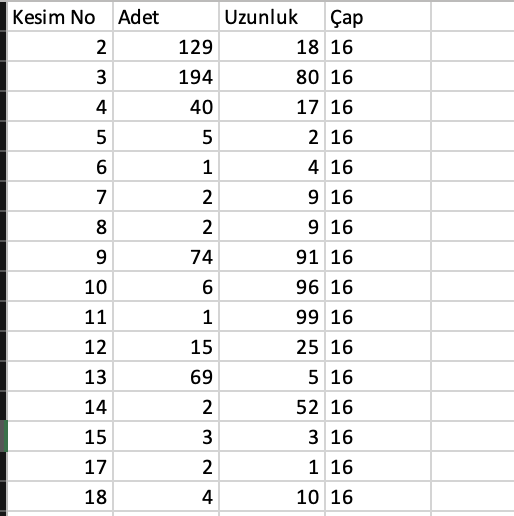 |
The Long Reinforcements sheet lists any long reinforcements included in the cutting plan and their locations. | 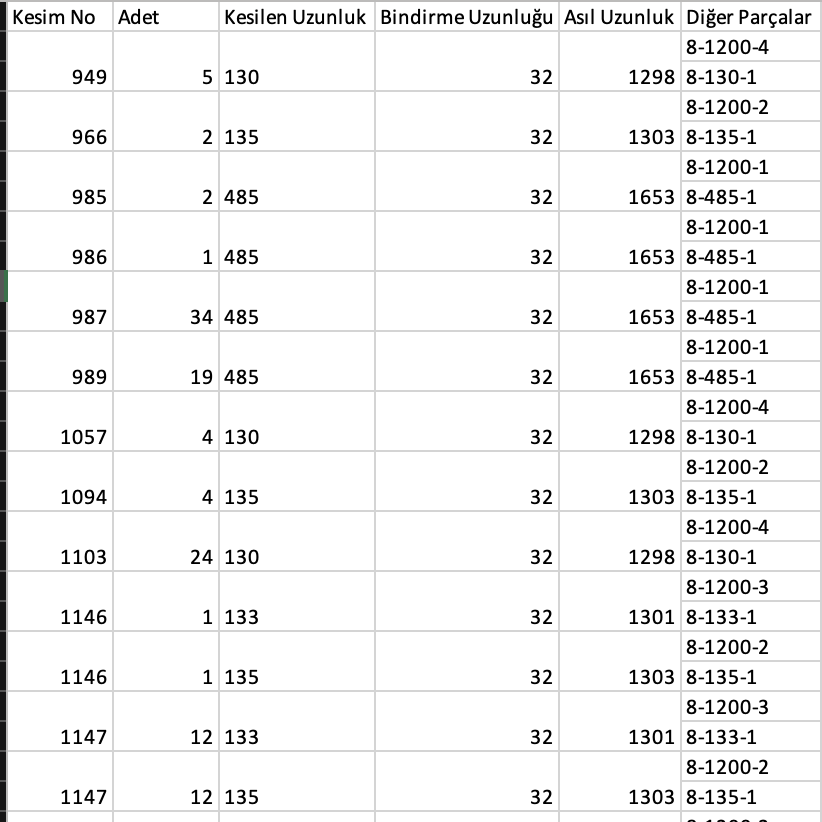 |
The cutting plan Excel file allows for any kind of analysis related to the cutting plan.
Deleting a Cutting Plan
To delete a cutting plan, click the trash icon to the right of the cutting plan title at the top of the Cutting Plan Inspection Page.

Please note that deletion operations are permanent and irreversible.