Inspecting a Project
To inspect a created project, navigate to the Project Inspection Page of the relevant project.
Accessing the Project Inspection Page
After creating your project using the Project Creation Page, you will automatically be redirected to the Project Inspection Page of the relevant project.
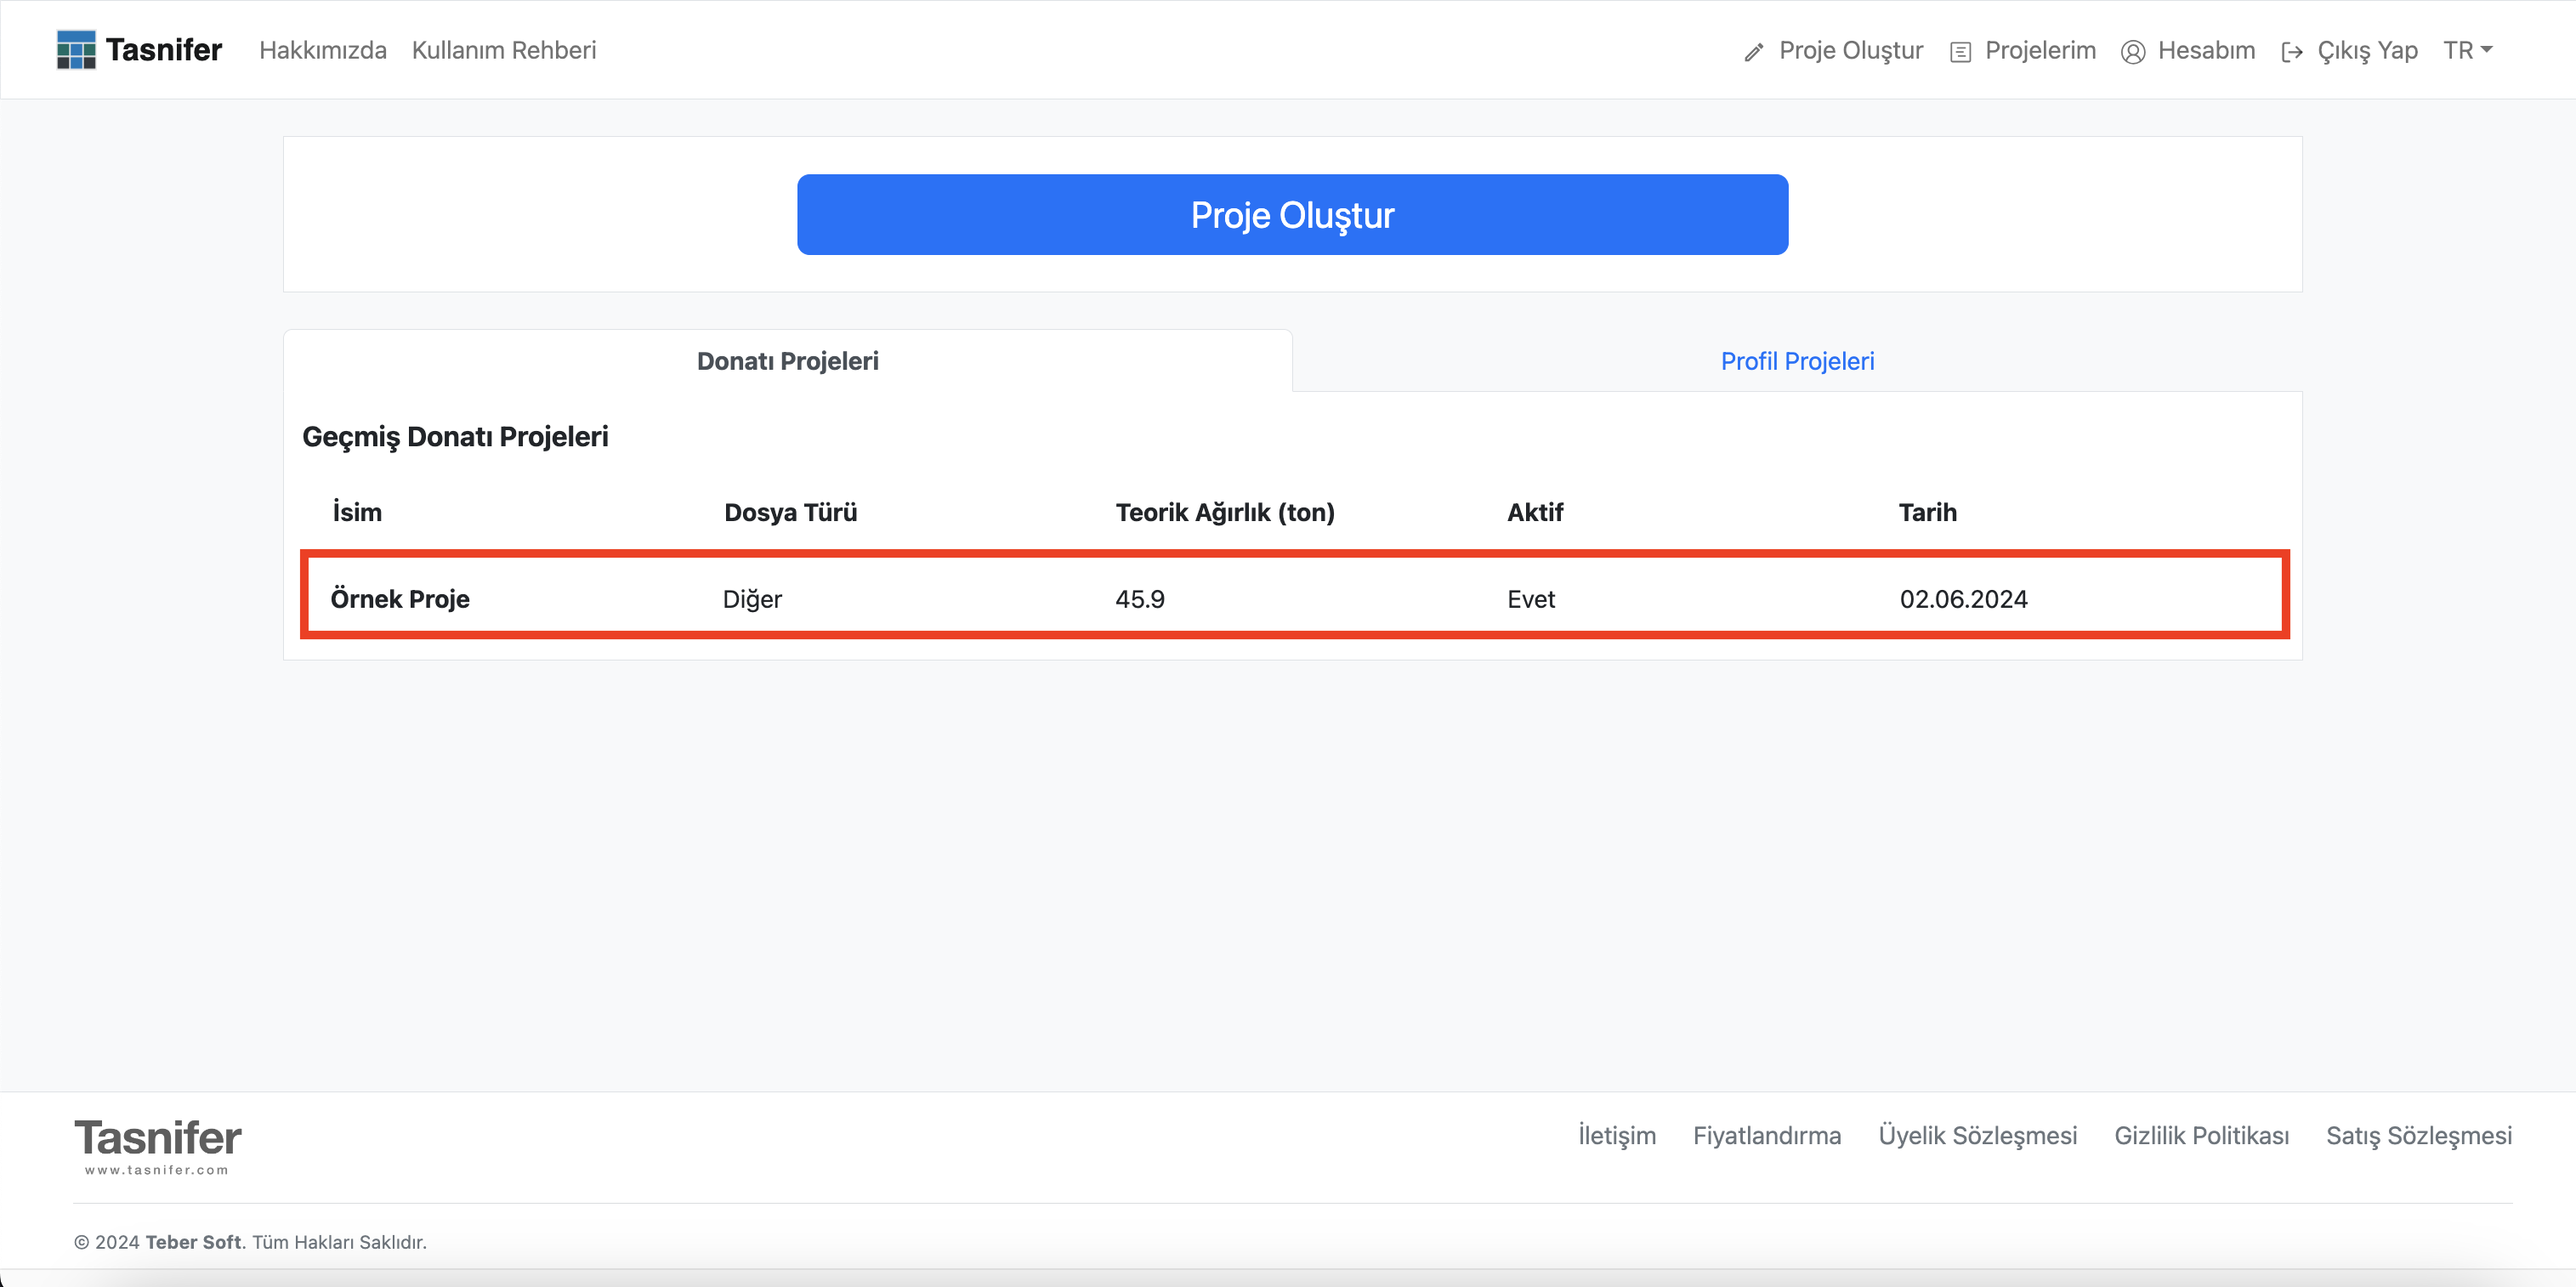
To access the Project Inspection Page of a previous project, first go to the My Projects page.
From the My Projects page, click on the relevant project item in the project list to access its Project Inspection Page.
Project Inspection Page
The Project Inspection Page appears as follows.
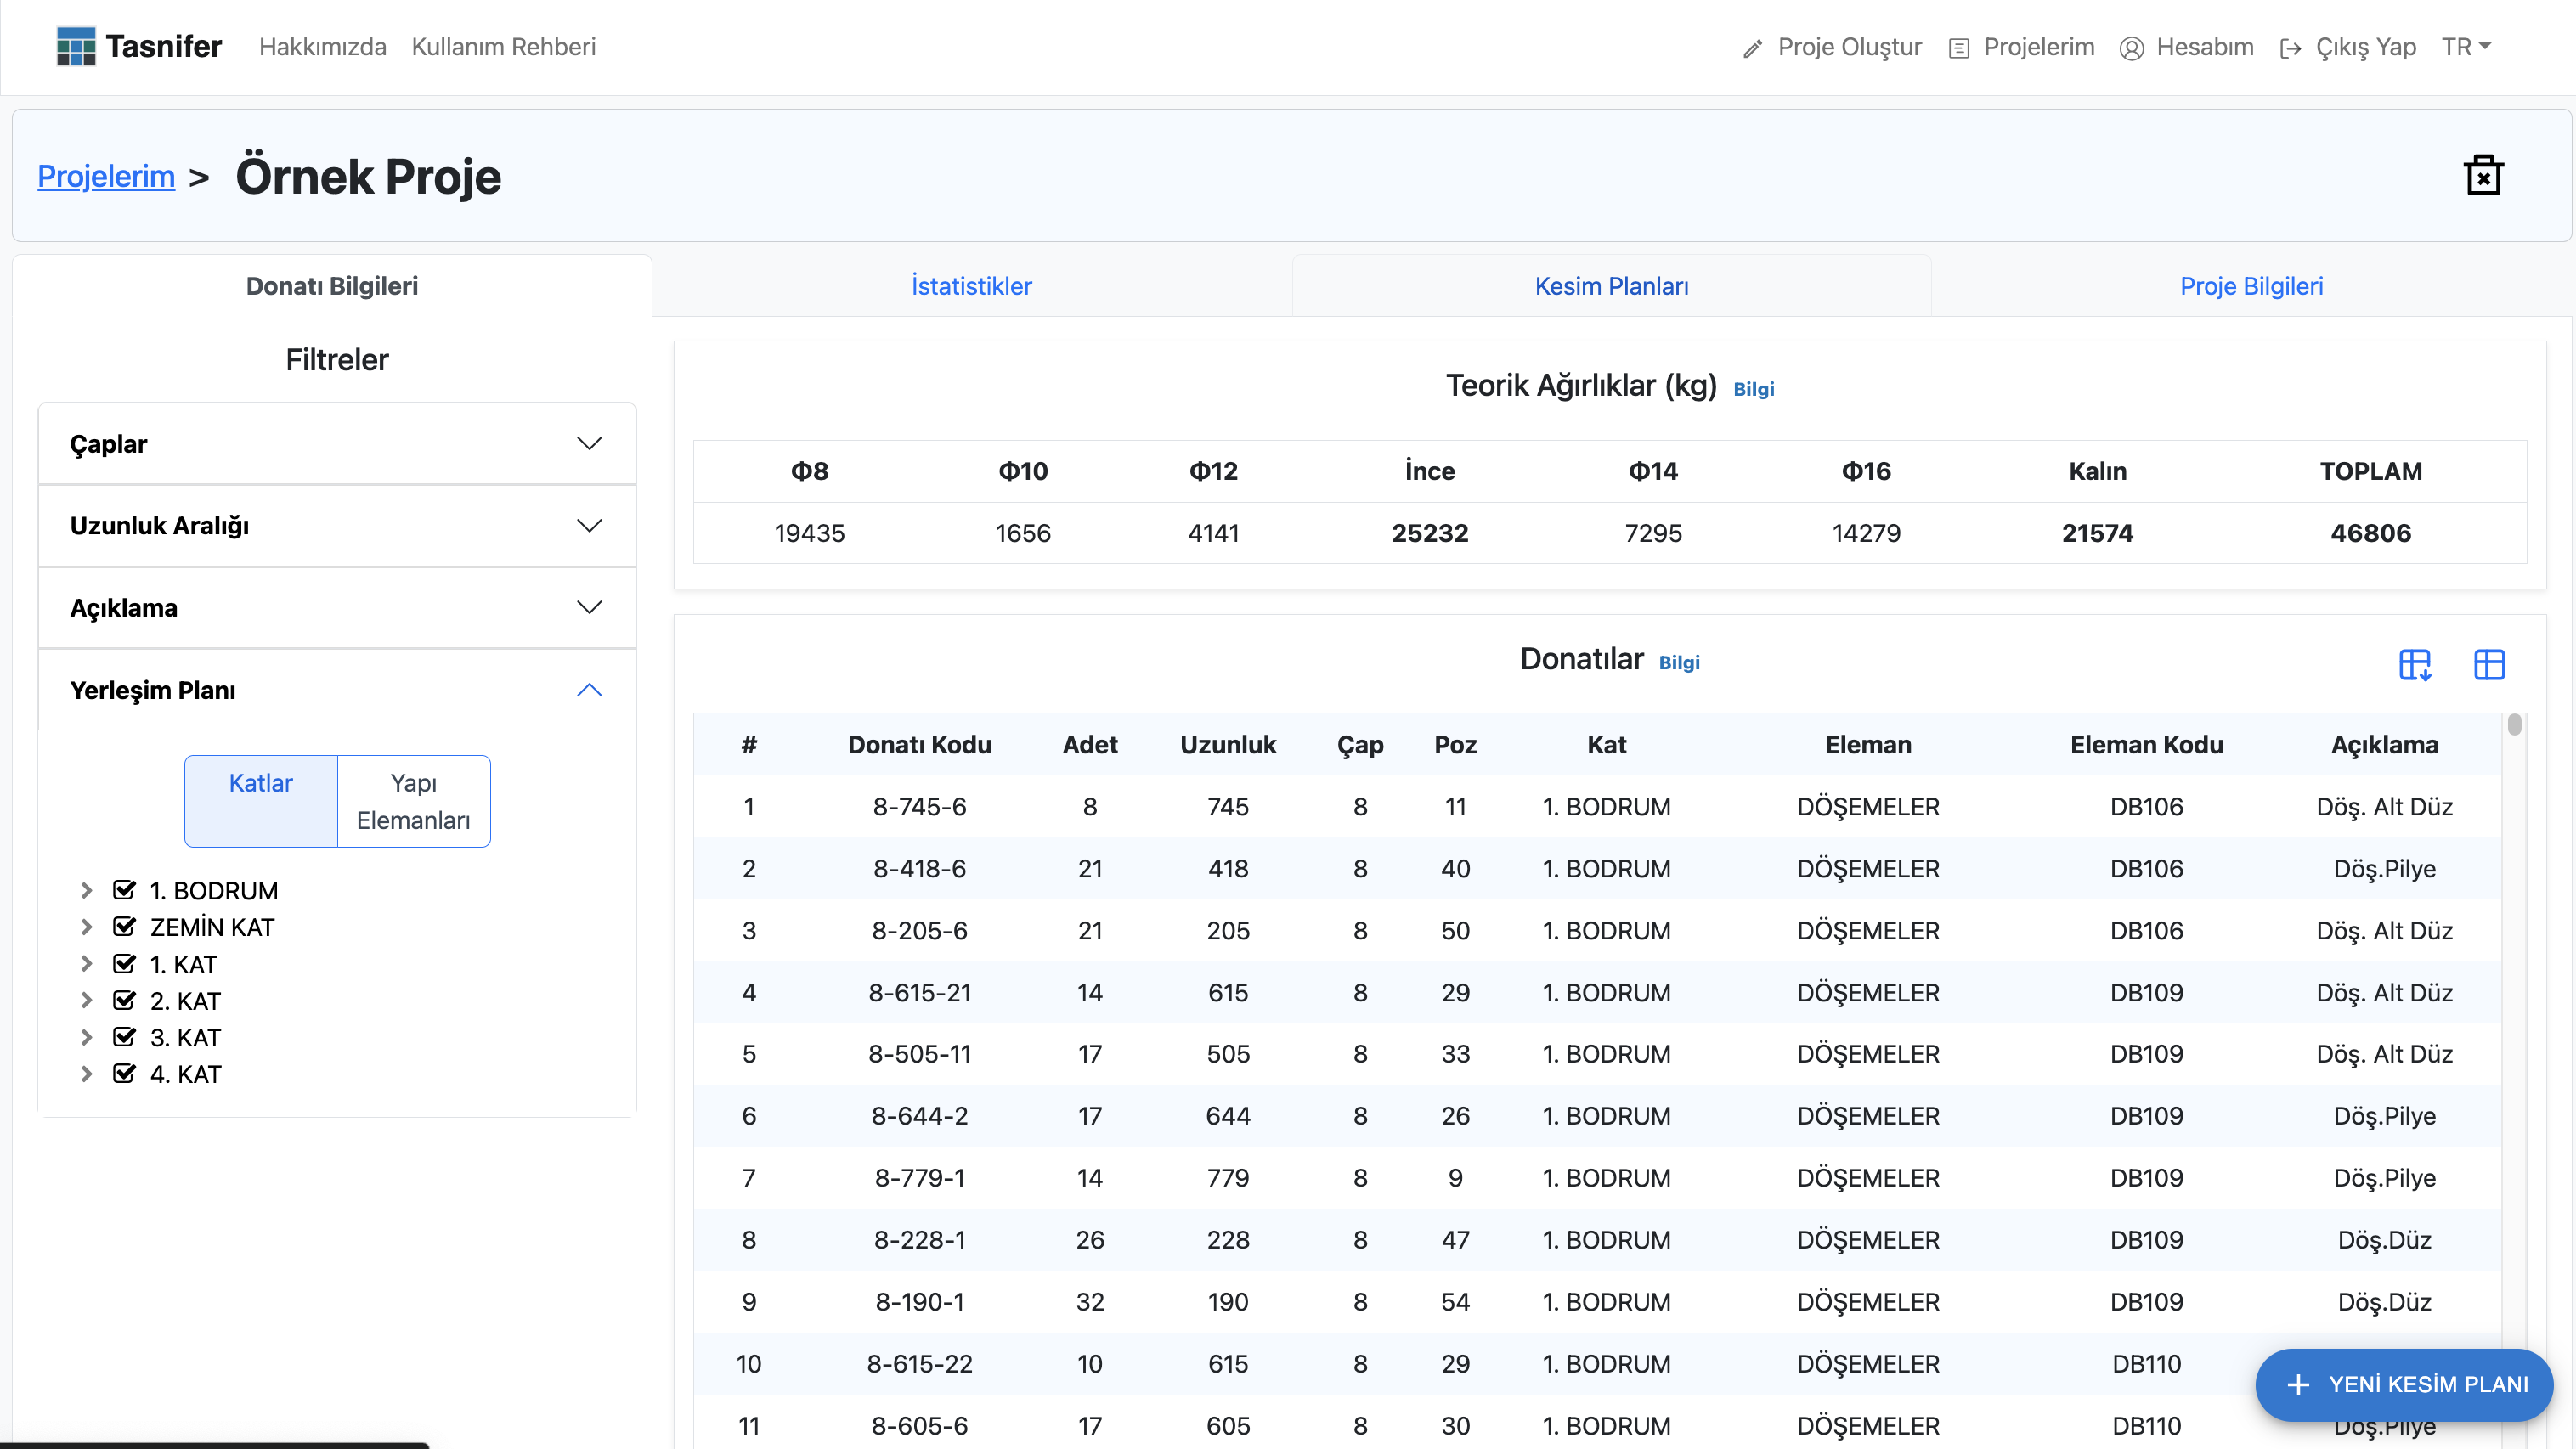
From this page, you can review information about reinforcements, download the project in Excel format, access cutting plans, navigate to the project's purchasing page, and obtain various statistics and details about the project.
This page contains four tabs:
- Reinforcement Information
- Statistics
- Cutting Plans
- Project Information
Reinforcement Information Tab
In this tab, reinforcements can be reviewed based on their selected locations in the layout plan. Reinforcements can be filtered by their functions. A list of reinforcements and quantity information by reinforcement diameters can be obtained.
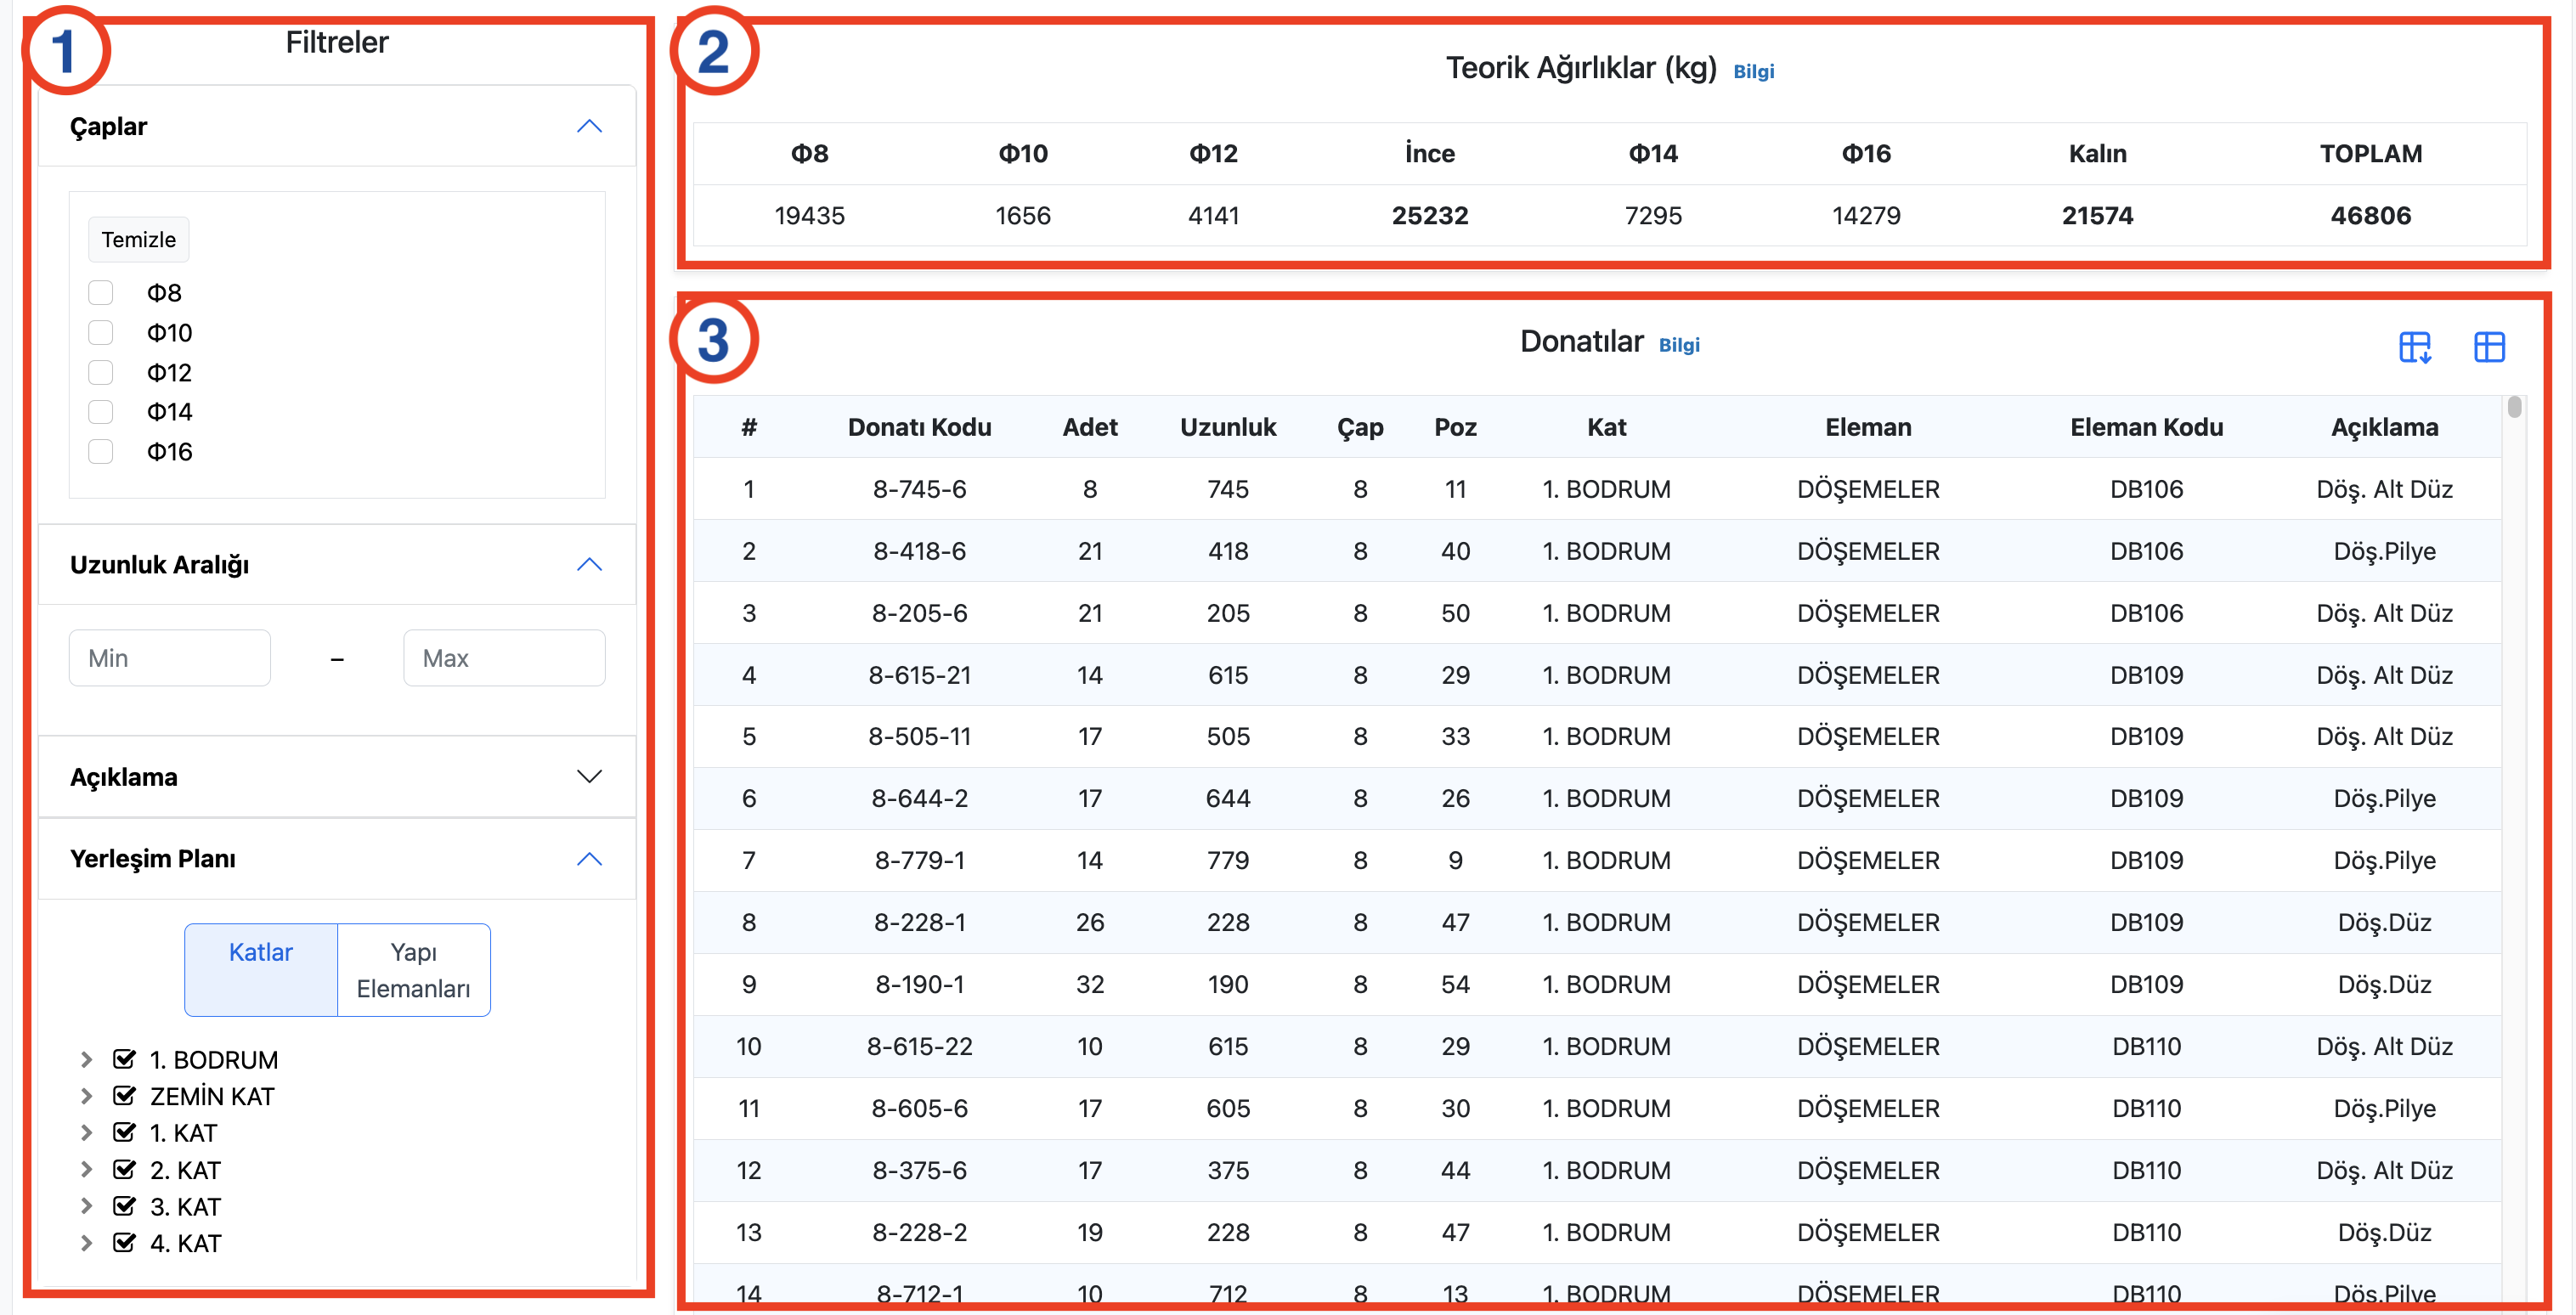
Important sections on this page include:
- Layout Plan
- Filters (created based on the "Description" column)
- Quantities of reinforcements in selected elements
- List of reinforcements in selected elements
- Option to view the reinforcement list in a detailed table format
The following sections will explain project inspection in detail.
Statistics Tab
This tab contains a statistics table created based on the layout plan of the reinforcements. To get detailed information about an element, click the arrow on the far right of the element.
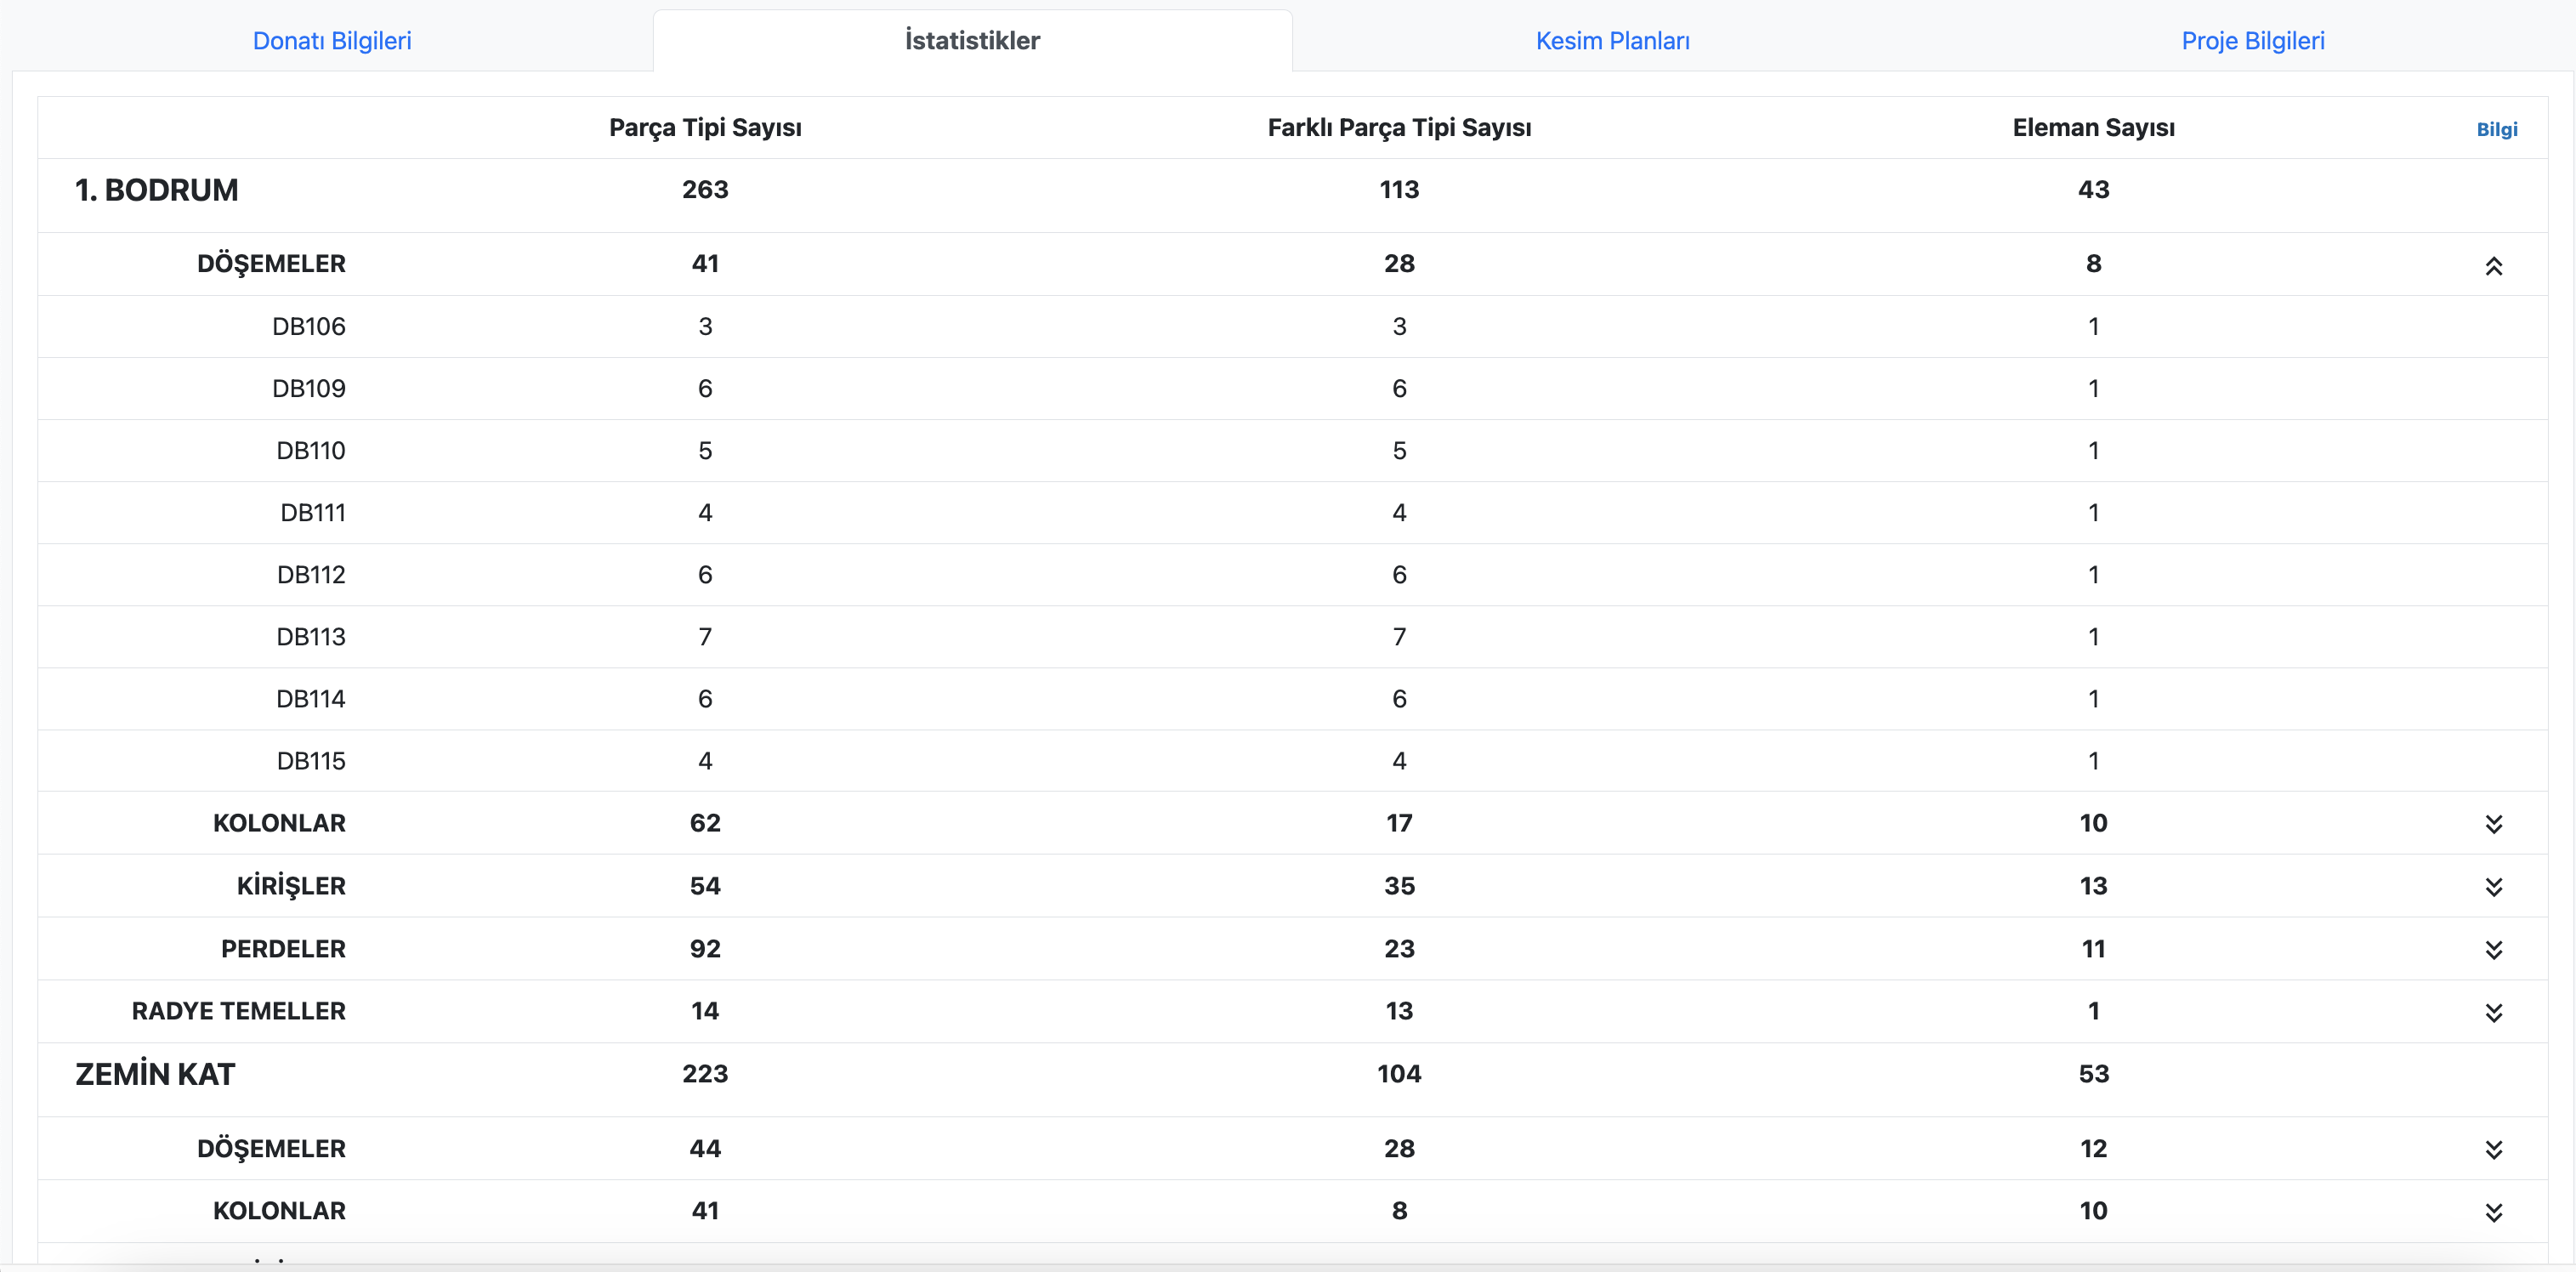
The statistics provided in this tab include:
Number of Part Types: The number of reinforcement groups that serve different functions in different locations but have the same length and diameter.
Number of Different Part Types: The number of reinforcement groups with different lengths and diameters. In this statistic, reinforcements serving different functions in different locations but having the same length and diameter are not counted separately.
Number of Elements: The number of each element with a unique structural element code for a structural element group. For example, the number of beams on the 1st floor, the number of columns on the 3rd floor, etc.
Cutting Plans Tab
This tab displays the list of cutting plans for the inspected project. You can navigate to the page for creating new cutting plans.
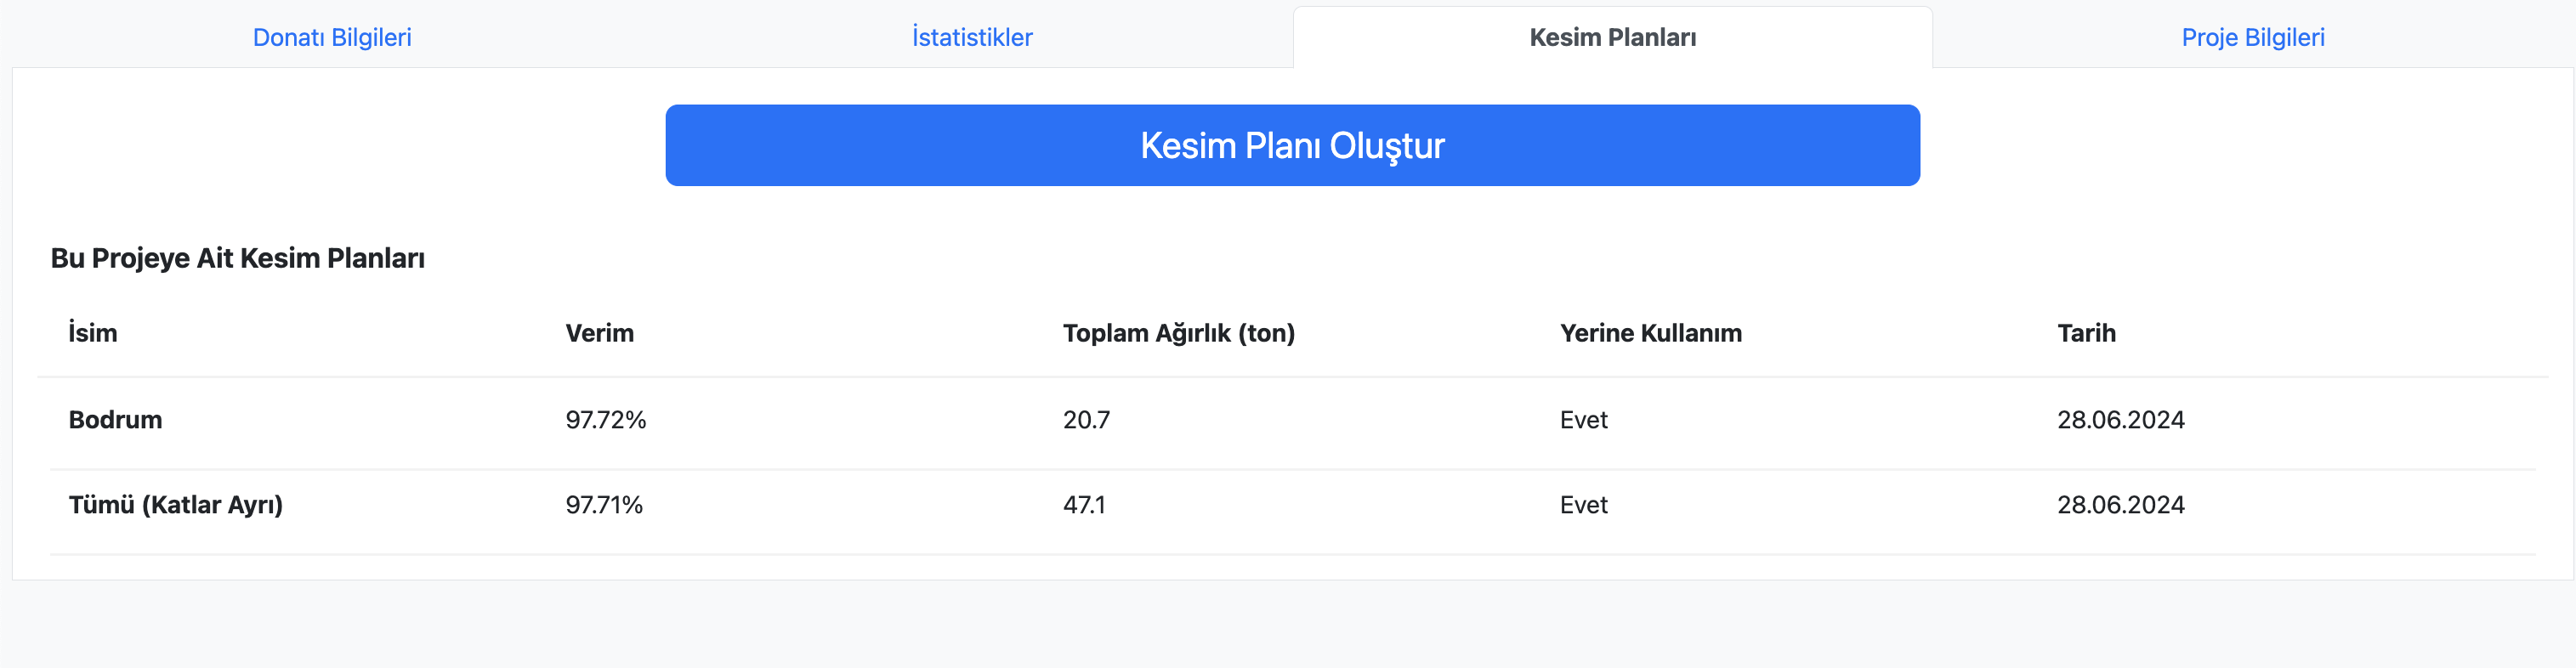
If there are cutting plans still being processed in the background, efficiency and weight information will appear as "Calculating."
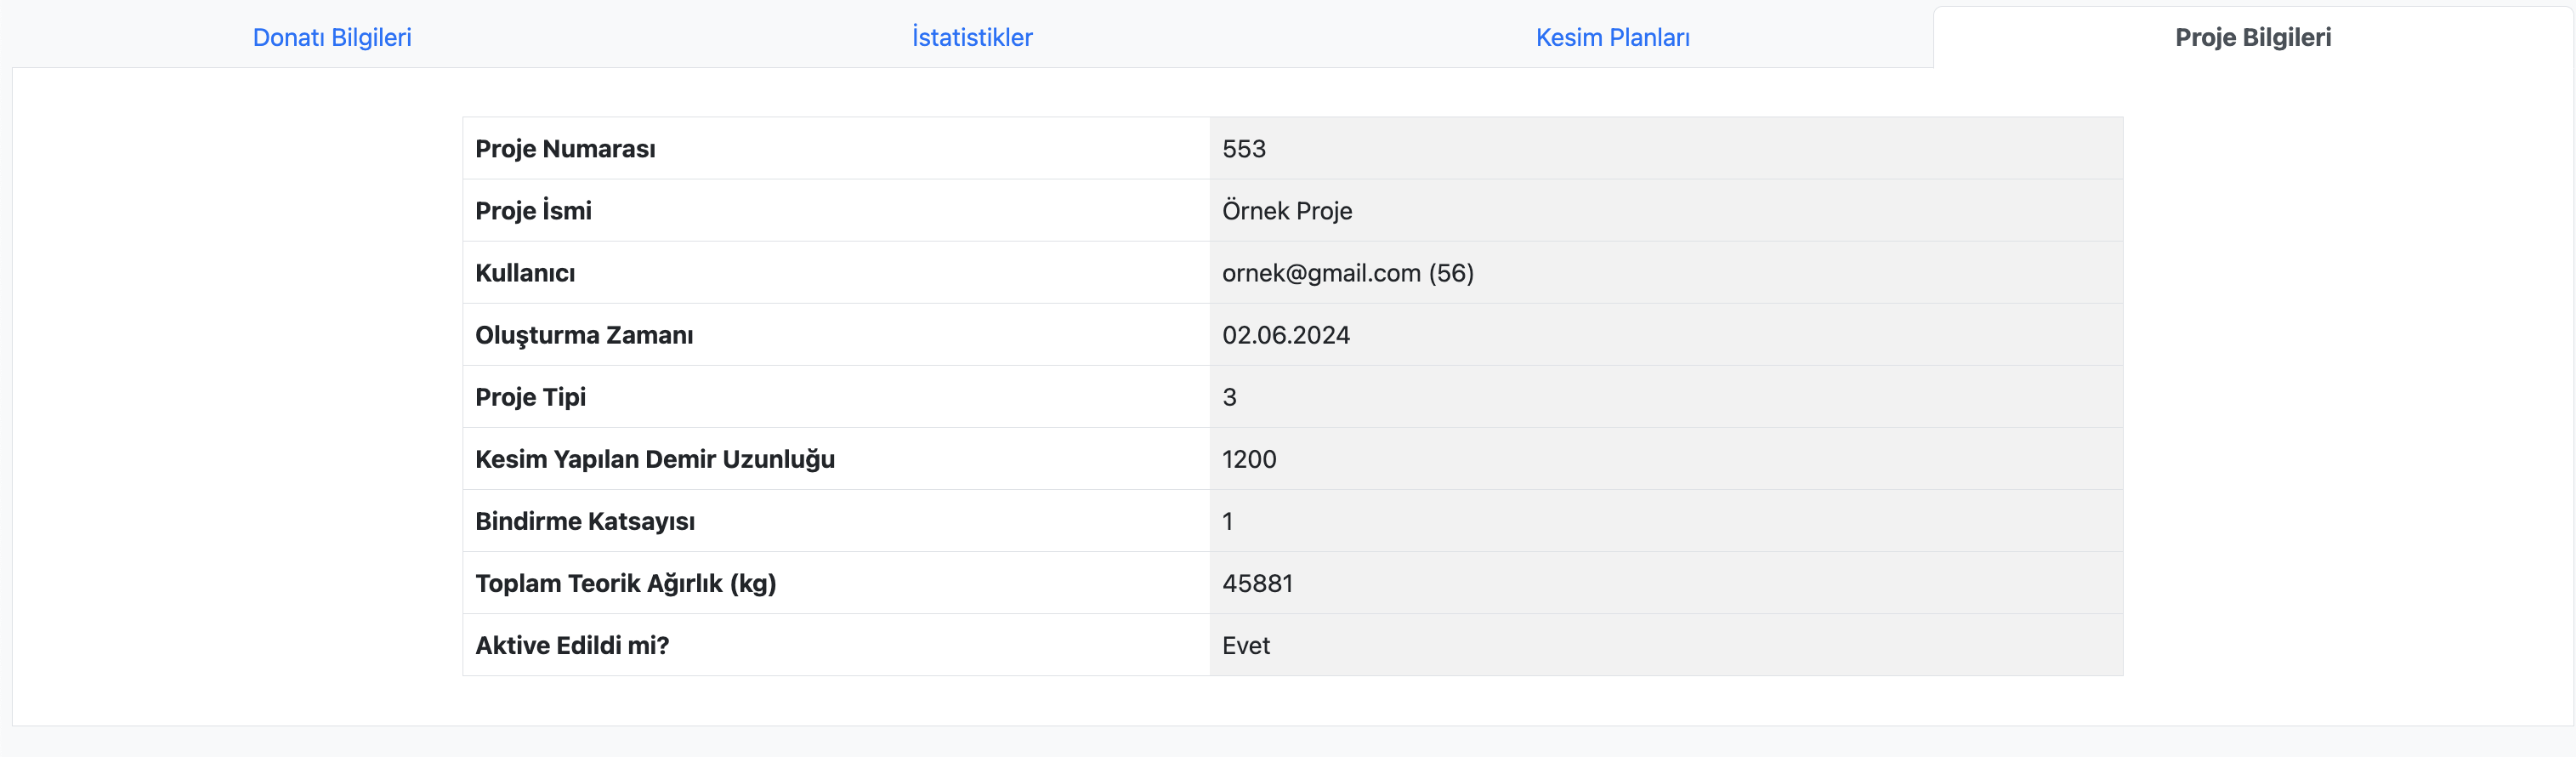
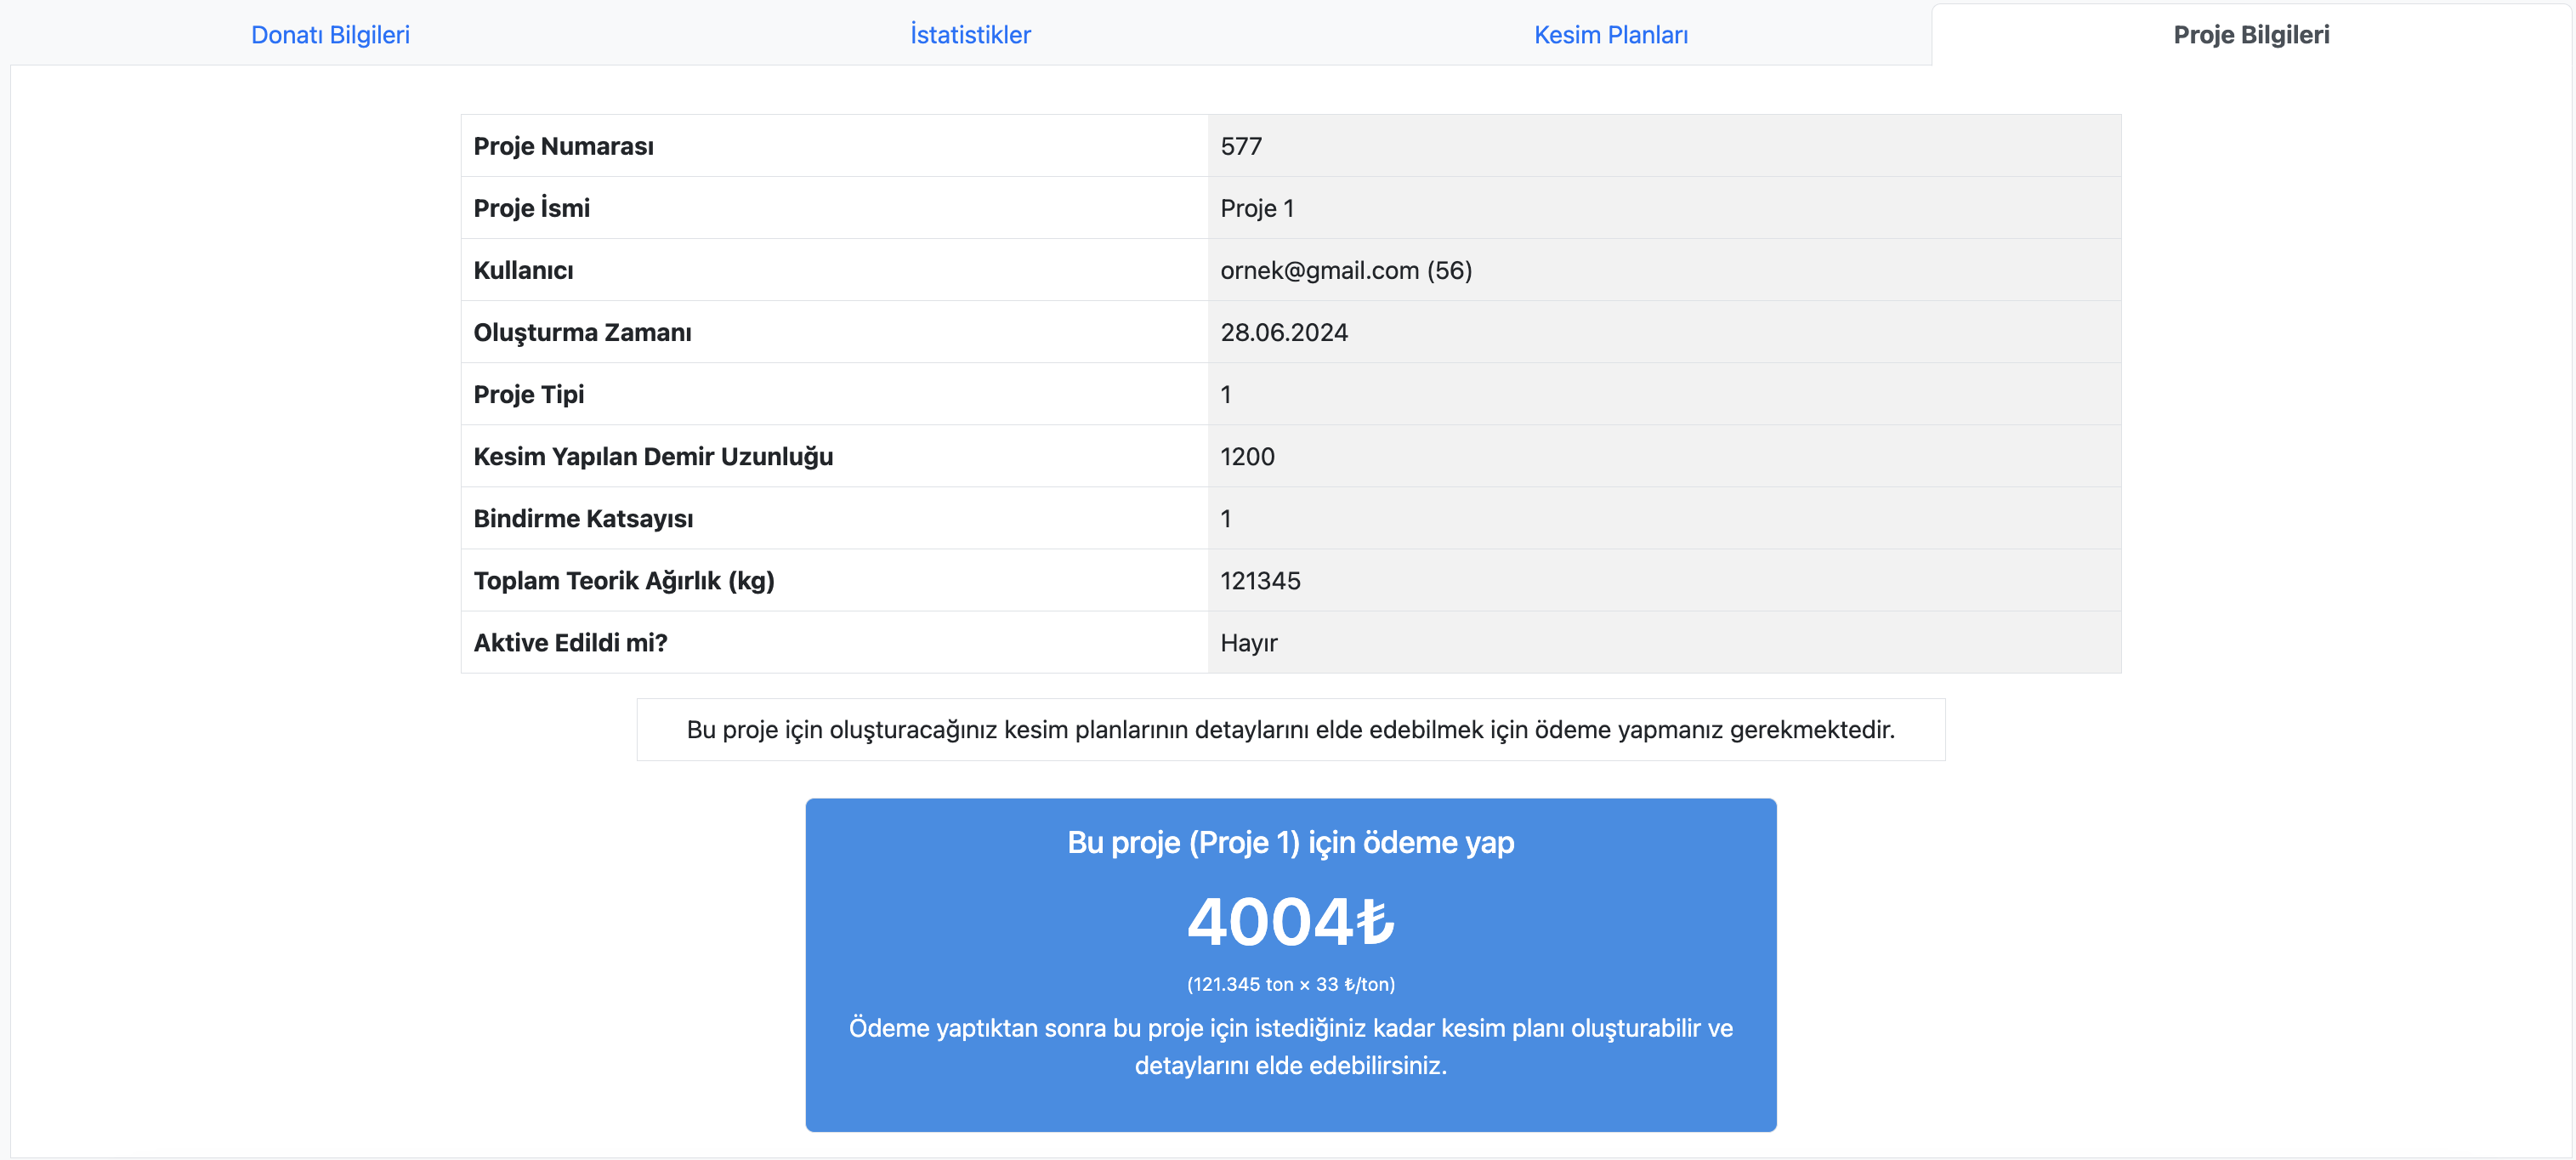
Project Information Tab
This tab shows details about the created project. For unpaid projects, you can navigate to the payment screen, and for projects with a payment request, you can view the order page.
|
"Project Information" for purchased projects |
|
"Project Information" for non-purchased projects |
How to Inspect a Project?
To get detailed information about the reinforcements in a project, go to the Reinforcement Information Tab on the Project Inspection Page of the relevant project.
This tab contains Filters and Layout Plan on the left side.
Filters
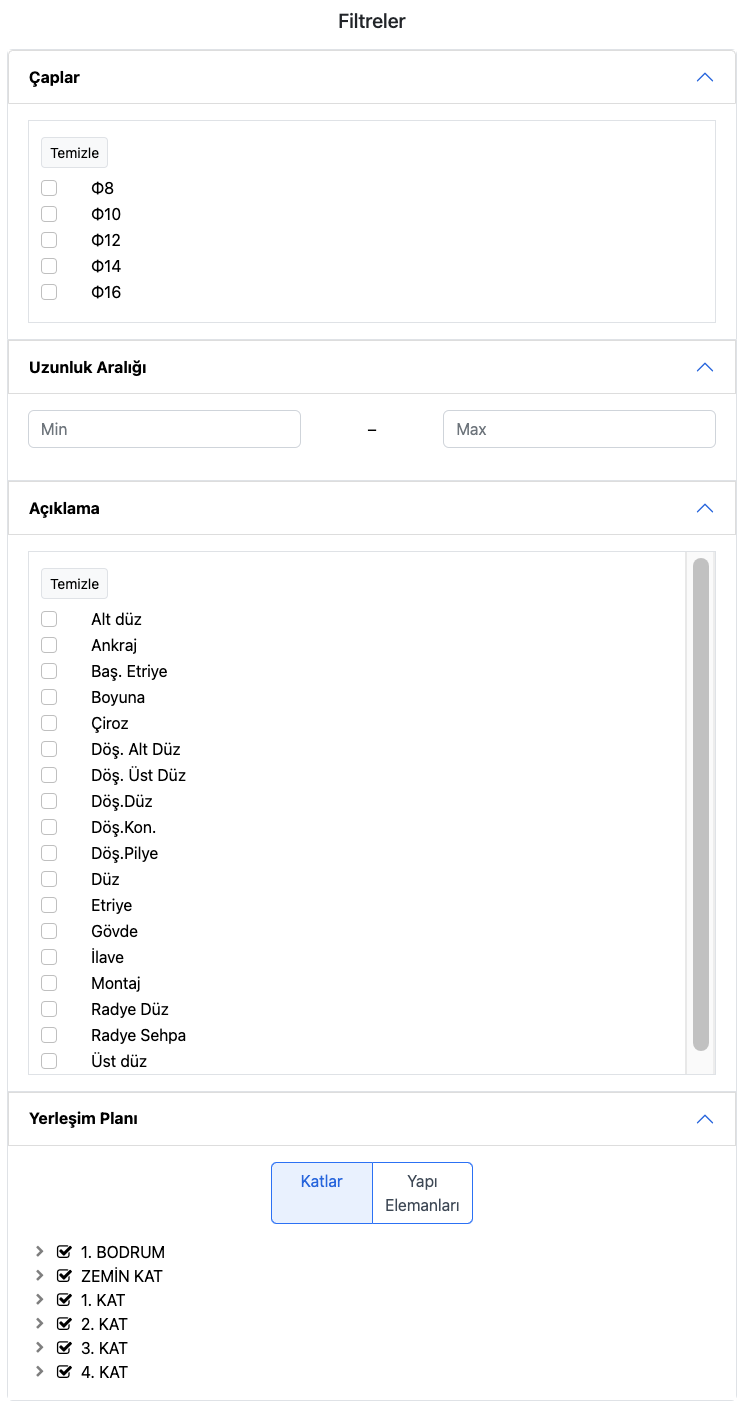
Filters allow you to filter reinforcements based on the content of the Description column. This column generally contains the functions of the reinforcements.
Layout Plan
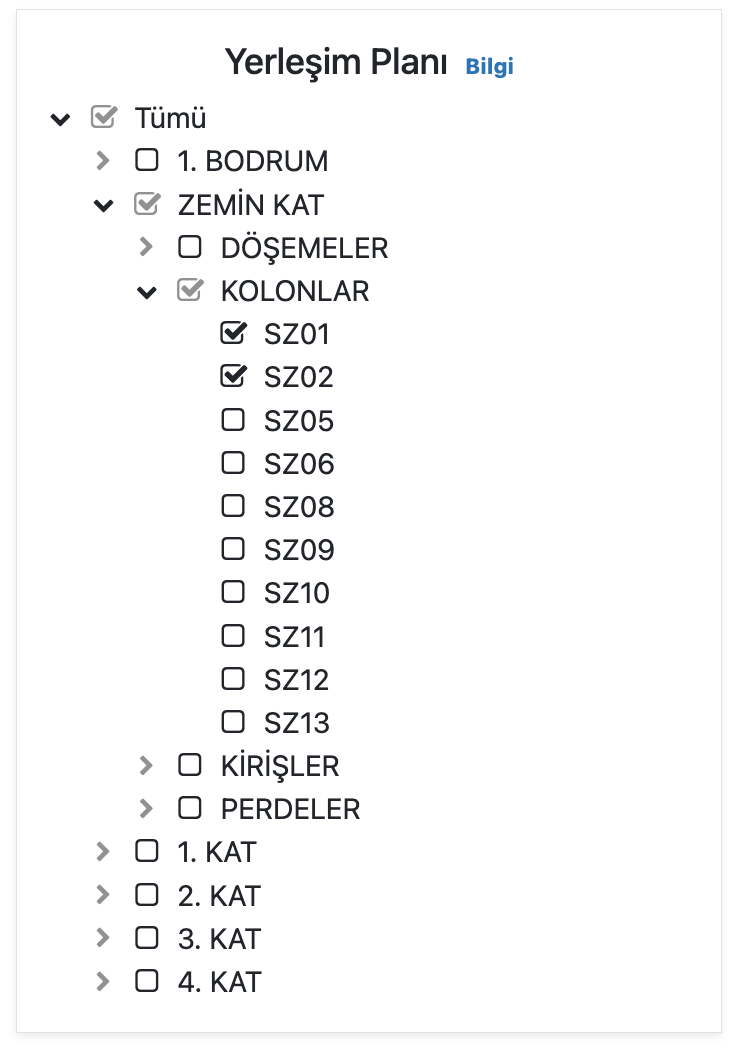
Layout Plan classifies the reinforcements in the uploaded structure by floor, structural element, and structural element names. To examine the layout plan and view the structural elements of a floor or the structural element codes of a structural element on a floor, click the arrow next to the layout plan elements.
Theoretical Weights
The quantities of reinforcements included in the structural elements selected from the layout plan and filtered through Filters can be found under the heading Theoretical Weights (kg).

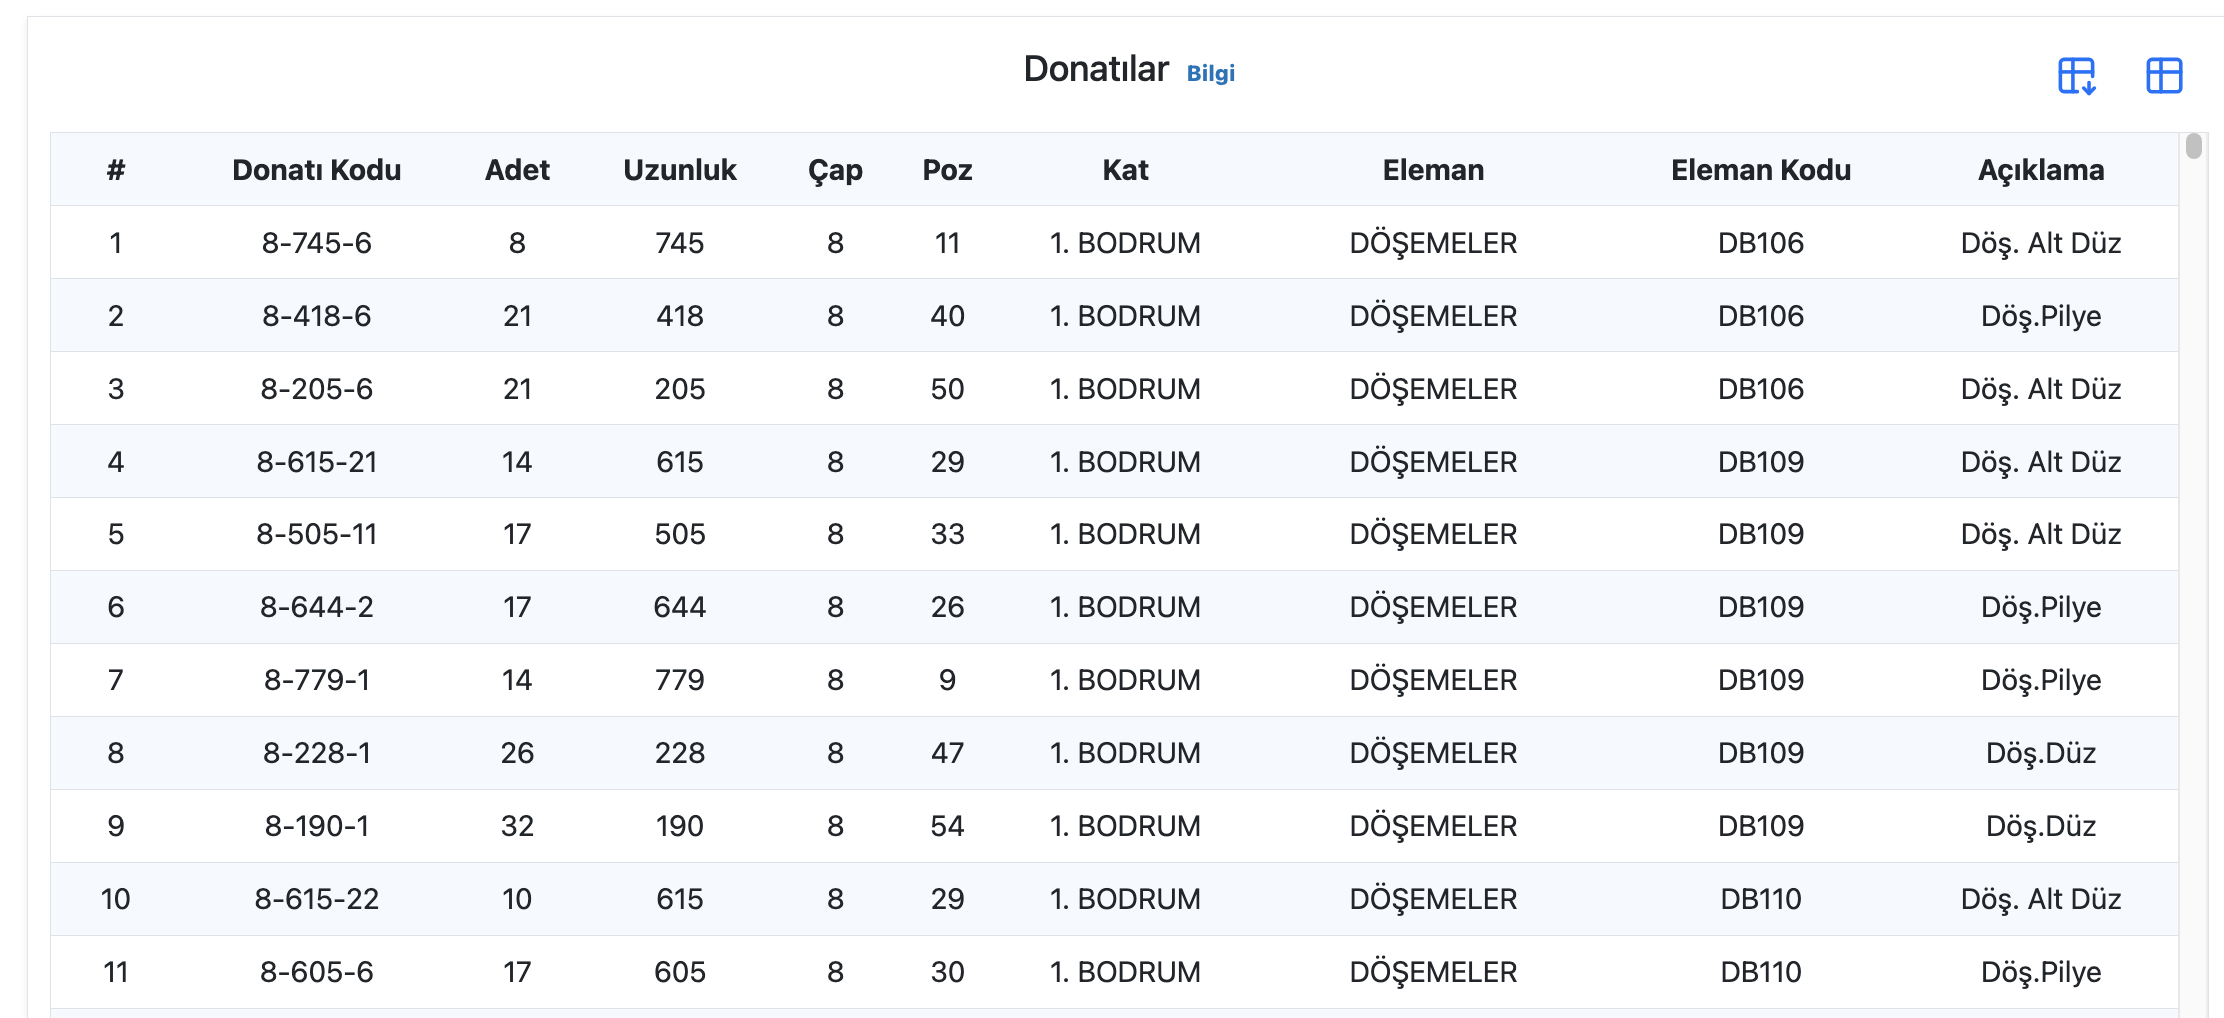
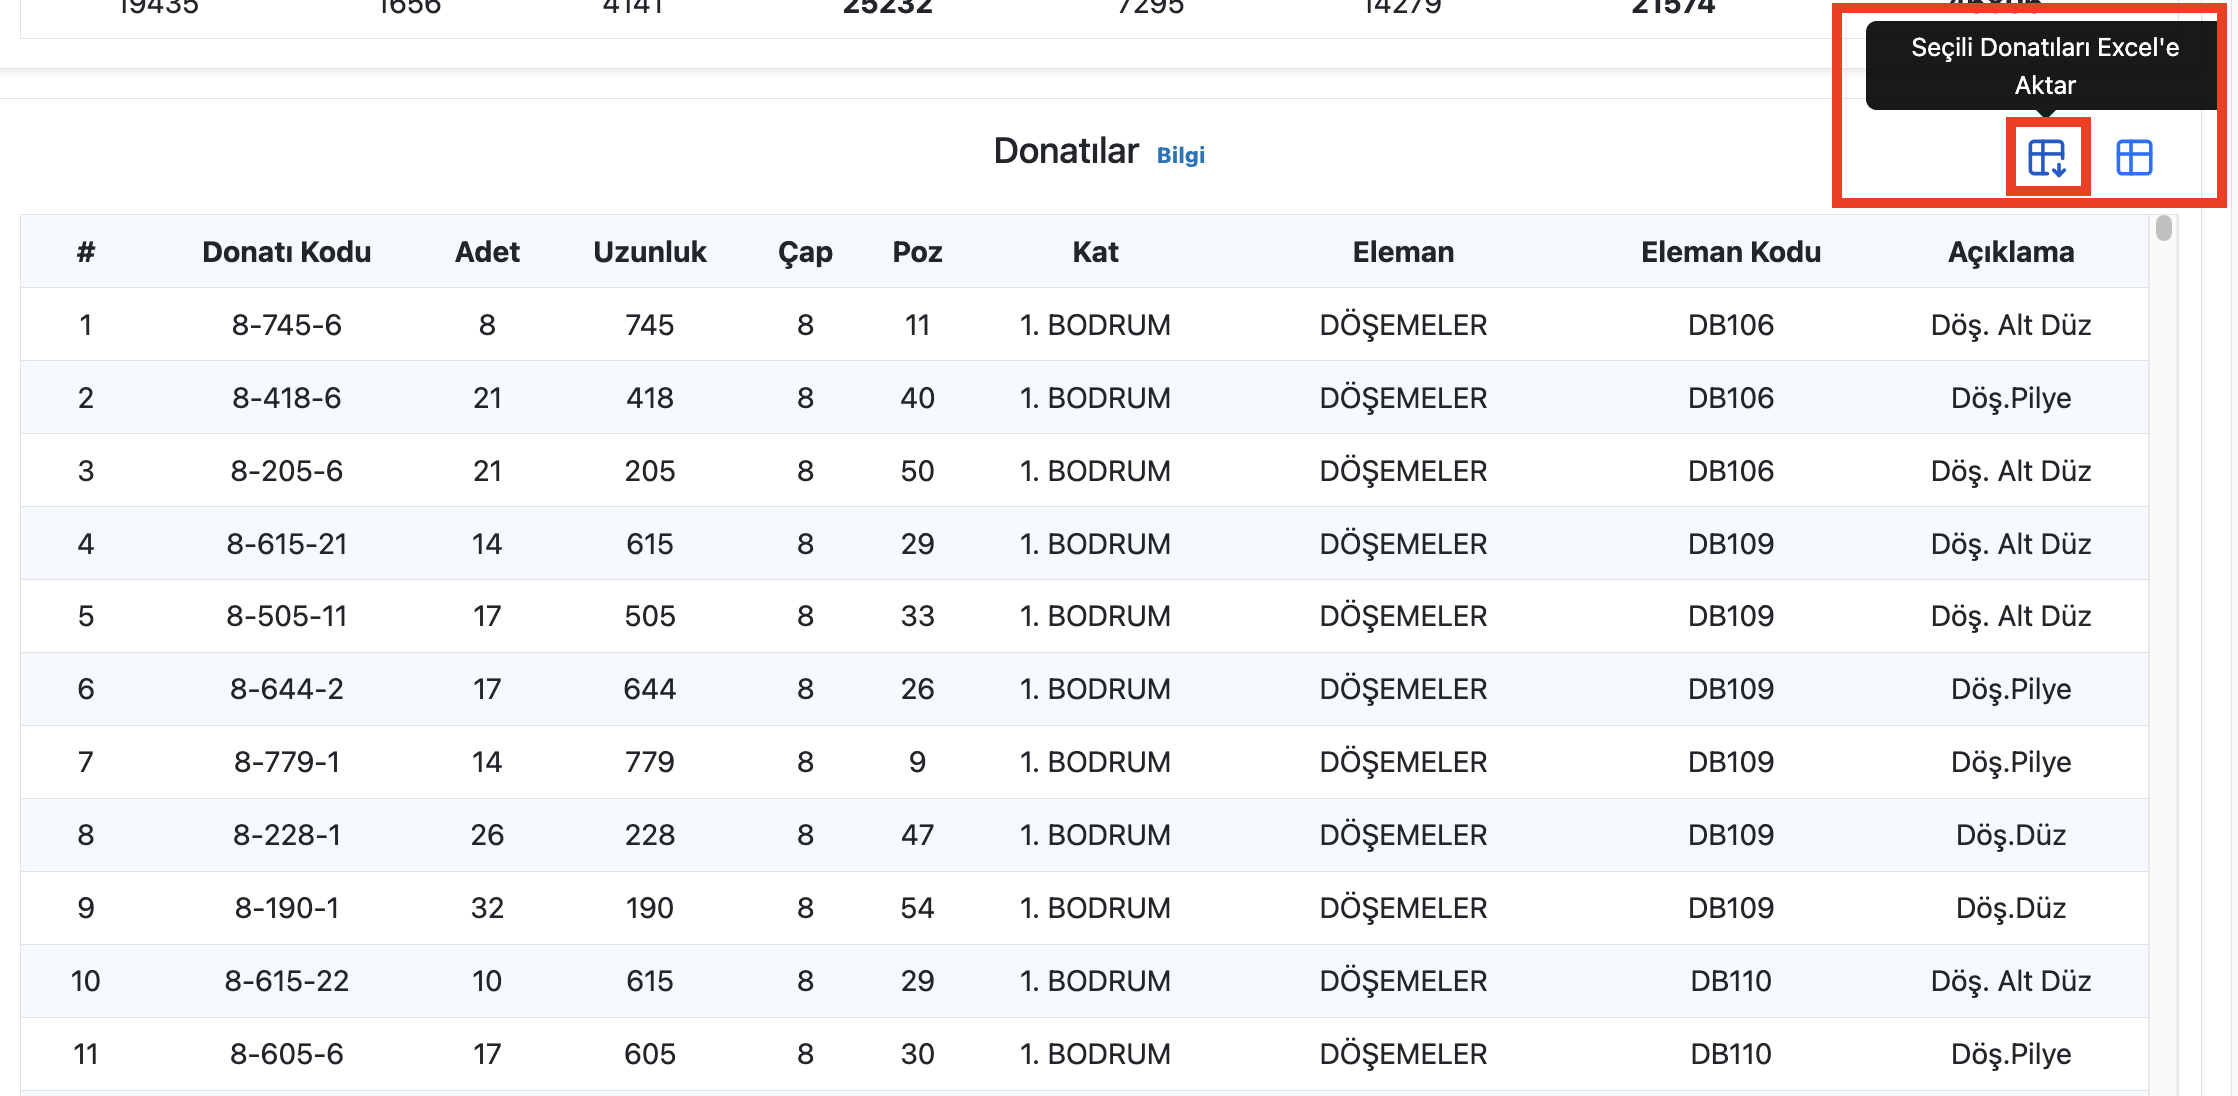
Reinforcement Table
The reinforcements in the selected structural element are listed under the Reinforcements heading.
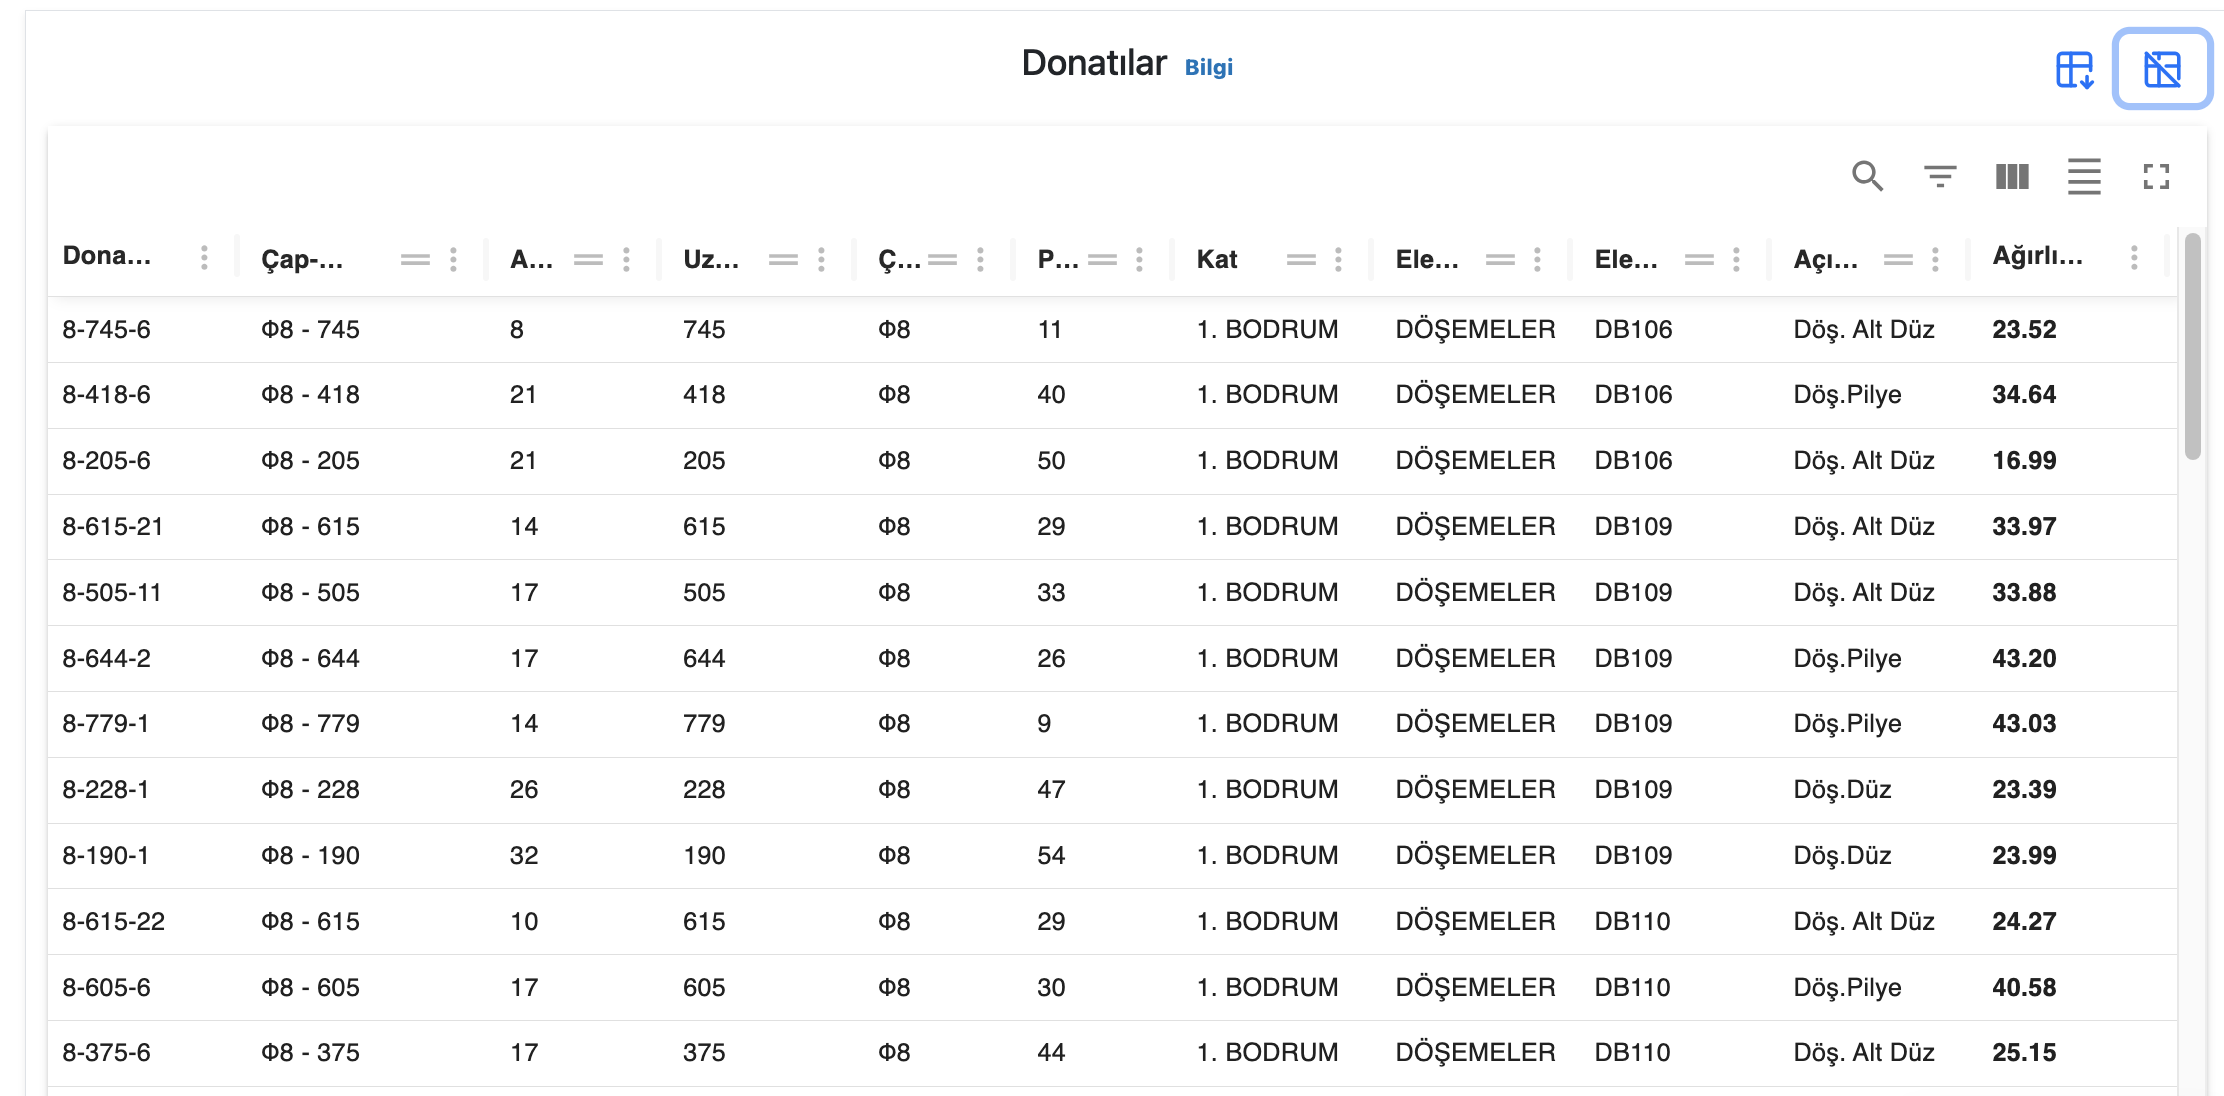
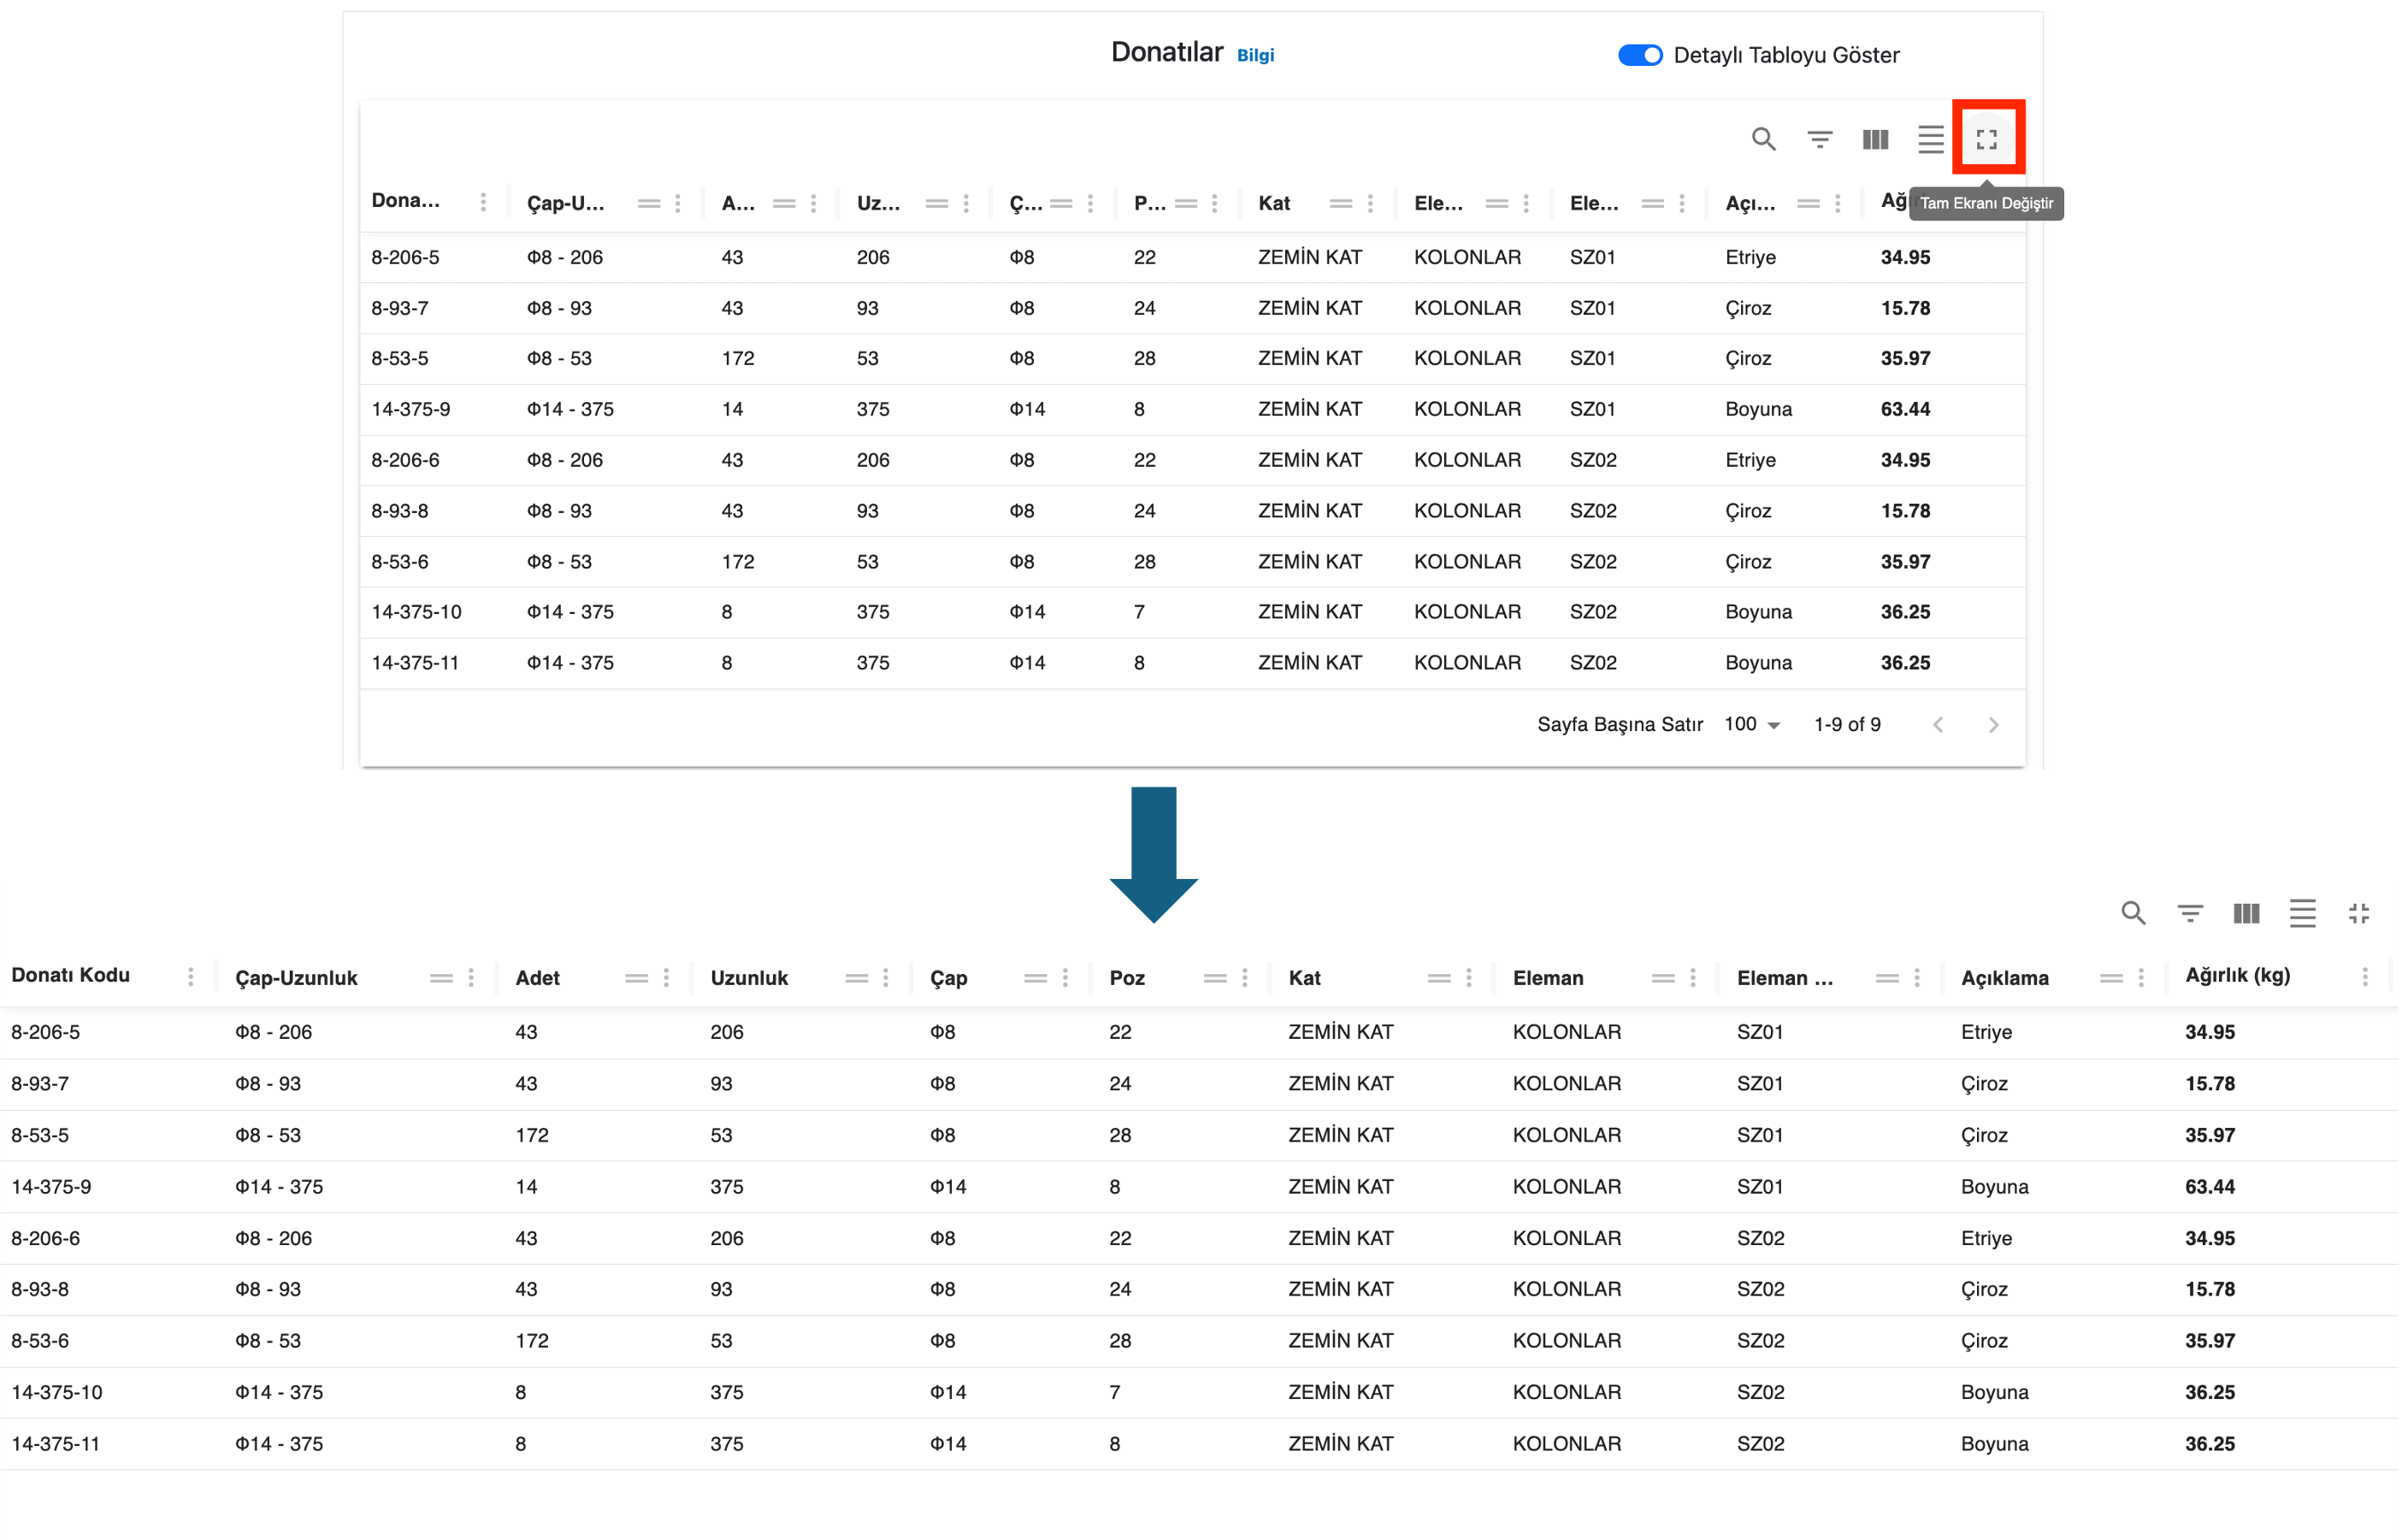
The Show Detailed Table option on the right side of the table header switches the reinforcement list to a detailed table view. The detailed table view makes it easier to filter, sort, and search among reinforcements. The table can be switched to full-screen view, columns can be hidden, column positions can be changed, and row spacing can be adjusted.
To switch to full-screen mode, click the square icon in the top-right corner of the detailed table.
The functions of the buttons in the detailed table are as follows:
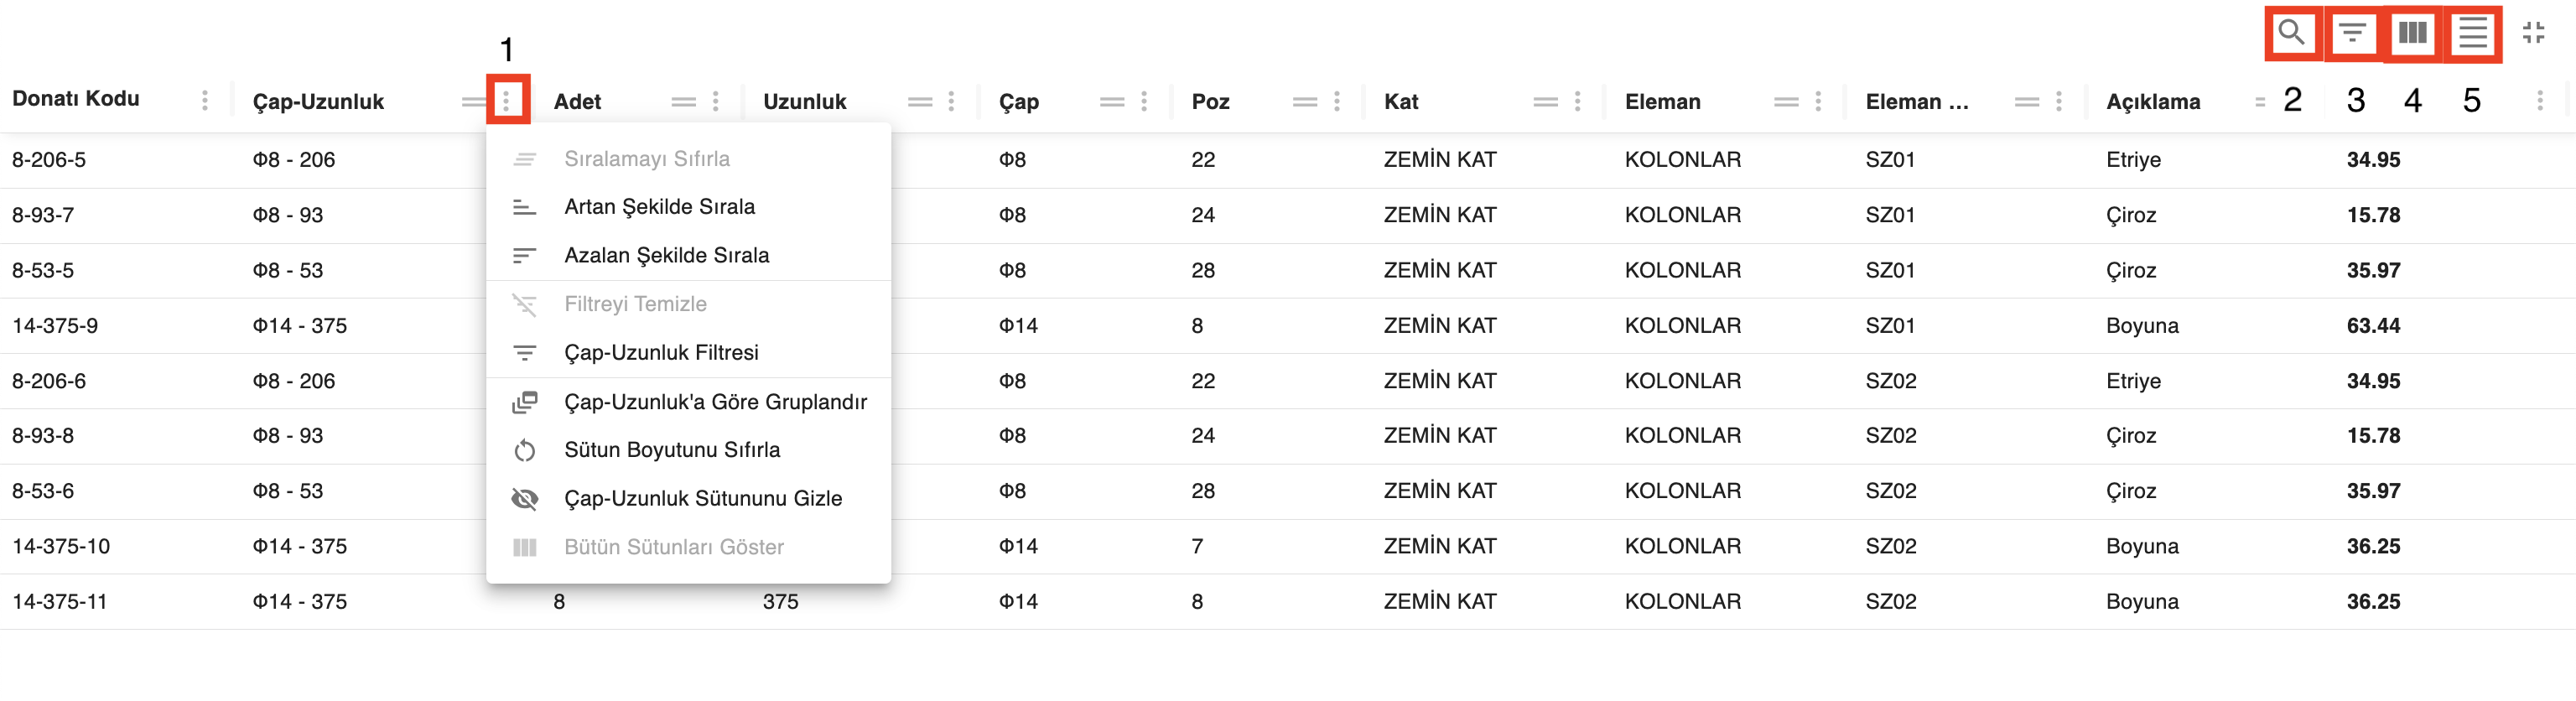
- Shows column options.
- Enables element search. Any column value can be searched.
- Toggles filters on or off.
- Determines which columns are shown or hidden.
- Changes row height.
When your project is uploaded, each reinforcement group with unique quantity, length, diameter, and, if available, position, floor, structural element, and element code information in the detailed quantity file is assigned a reinforcement code. This reinforcement code consists of the diameter, length, and a sequence number determined by Tasnifer. For example, the reinforcement group with the code 8-206-29 refers to the 29th reinforcement group with a diameter of 8 mm and a length of 206 cm. These reinforcement codes are generated to make it easier to distinguish reinforcements based on their locations and are different from the position information in the quantity file.
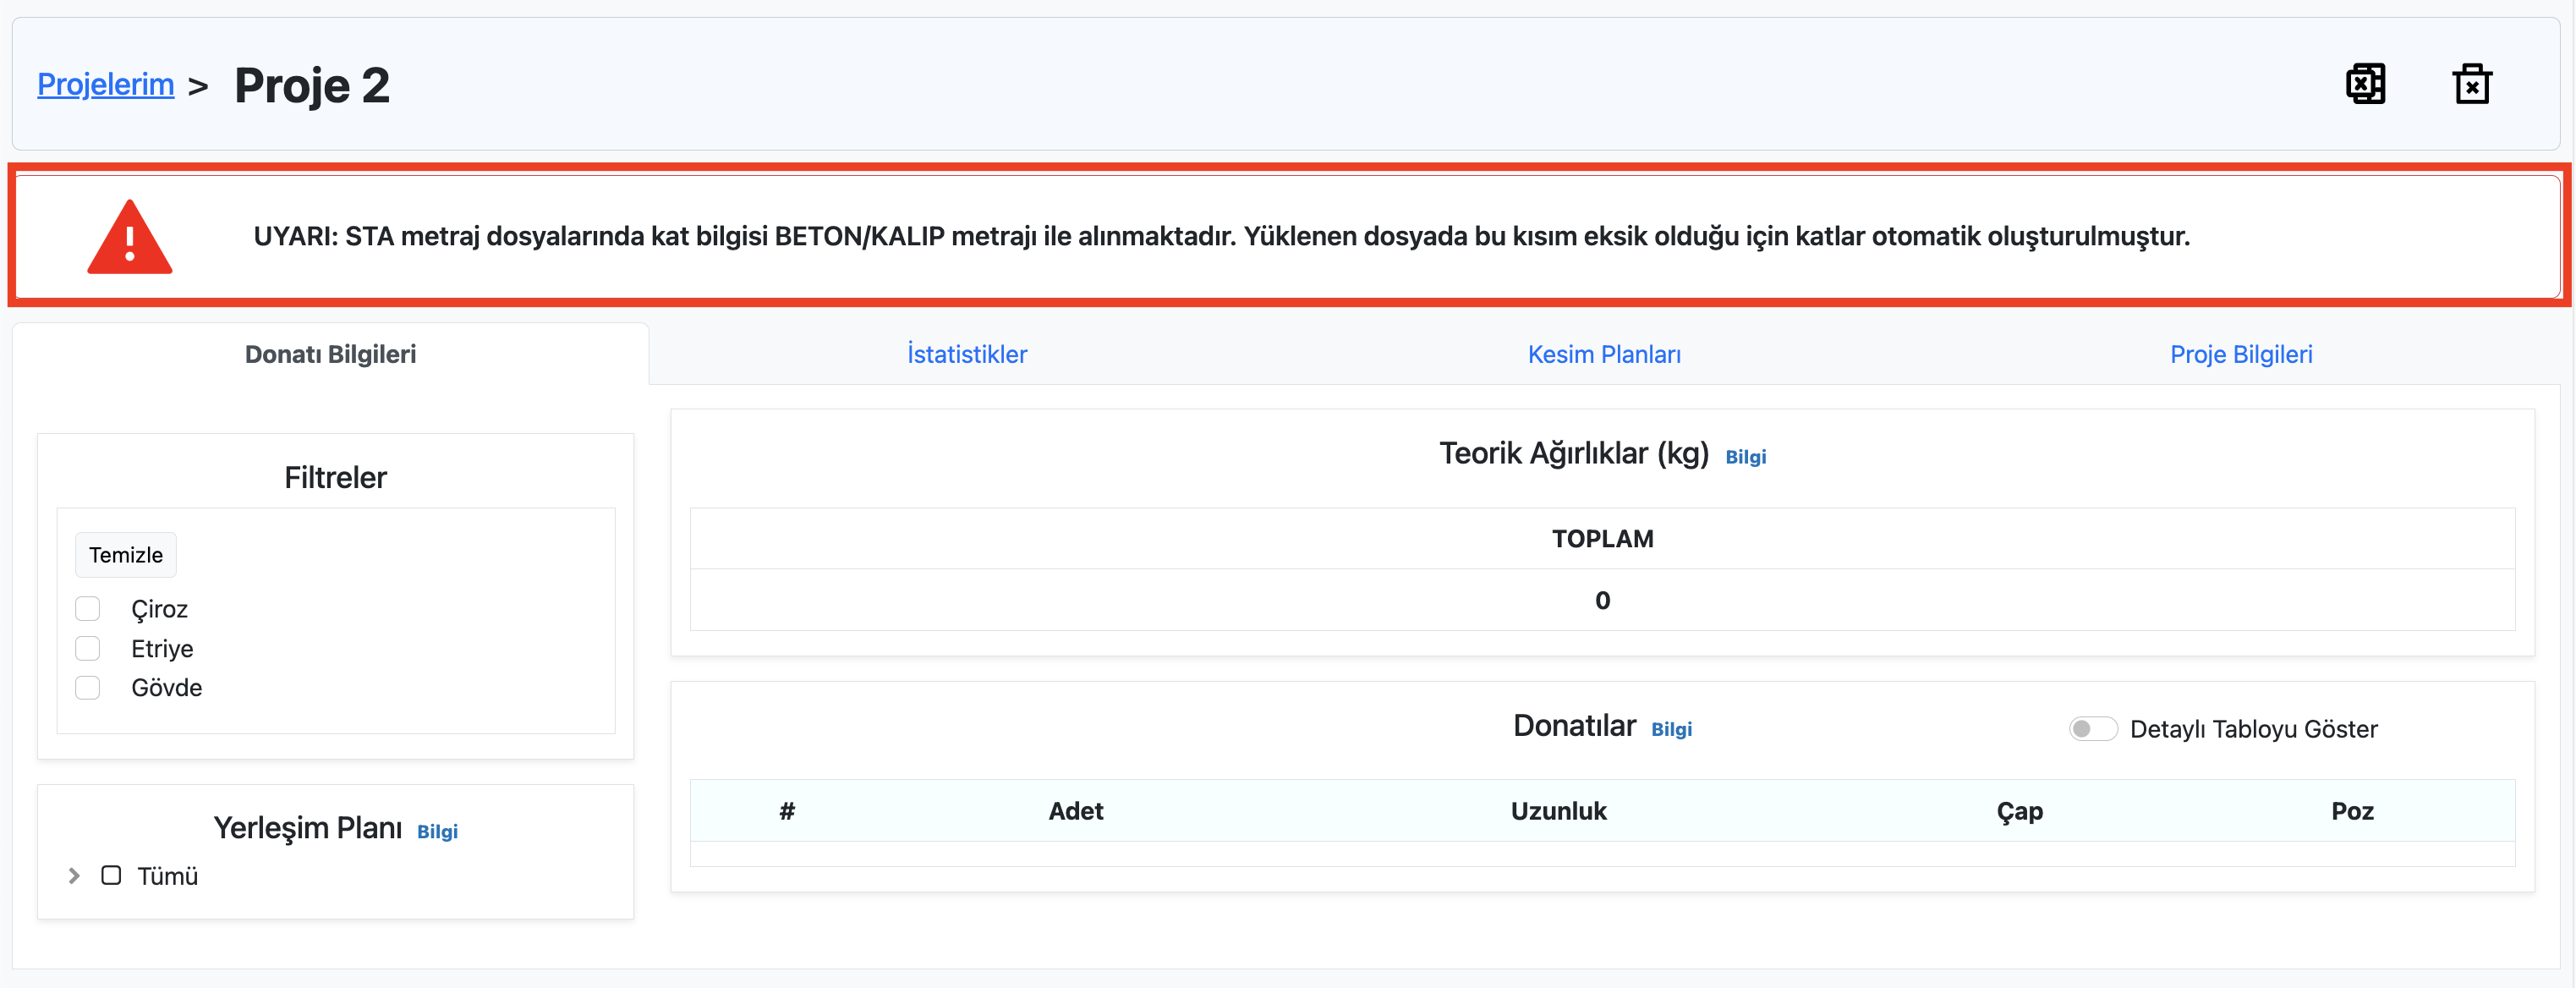
Warnings
If a problem that does not prevent the project from being uploaded to the system is encountered during the upload process, a warning message about this problem is displayed at the top of the Reinforcement Information Tab on the Project Information Page as shown below. This warning is for informational purposes only and does not prevent cutting plans from being created for the project.
Long Reinforcements
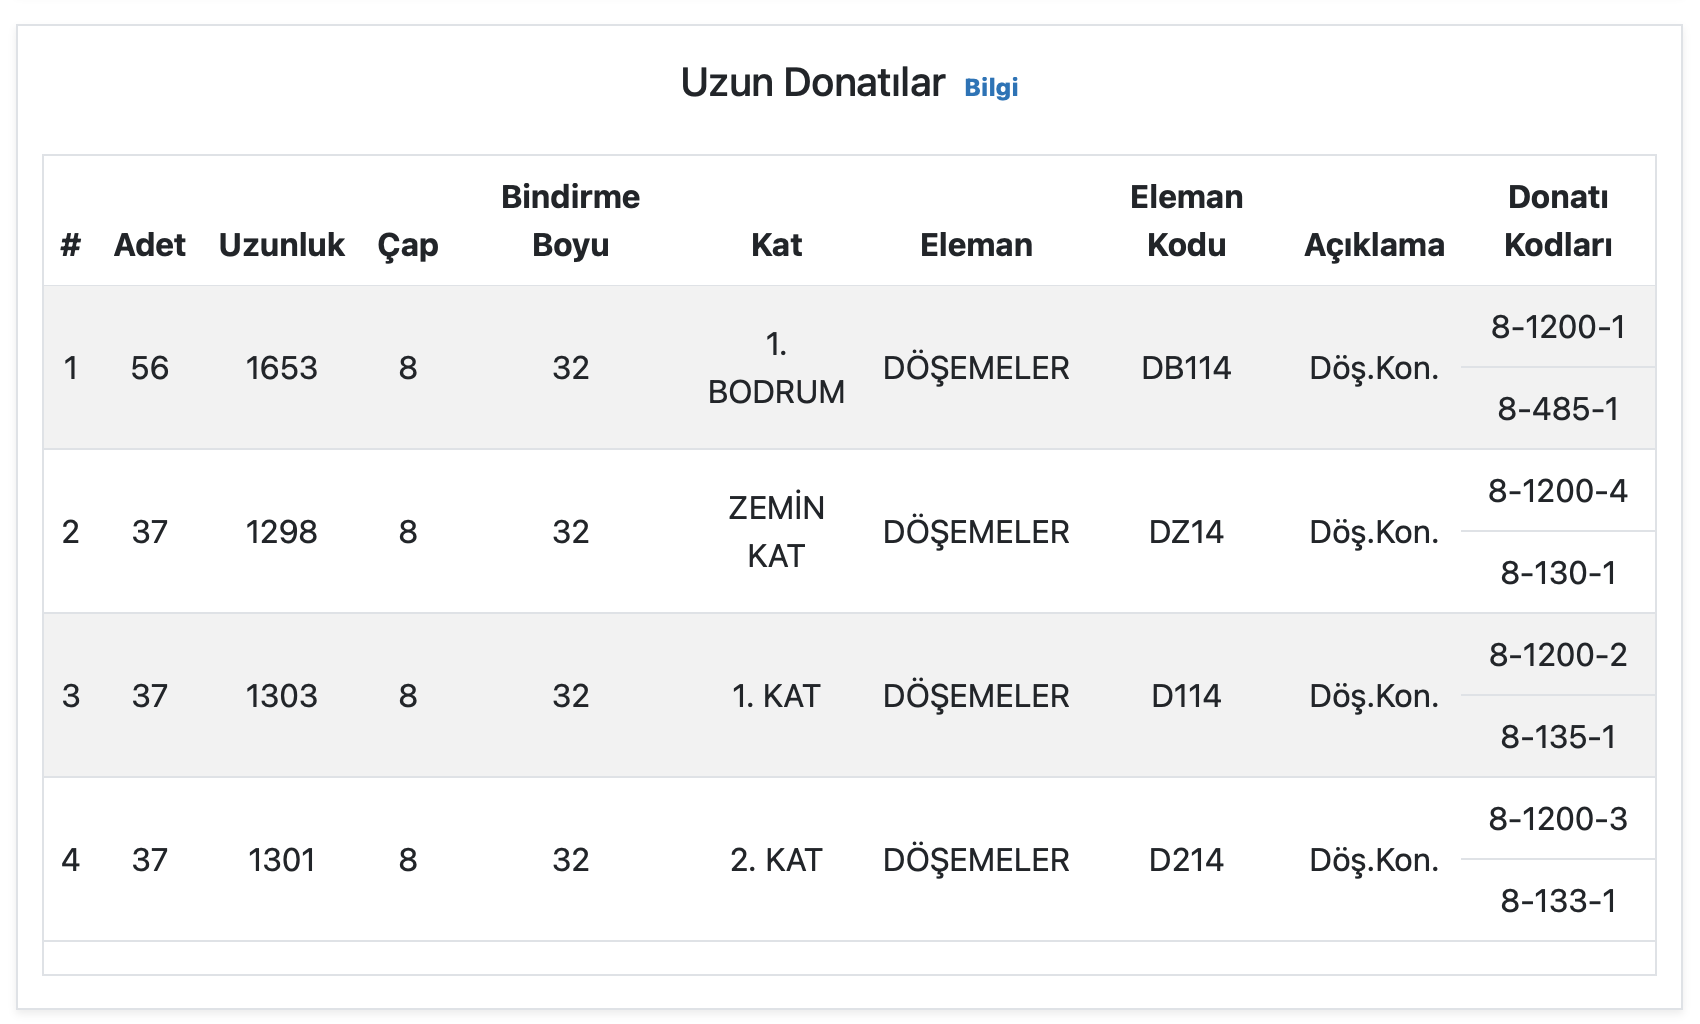
If there are reinforcements in the project that are longer than the standard cutting length of the rebar (12 meters), information about these reinforcements is displayed at the bottom of the Reinforcement Information tab. After selecting the structural elements to be inspected from the layout plan, the list of these long reinforcements is provided under the Long Reinforcements heading at the bottom of the page.
Downloading the Project Excel File
Every project uploaded to Tasnifer is automatically converted to Excel format and can be downloaded afterward.
To download the Excel file, click the Excel icon on the right side of the project title at the top of the Project Inspection Page.
Detailed information about the Excel format is provided here.
After downloading the Excel file, you can make any changes to the file and upload it to the system as a new project.
Deleting a Project
Inactive (non-purchased) projects can be deleted by the user. When a project is deleted, all cutting plans created for the project are also deleted.
To delete a project, click the trash can icon on the right side of the project title at the top of the Project Inspection Page.

Deleting activated projects is not allowed by the user to prevent potential mistakes. If you wish to delete an activated project, you can contact us via info@tebersoft.net.
Please note that deletion operations are permanent and irreversible.